
Introduction
Notes on using different Operating Systems and services relating to DevOps, for reference.
OpenBSD - a FREE, multi-platform 4.4BSD-based UNIX-like operating system...
FreeBSD - an operating system used to power modern servers...
Debian - The Universal operating system...
Nginx - [engine x] is an HTTP and reverse proxy server...
ZFS - OpenZFS is an advanced file system and volume manager...
Rust - A language empowering everyone to build reliable and efficient software.
Termux - an Android terminal emulator and Linux environment app...

Install OpenBSD on VirtualBox
Assumptions:
- Using
rootfor installing packages. - Disabling SSH root logins.
- Creating a regular user.
Some Specifics:
- Using
https://mirror.aarnet.edu.aumirror during install - Setting Time Zone as
Australia/Brisbane
Contents:
- Getting OpenBSD
- Virtual Box
- Install OpenBSD
- Post Install
- Update Packages
- Upgrade OpenBSD
- GNOME
- Firefox ESR
- ProtonVPN
- Cheat Sheet
- Video Links
Downloading OpenBSD
1. Getting OpenBSD
Different types of images are available.
- In our case download the
cd70.isofile because it contains signatures so the installer doesn't complain. - Use
httpinstead ofcd0source as option when installing to utilize signatures. - If you wish to install from cd type
yesand hit enter instead.
Explanation cited from the OpenBSD website below:
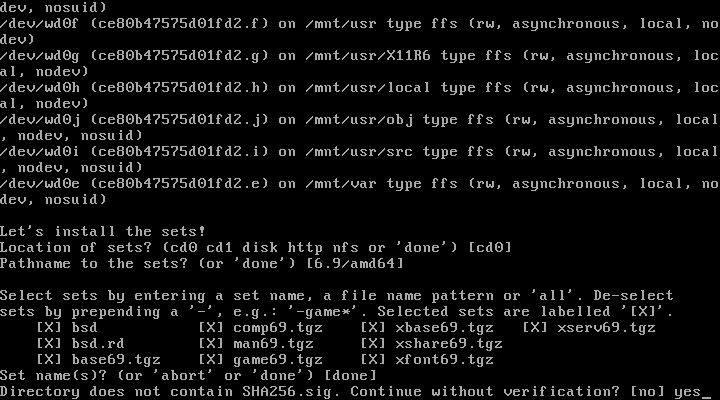
The install70.iso and install70.img images do not contain an SHA256.sig file, so the installer will complain that it can't check the signature of the included sets:
Directory does not contain SHA256.sig. Continue without verification? [no]This is because it would make no sense for the installer to verify them. If someone were to make a rogue installation image, they could certainly change the installer to say the files were legitimate. If the image's signature has been verified beforehand, it is safe to answer "yes" at that prompt.
2. Save cd70.iso file.
Save the ISO file to use with Virtual Box and proceed to Install OpenBSD or Virtual Box section.
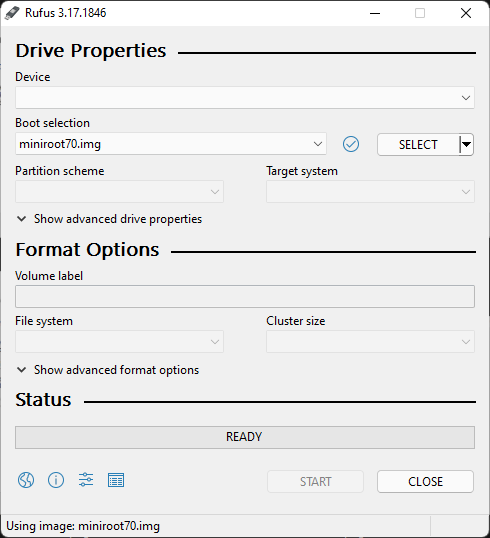
Booting from USB drive.
To create a bootable USB drive for installing on a 'bare metal' machine download the miniroot70.img file and use dd command to burn the file to a USB stick. If using a DVD download an .iso file instead.
Replace rsd6c with appropriate device.
`dd if=miniroot70.img of=/dev/rsd6c bs=1M`
On a Windows machine Rufus can be used to burn a ISO image to USB stick.
Links
Virtual Box
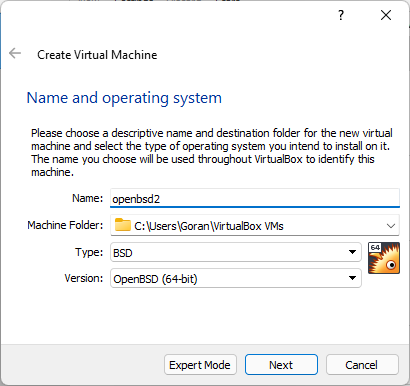
Set up a new VM on Virtual Box
Summary:
- Select to create a New Virtual Machine
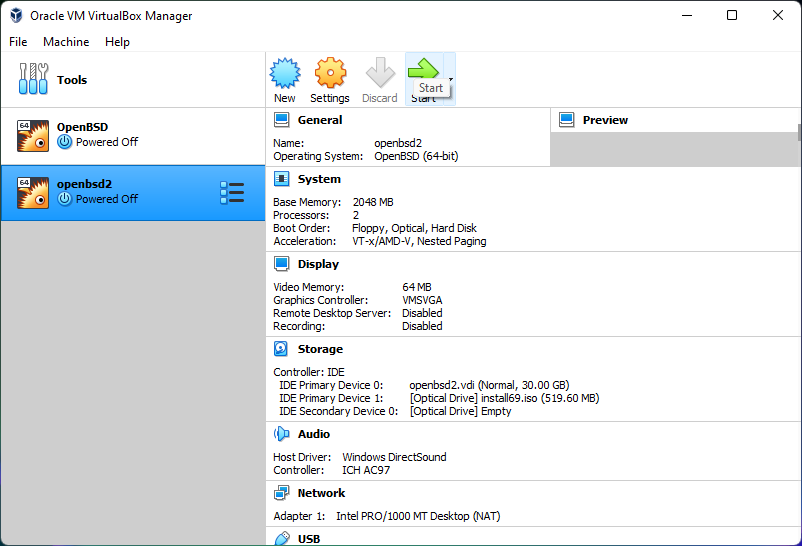
- Select 2048 MB of RAM if running GNOME. 1024 MB is enough if GNOME will not be run.
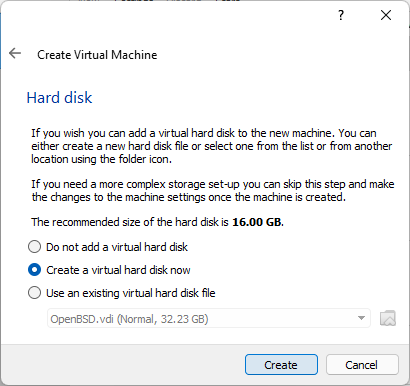
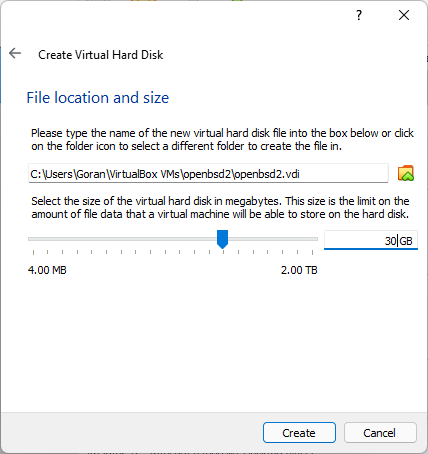
- Select 50 GB of Disk space if you will install GNOME, otherwise 30 GB is enough.
- Select either 1 or 2 CPU. 1 if you run into problems after install.
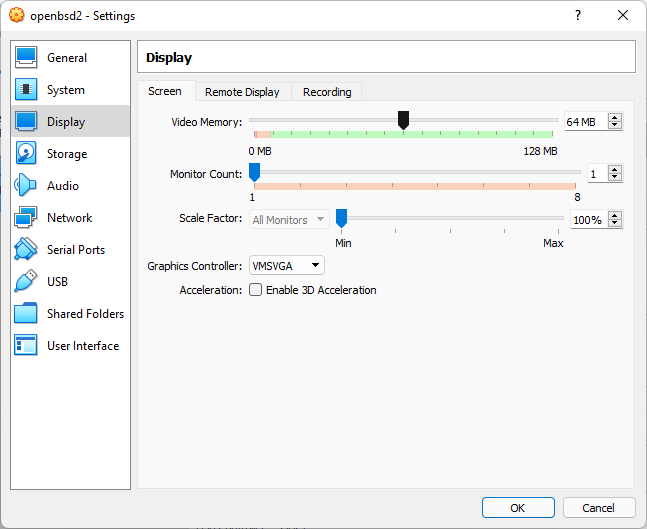
- Select to increase Video memory if you wish.
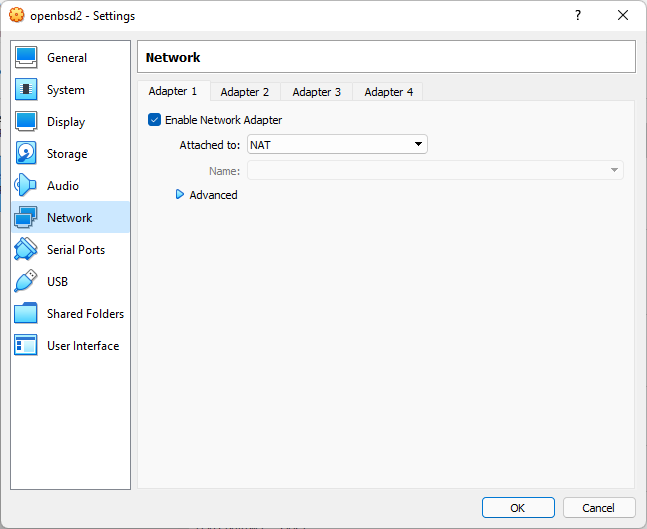
- Select NAT for Network, or other prefered network.
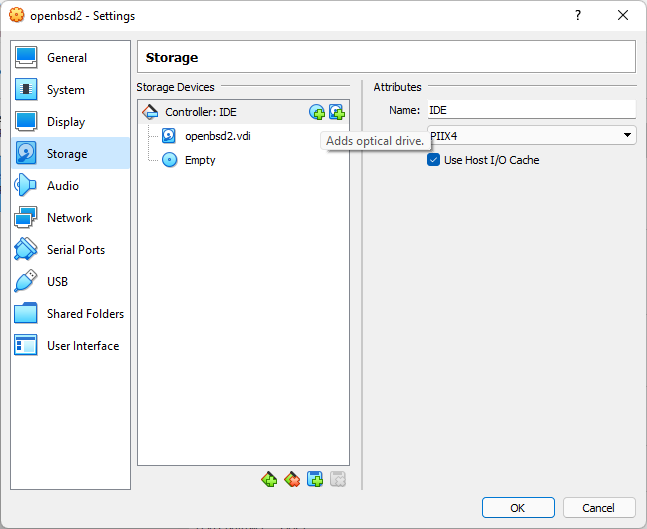
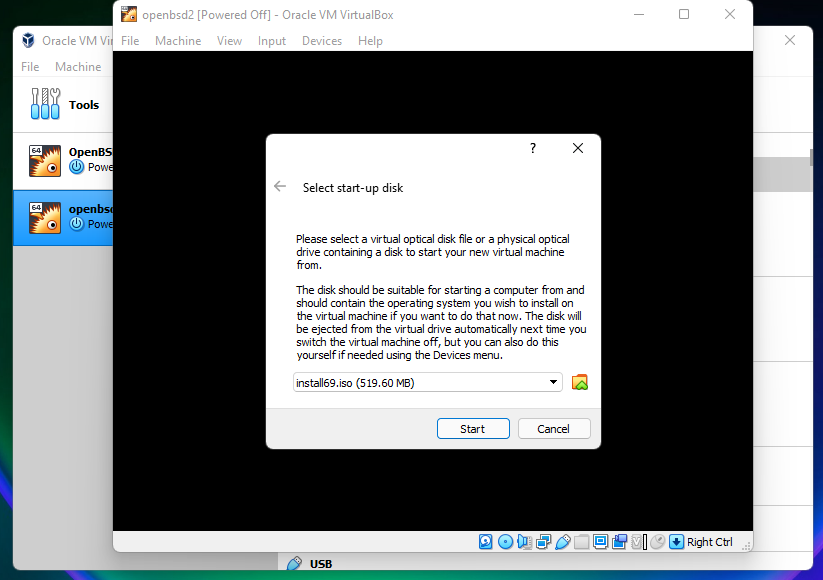
- Attach boot volume now or later when you start machine. It will ask for it if not attached
- After reboot or shutdown and detach the DVD ISO file in Virtual Box and start OS to boot from the disk.
Video
Screenshots
Create New Virtual Machine

Naming the VM
Select Memory Size

Create a new Hard Disk
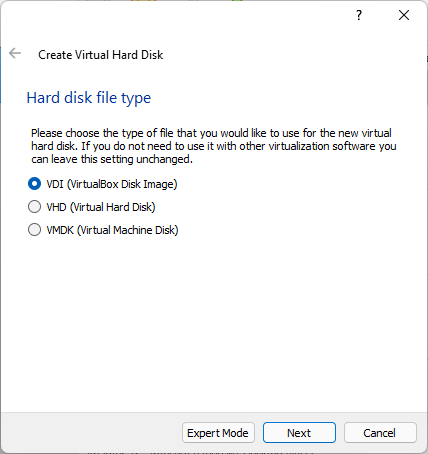
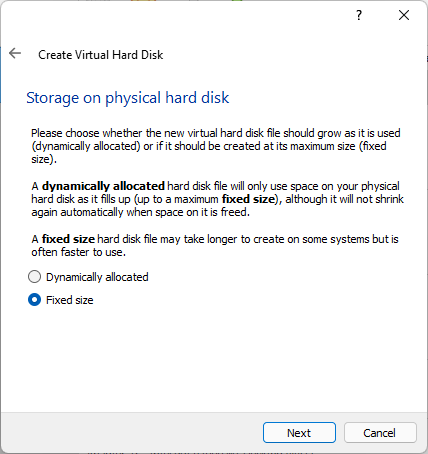
Hard Disk Type
Disk of fixed-size is faster
Choose Hard Disk size
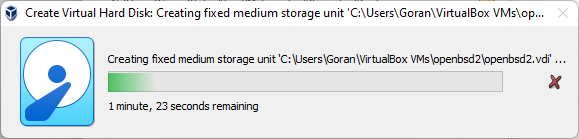
Disk Being Created
Select Number of CPU

Select Video Memory
Add Optical Drive for booting
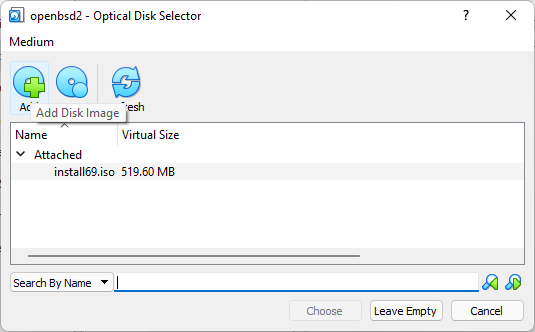
Select boot image

Boot image attached

Select Network
Start new VM
Select startup boot disk
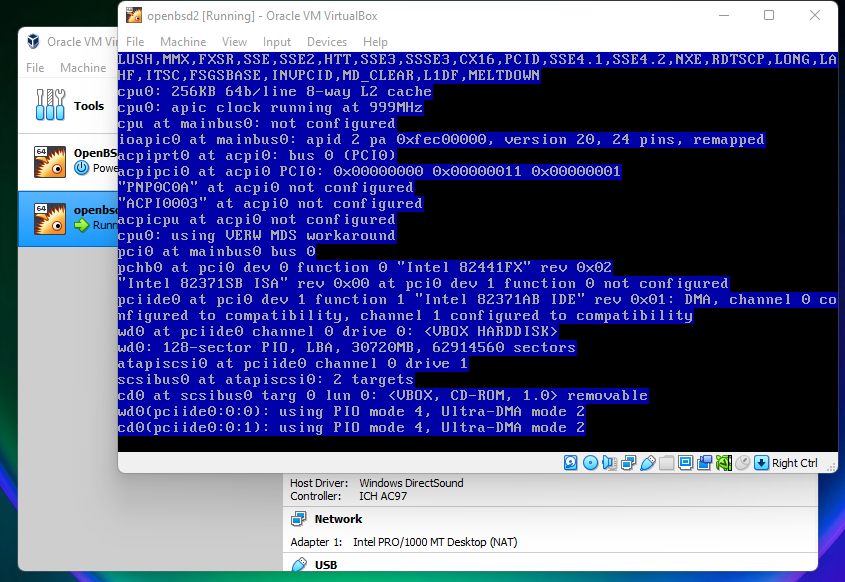
Machine Starting
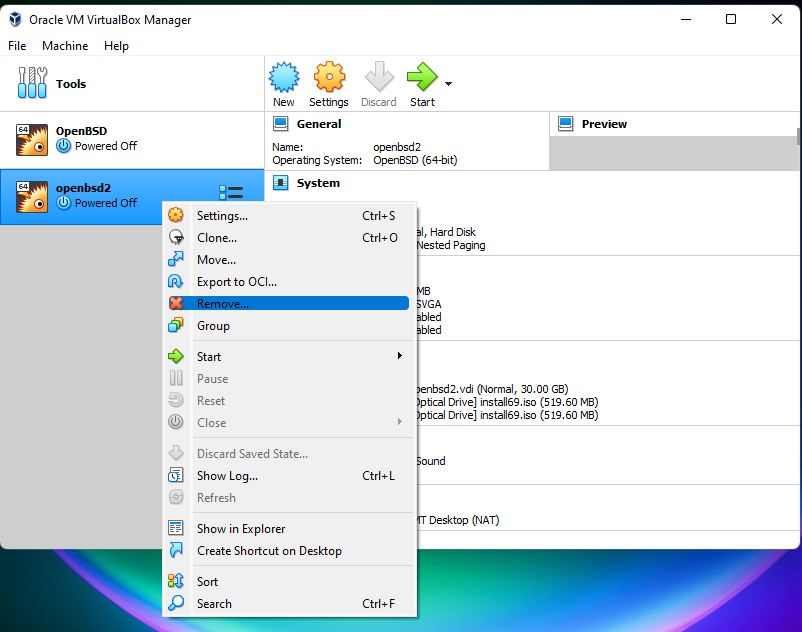
Removing a VM
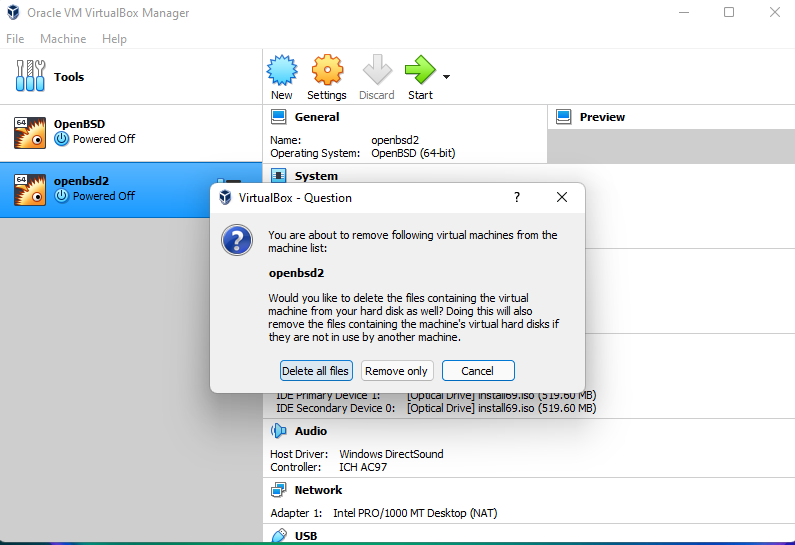
Delete all VM files
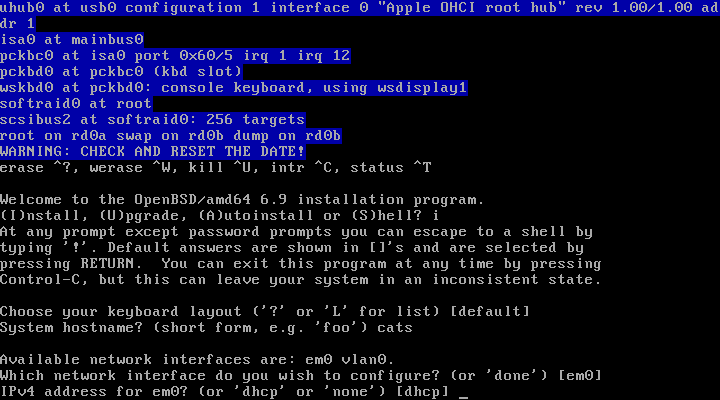
Installing OpenBSD
Installing OpenBSD is very simple, involves choosing appropriate options by pressing appropriate keys.
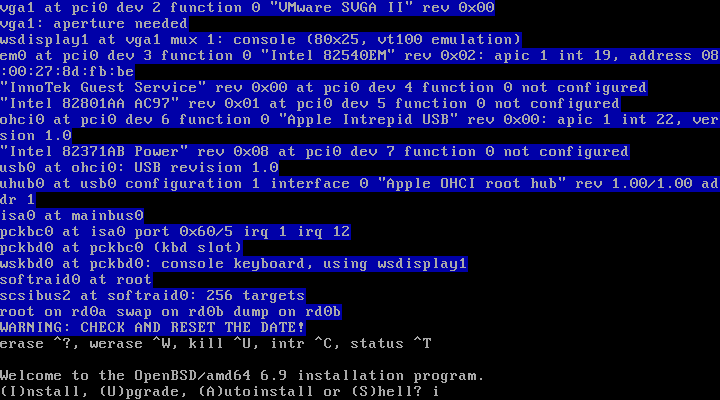
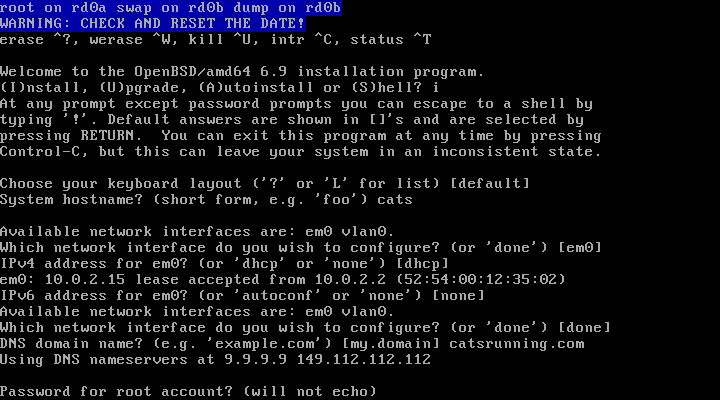
Starting the installer is done by typing the letter i and pressing enter.
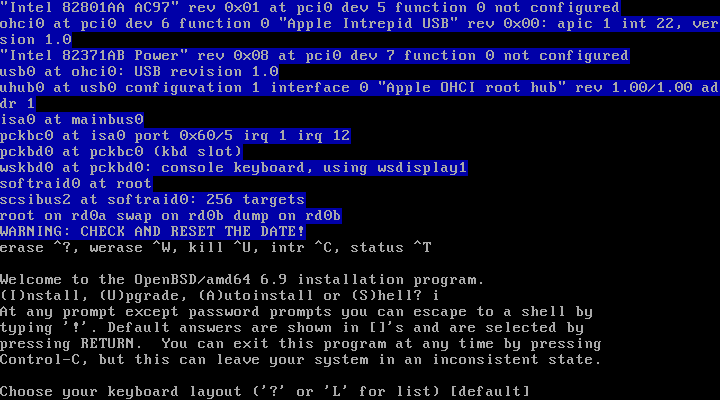
Following option is choosing the keyboard layout.
Hit enter to choose the [default] option and proceed, otherwise select L to list available Keyboard layouts.
The [default] options is US QWERTY keyboard.
Following the install steps below is sufficient, screenshots are provided below.
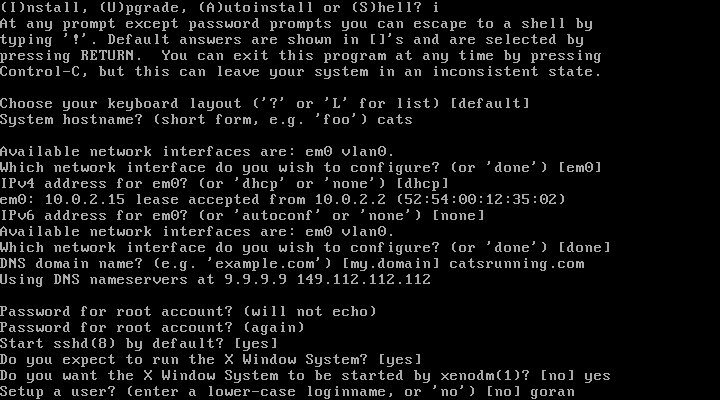
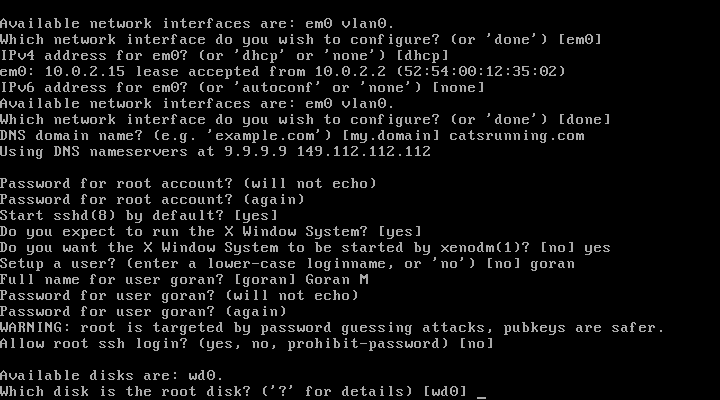
Installation Steps:
Select an option and hit enter to proceed:
| No | Options | Choose | Description |
|---|---|---|---|
| 1. | Installer: | i + enter | Starts the installer |
| 2. | Keyboard: | [default] + enter | Selects QWERTY keyboard |
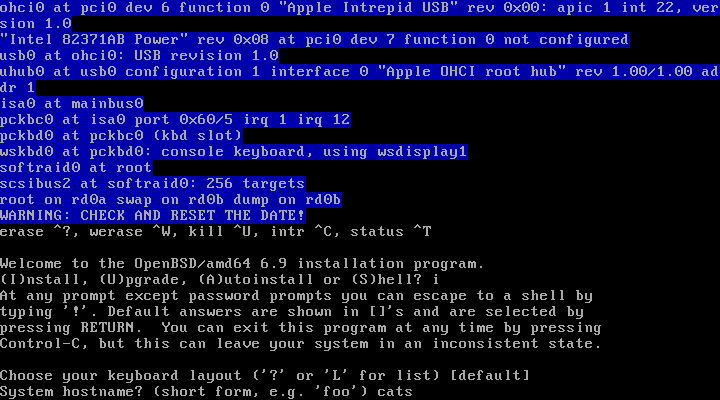
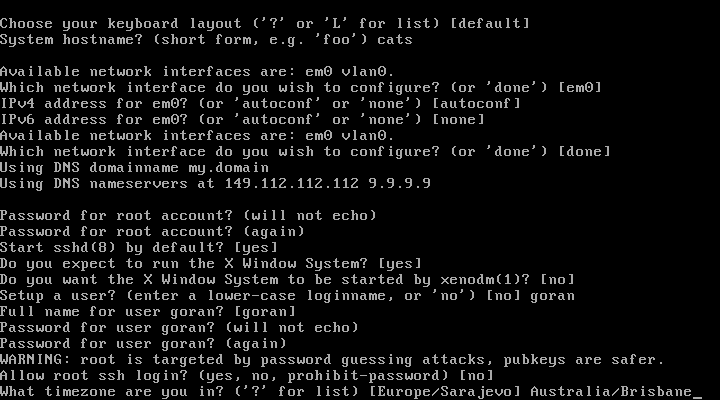
| 3. | Hostname: | OpenBSD-VM + enter | Gives computer a name |
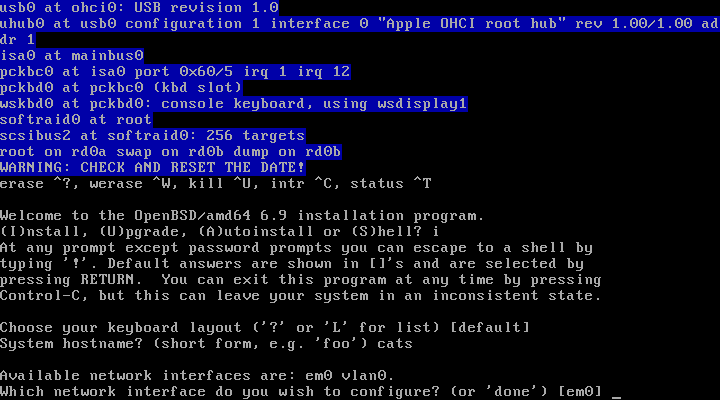
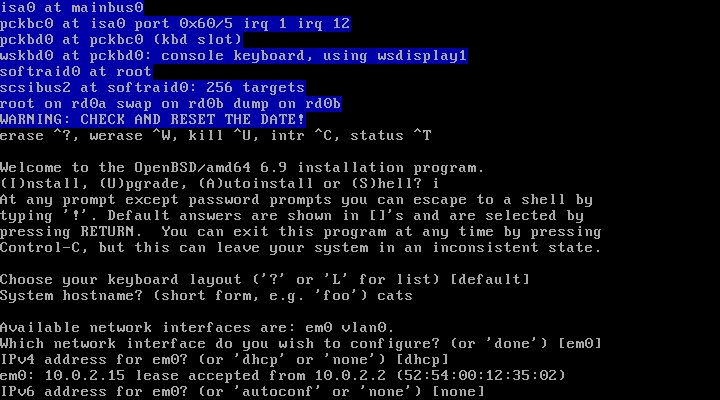
| 4. | Network: | [em0] + enter | Selects em0 as default Network device |
| 5. | IPv4: | [dhcp] + enter | Selects DHCP for IPv4 |
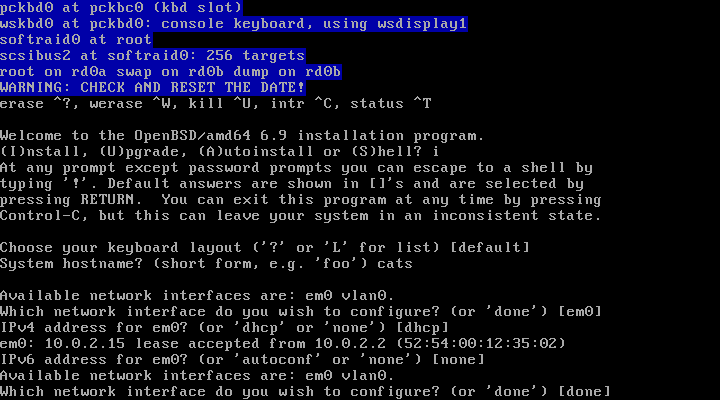
| 6. | IPv6: | [none] + enter | Selects not to use IP version 6 |
| 7. | Network: | [done] + enter | Done with setting up network |
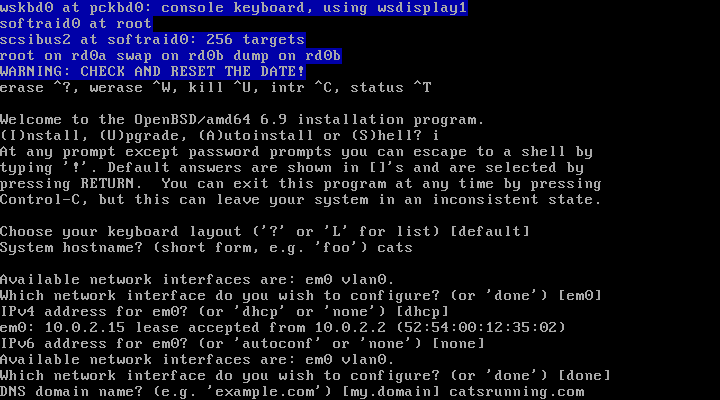
| 8. | Domain name: | catsrunning.com + enter | Domain name of server |
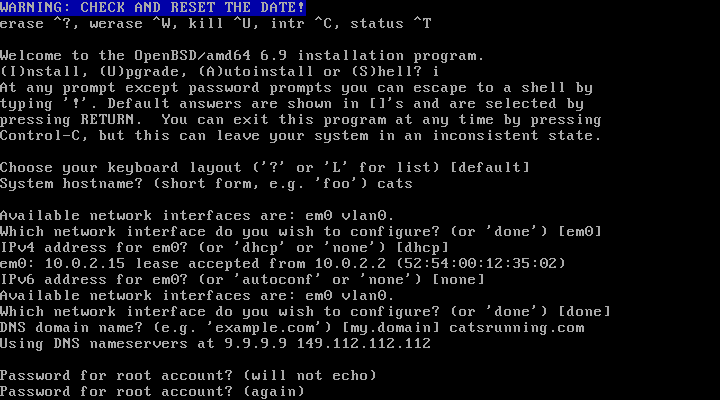
| 9. | Password: | 5235678 + enter | Sets root password as 5235678 |
| 10. | Password: | 5235678 + enter | Again |
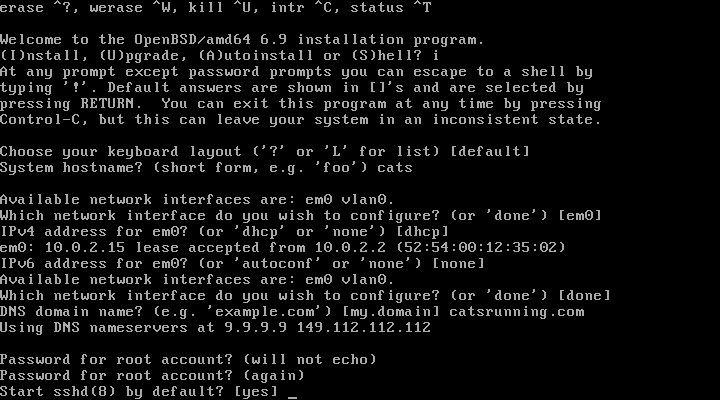
| 11. | sshd: | [yes] + enter | Starts SSH daemon at boot |
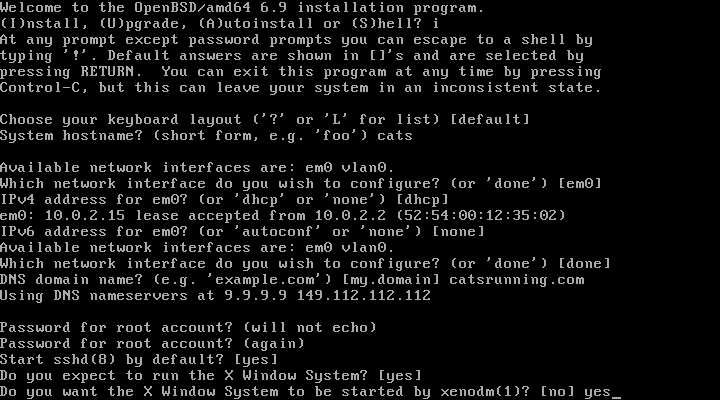
| 12. | X: | [yes] + enter | Installs Xorg on sytem |
| 13. | xenodm: | [yes] + enter | Starts X automatically. If no is selected X can be started by typing startx |
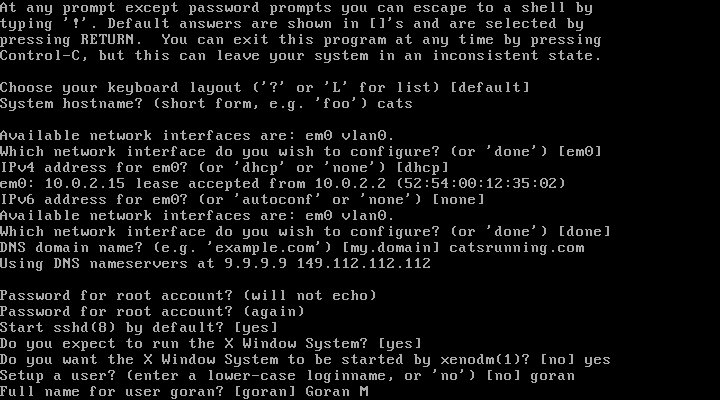
| 14. | User: | john + enter | Creates user 'john' |
| 15. | Name: | John Smith + enter | Saves Full name of user |
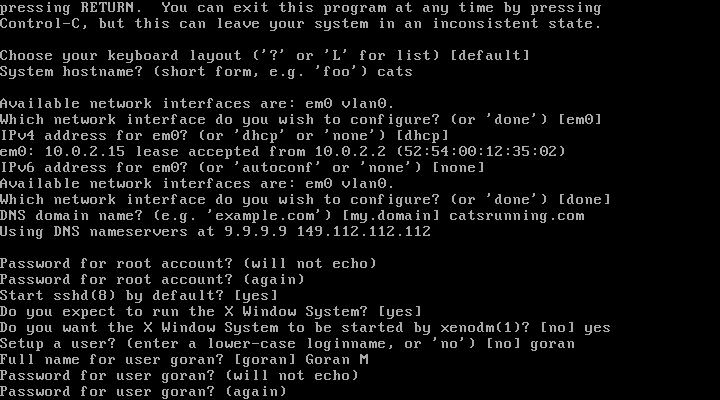
| 16. | Password: | 123456 + enter | Creates password for user john |
| 17. | Password: | 123456 + enter | Again |
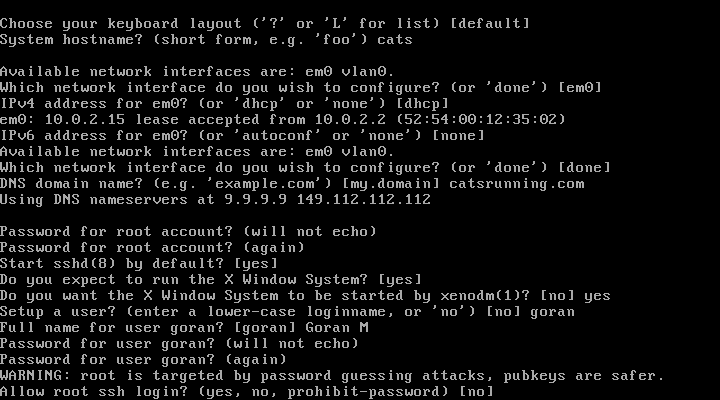
| 18. | Root SSH: | [no] + enter | Select no to disallow root logins and use user john to SSH into VM |
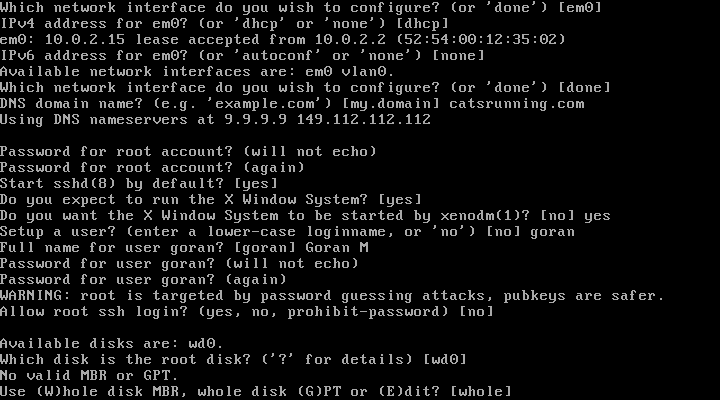
| 19. | Disk: | [wd0] + enter | Selects the disk wd0 to install OpenBSD |
| 20. | Whole: | [whole] + enter | Uses whole disk with MBR. To use GPT select G if installing on a real and new Computer |
| 21. | Auto: | [a] + enter | Selects auto layout of partitions on disk |
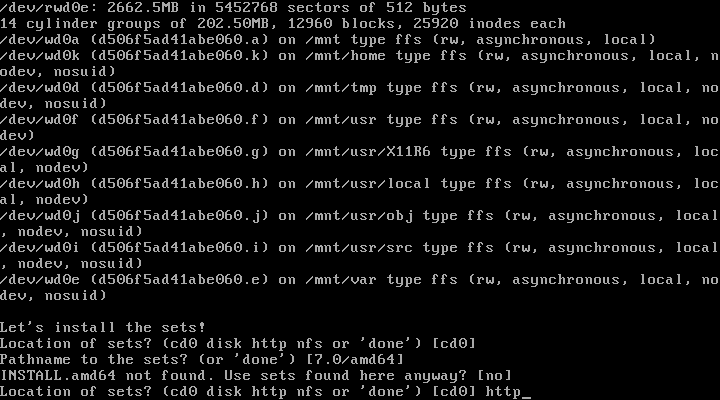
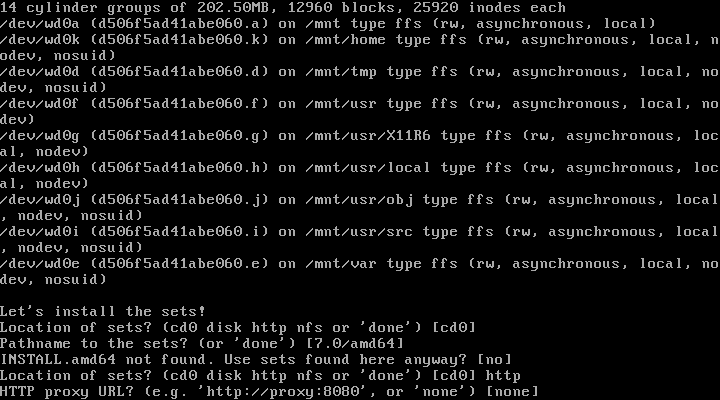
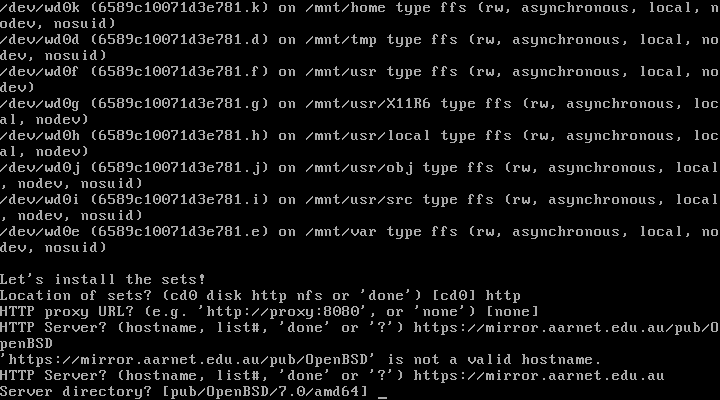
| 22. | Location of Sets: | [http] + enter | Selects http as location of sets to be installed |
| 23. | Proxy: | [none] + enter | No proxy server selected |
| 24. | HTTP Server: | https://mirror.aarnet.edu.au + enter | Selects an Australian mirror |
| 25. | Server directory: | [pub/OpenBSD/7.0/amd64] + enter | Hit enter, it will automatically select the needed directory [pub/OpenBSD/7.0/amd64] as location of sets |
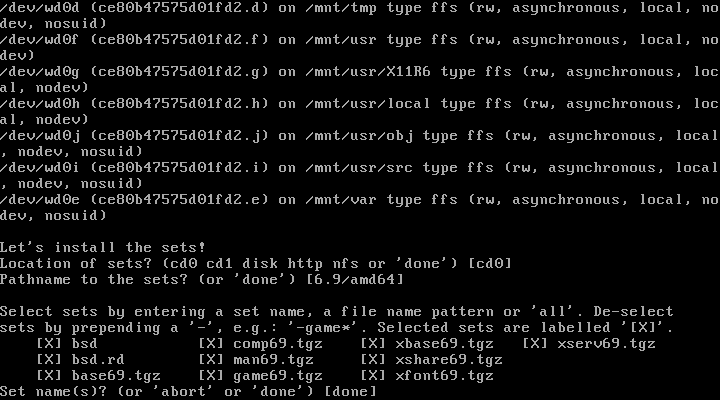
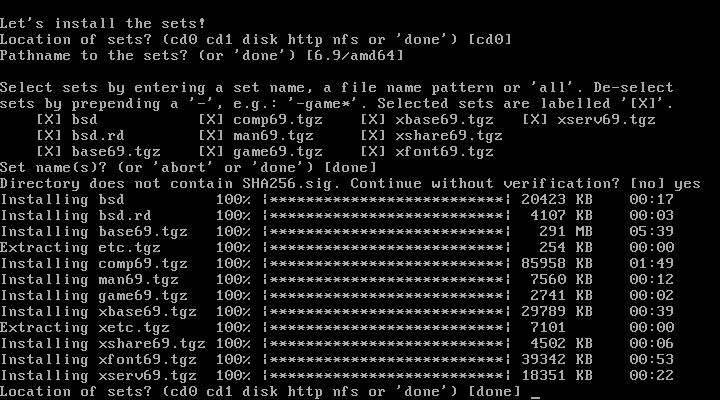
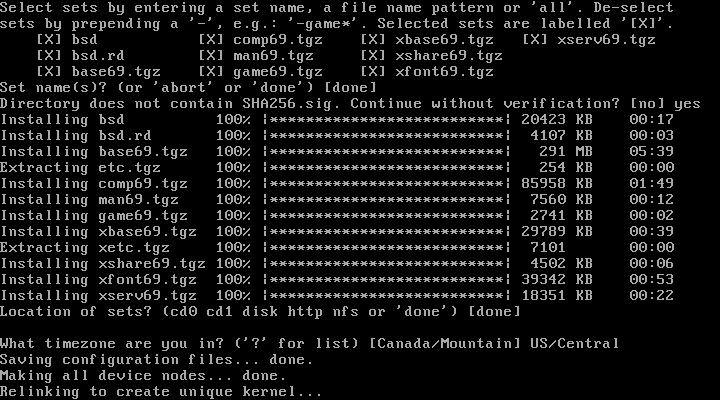
| 26. | Select sets: | [done] + enter | Hit enter to select to install all sets. If installing form cd instead http you would type yes here and proceed. |
| 27. | Location of Sets: | [done] +enter | Done, no additional sets to install |
| 28. | Timezone: | [Australia/Brisbane] + enter | Type appropriate Time Zone and hit enter |
| 29. | Reboot: | [reboot] + enter | Reboot the system. Remove the DVD boot disk if it boots to install again. |
After OpenBSD is installed go to Post Install
Copy paste options:
Mirror:
https://mirror.aarnet.edu.au
Time Zone:
Australia/Brisbane
Screenshots
1. Start the Installer
2. Choose a Keyboard layout
3. Enter a Hostname
4. Choose Network Interface
5. Selecd DHCP for IPv4
6. IPv6 not used
7. Done with Network
8. Enter a Domain Name
9. Enter assword for root account
10 Enter assword again
11. Start SSH daemon at boot
12. Install X Window System

13. Start X by xenodm automatically
14. Set up a user
15. Enter full name of user
16. Enter password for user
18. Allow root SSH login
19. Select root disk to install OpenBSD
20. Selects whole disk with MBR
21. Use automatic partition layout

22. Selects http as location of sets to be installed
23. No proxy server
24. 25.
-
Set
https://mirror.aarnet.edu.auas http server mirror -
Hit
enterto select [pub/OpenBSD/7.0/amd64] as location of sets
26. Select sets
26. In case sets are being installed from a cd type yes
27. Done installing sets
28. Set Time Zone
Relinking to create a unique kernel
reboot
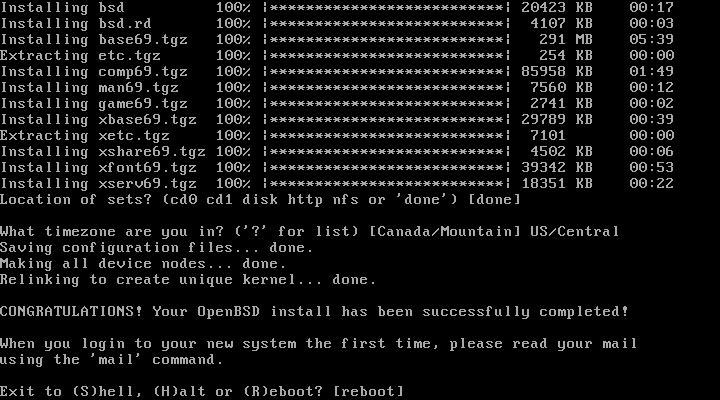
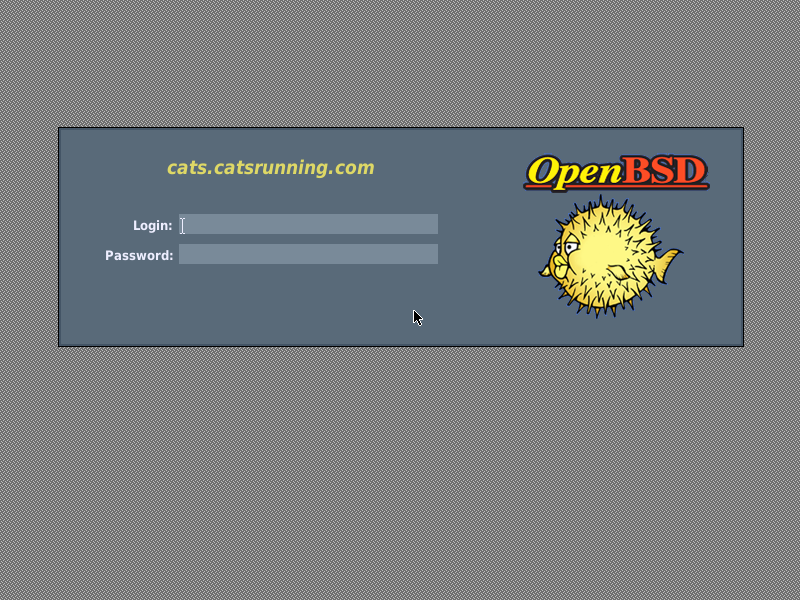
After reboot
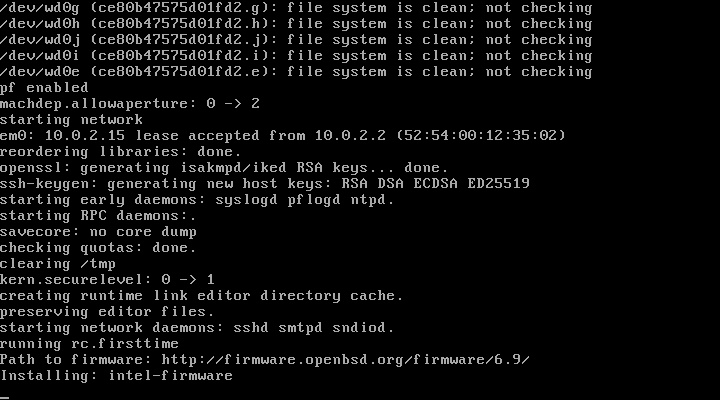
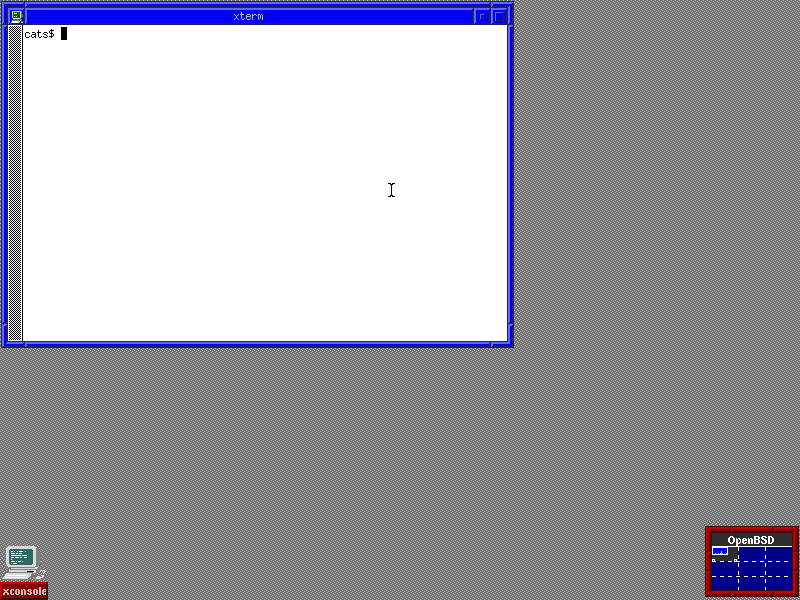
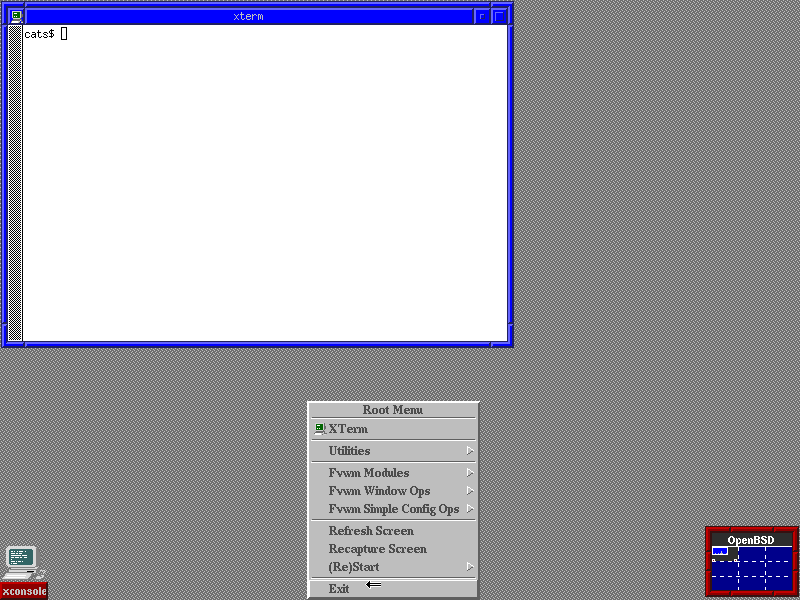
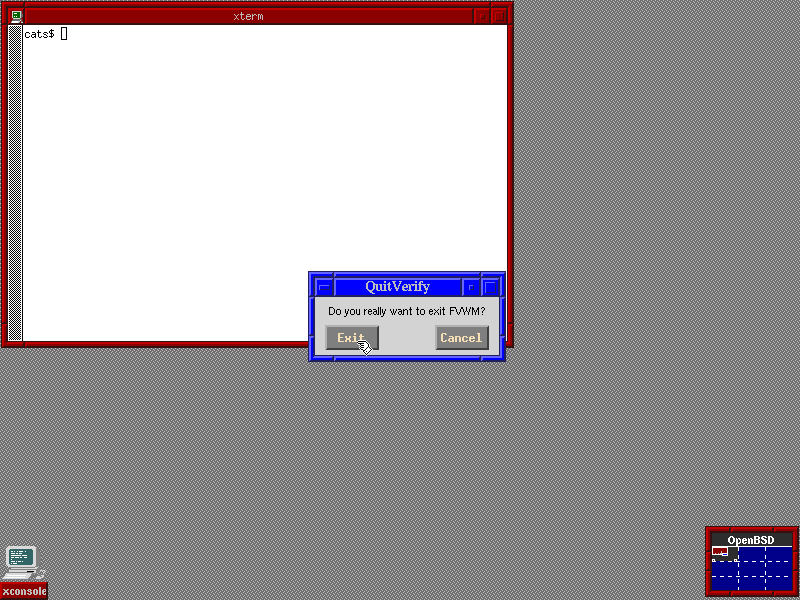
Default X Window Manager installed
Video
Security Updates
Apply binary patches (available on amd64, arm64, i386)
The syspatch(8) utility can be used to upgrade any files in need of security or reliability fixes on a supported OpenBSD release. This is the quickest and easiest method to get the base system up to date.
Run:
syspatch
Installing patches
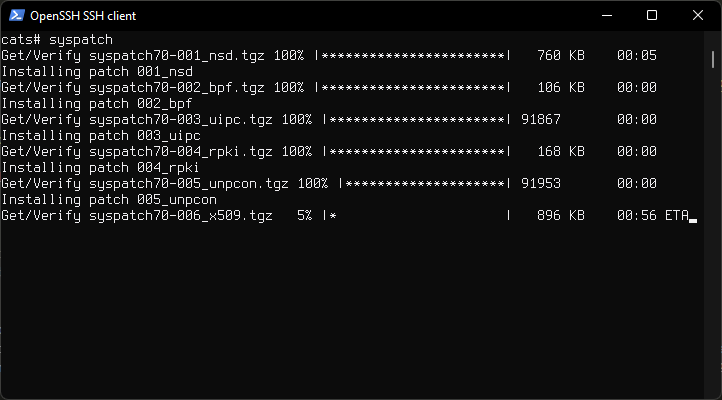
After it finishes reboot the system.
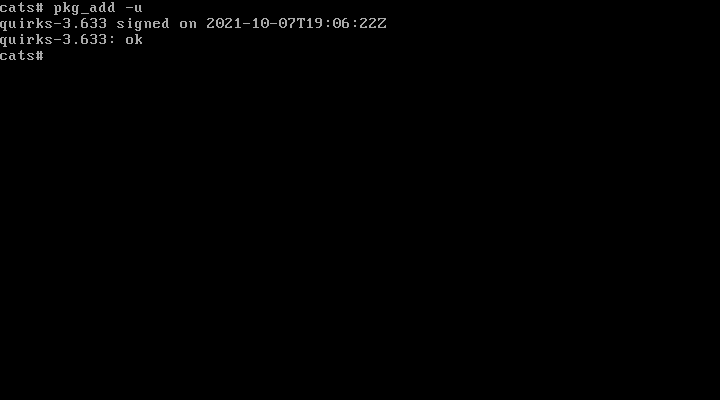
Update packages
To update all packages run:
pkg_add -u
Updating packages
Docs:
Upgrade OpenBSD
OpenBSD posts a upgrade guide documentation link for the latest release on their faq page.
Summary:
-
Verify
/usrpartition space. -
Run
sysupgrade -
Run
sysmergeif needed. -
Run
pgk_add -u
Upgrade process:
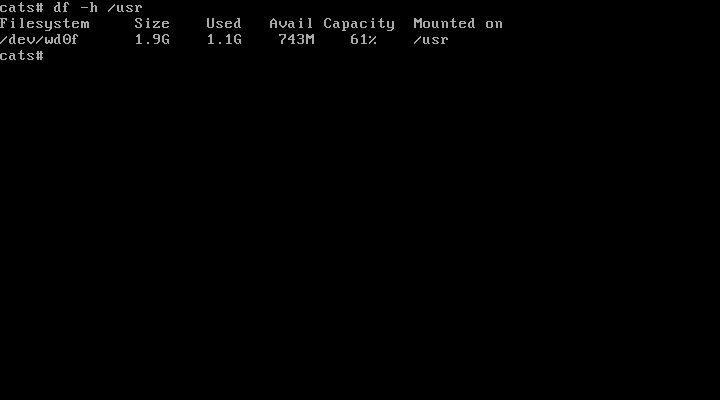
1. Verify space
To verify at least 1.1 GB of space on /usr run the following command:
df -h /usr
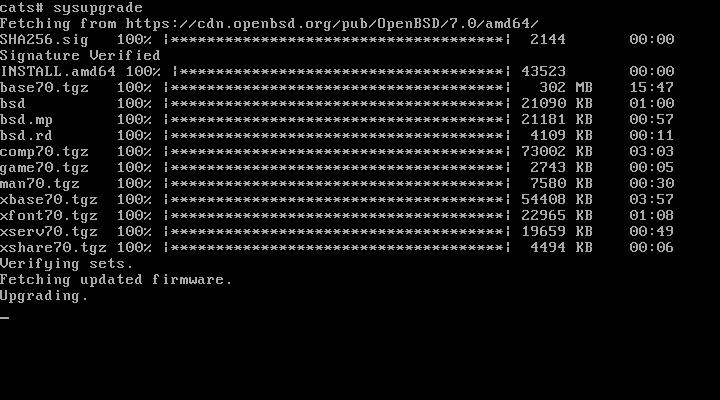
2. Upgrade
Upgrade the system by running:
sysupgrade
3. Auto-reboot
System will reboot and run sysmerge and you can proceed to step 4. In some cases, configuration files cannot be modified automatically, then run sysmerge ater reboot.
4. Update packages
Run pgk_add -u to updade all packages, reboot, why not, enjoy.
Screenshots
Check space on /usr partition
Sysupgrade running
Install GNOME on OpenBSD
You may skip this step and use the X Window Manager that is installed by default on OpenBSD and proceed to installing Firefox ESR and ProtonVPN.
If you prefer more to have more Desktop Environment features you can install GNOME by following the instructions below.
1. Install
Install GNOME with extras and nano text editor.
pkg_add gnome gnome-extras nano
2. Config
Edit /etc/login.conf file and add the following below:
nano /etc/login.conf
gnome:\
	:datasize-cur=1024M:\
	:tc=default:

gdm:\
	:tc=xenodm:
This will create a "gnome" login class and set proper limits needed to run GNOME, and also give gdm the default limits of xenodm.
3. Setup Users
Then add a user to the 'gnome' login class.
Do this for any user that will be running GNOME.
usermod -L gnome ${username}
4. Enable GNOME
Then run the following to disable 'xenodm' and enable 'gdm' (GNOME display manager) along with packages necessary to run GNOME.
rcctl disable xenodm
rcctl enable multicast messagebus avahi_daemon gdm
reboot
Firefox ESR
Install Firefox-ESR
pkg_add firefox-esr
Firefox ESR description.
Firefox Extended Support Release (ESR) is an official version of Firefox developed for large organizations like universities and businesses that need to set up and maintain Firefox on a large scale. Firefox ESR does not come with the latest features but it has the latest security and stability fixes.

Link to above description at support.mozilla.org
FireFox Plugins

To block ads install Adblock Plus or uBlock Origin.
To autodelete cookies when cookies aren't being used when switching a tab install Cookie Autodelete
TOR
Install TOR Browser
pkg_add tor-browser
For better privacy use TOR Browser.
TOR Browser was developed to do the following:
- BLOCK TRACKERS
- DEFEND AGAINST SURVEILLANCE
- RESIST FINGERPRINTING
- MULTI-LAYERED ENCRYPTION
- BROWSE FREELY
TOR Project Mission statement:
To advance human rights and freedoms by creating and deploying free and open source anonymity and privacy technologies, supporting their unrestricted availability and use, and furthering their scientific and popular understanding.

Browser hardening
Browser hardening boils down to editing Browser settings to disallow Websites to track your activity among other things.
This Article talks about Browser privacy, it reviews many Browsers, and gives options to choose from. It mentions this Firefox Privacy Guide which uses the arkenfox user.js.
ProtonVPN on OpenBSD
1. Install
Install OpenVPN client
pkg_add openvpn
Choose option 1.
2. Make a directory
Create a new directory to place config files and scripts.
mkdir /etc/openvpn/
3. Download scripts
Download client.up and client.down scripts from GitHub and place them in /etc/openvpn directory.
Make scrits executable
chmod +x client.up client.down
You can also copy scripts at the end of the page.
4. Download .ovpn file
Download a Linux configuration file from ProtonVPN Downloads page.
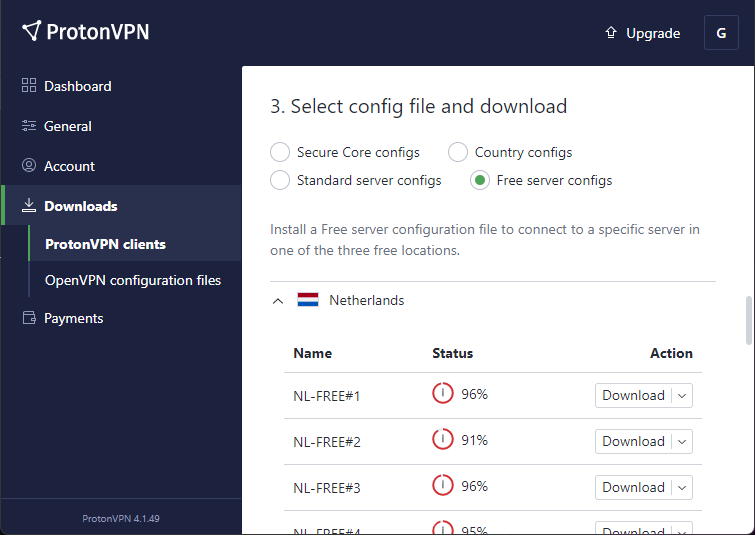
Rename the downloaded config file nl-free-01.protonvpn.com.udp.ovpn to proton.ovpn for simplicity.
Move the config file to /etc/openvpn/ folder.
5. Edit config
Edit the the two lines below in the proton.ovpn file.
up /etc/openvpn/update-resolv-conf
down /etc/openvpn/update-resolv-conf
So they look like this.
up /etc/openvpn/client.up
down /etc/openvpn/client.down
In order to link the scripts we downloaded.
6. Create Network Interface
Create a file named /etc/hostname.tun0.
nano /etc/hostname.tun0
And add the following to the /etc/hostname.tun0 file.
up
!/usr/local/sbin/openvpn --daemon --config /etc/openvpn/proton.ovpn
7. Save credentials
Auto connect to VPN and avoid having to entering username and password at the prompt by saving the credentials to a file.
Copy your IKEv2 ProtonVPN username and password.
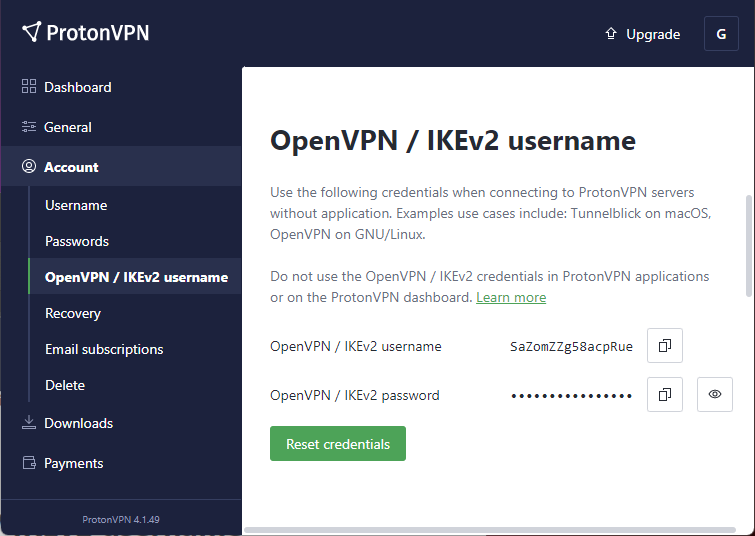
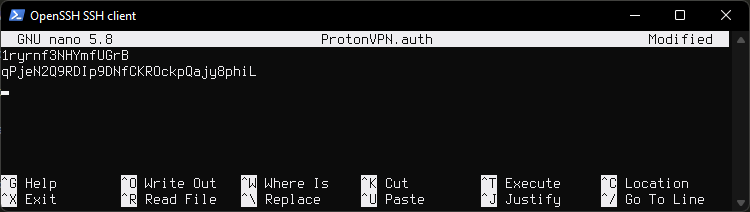
Create a new file and paste your username and password on two lines.
nano /etc/openvpn/ProtonVPN.auth
Edit the .ovpn file.
nano /etc/openvpn/proton.ovpn
Find the line auth-user-pass.
Add /etc/openvpn/ProtonVPN.auth at the end of auth-user-pass.
It will look like this:
auth-user-pass /etc/openvpn/ProtonVPN.auth
Edit file permissions for security
chown root:wheel /etc/openvpn/ProtonVPN.auth
chmod 0400 /etc/openvpn/ProtonVPN.auth
7. Disable resolvd
Disable resolvd and dhcpleased by running:
rcctl disable resolvd dhcpleased
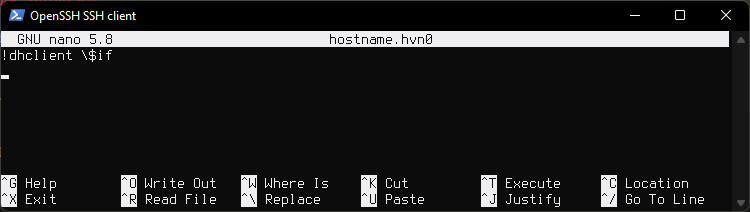
Enable dhclient(8) by adding "!dhclient \$if" to hostname.if(5). This would be the main interface that was created during install. In my case it is named hostname.hvn0
nano /etc/hostname.hvn0
Remove or comment out autoconf line and paste !dhclient \$if instead.
It will look like this.
Disabling
resolvdis needed because it rewrites theresolv.conffile if it detects the file has been changed, or rewrites the file if it has been deleted. This interferes withclient.upscript which has to modifyresolv.confin order to prevent DNS leaks by adding ProtonVPN DNS servers toresolv.conf, so that way our queries do not go through our local DNS.
8. Reboot
reboot and your VPN tunnel should be up and running.
9. Done
You are done. Nothing further is needed. Below are some micelaneous commnads to test the tunnel.
Testing
Check routes
To show routing table run:
route show
netstat -nr -f inet | more
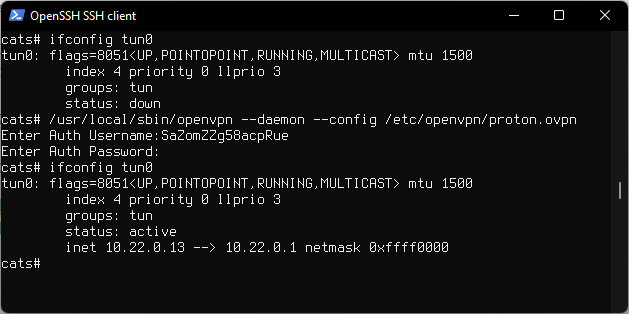
To show interface run:
ifconfig tun0
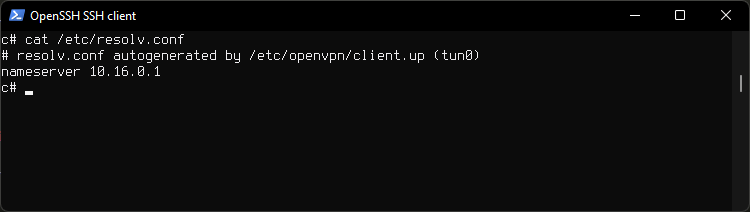
Check resolv.conf
Look at resolv.conf for ProtonVPN DNS our queries will go through.
cat /etc/resolv.conf
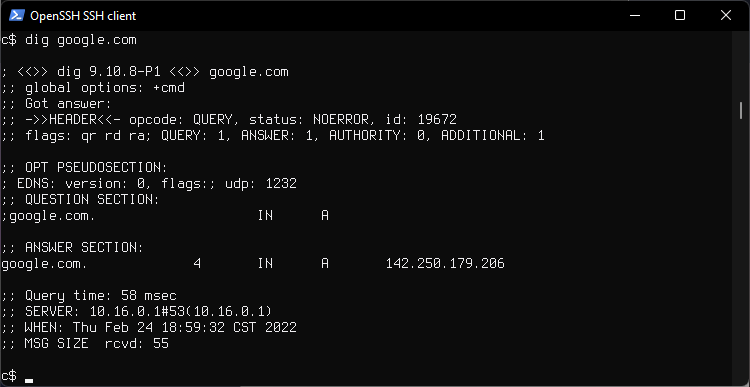
Check DNS
See which DNS server responds to our queries, at the bottom.
dig google.com
10.16.0.1 is a ProtonVPN assigned DNS.
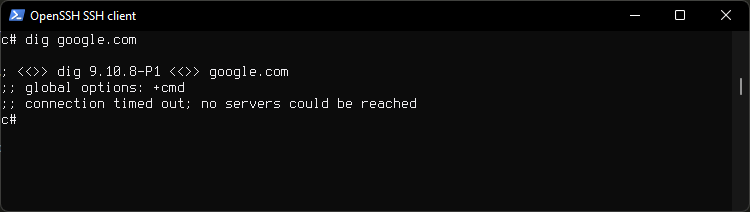
Check KillSwitch
Bring the tunnel downe
ifconfig tun0 down
You can also reset ProtonVPN credentials while tunnel is on
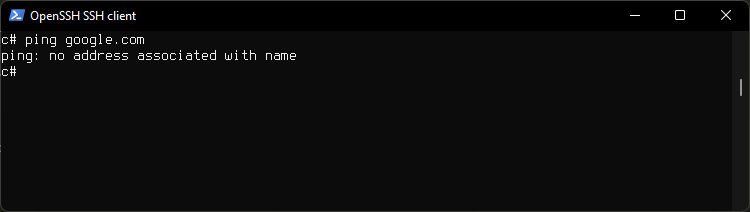
Then chech the network is down by running
dig google.com
ping 8.8.8.8
ping google.com
Reboot the system to reset the tunnel to connect to VPN.
Manual connect to VPN
For testing you can start the VPN as root.
Daemon mode
/usr/local/sbin/openvpn --daemon --config /etc/openvpn/proton.ovpn
In foreground, non daemon mode. Log messages will be displayed. You can hit CTRL+C to exit.
/usr/local/sbin/openvpn --config /etc/openvpn/proton.ovpn --verb 9
With --verb 9 flag for more verbose output
/usr/local/sbin/openvpn --config /etc/openvpn/proton.ovpn --verb 9
If credentials are not saved, openvpn will ask you to enter your username and password.
Auto start with rcctl
Starting the openvpn automatically when system boots using the client .ovpn config file. Tunnel in our config already starts on boot, this is just another option, if running a VPN server this is how it would be done.
Enable openvpn
rcctl enable openvpn
Set openvpn flags
rcctl set openvpn flags "--daemon --config /etc/openvpn/proton.ovpn"
Start openvpn client
rcctl start openvpn
Check if running
rcctl check openvpn
On reboot openvpn client will start automatically.
Scripts
client.up
#!/bin/sh

# Copyright (c) 2005-2018 OpenVPN Inc
# Licensed under the GPL version 2

# First version by Jesse Adelman
# someone at boldandbusted dink com
# http://www.boldandbusted.com/

# PURPOSE: This script automatically sets the proper /etc/resolv.conf entries
# as pulled down from an OpenVPN server.

# INSTALL NOTES:
# Place this in /etc/openvpn/client.up
# Then, add the following to your /etc/openvpn/<clientconfig>.conf:
#   client
#   up /etc/openvpn/client.up
# Next, "chmod a+x /etc/openvpn/client.up"

# USAGE NOTES:
# Note that this script is best served with the companion "client.down"
# script.

# Tested under Debian lenny with OpenVPN 2.1_rc11
# It should work with any UNIX with a POSIX sh, /etc/resolv.conf or resolvconf

# This runs with the context of the OpenVPN UID/GID
# at the time of execution. This generally means that
# the client "up" script will run fine, but the "down" script
# will require the use of the OpenVPN "down-root" plugin
# which is in the plugins/ directory of the OpenVPN source tree

# A horrid work around, from a security perspective,
# is to run OpenVPN as root. THIS IS NOT RECOMMENDED. You have
# been WARNED.
PATH=/bin:/usr/bin:/usr/local/bin:/sbin:/usr/sbin:/usr/local/sbin

# init variables

i=1
domains=
fopt=
ndoms=0
nns=0
nl='
'

# $foreign_option_<n> is something like
# "dhcp-option DOMAIN example.com" (multiple allowed)
# or
# "dhcp-option DNS 10.10.10.10" (multiple allowed)

# each DNS option becomes a "nameserver" option in resolv.conf
# if we get one DOMAIN, that becomes "domain" in resolv.conf
# if we get multiple DOMAINS, those become "search" lines in resolv.conf
# if we get no DOMAINS, then don't use either domain or search.

while true; do
  eval fopt=\$foreign_option_${i}
  [ -z "${fopt}" ] && break

  case ${fopt} in
		dhcp-option\ DOMAIN\ *)
           ndoms=$((ndoms + 1))
           domains="${domains} ${fopt#dhcp-option DOMAIN }"
           ;;
		dhcp-option\ DNS\ *)
           nns=$((nns + 1))
           if [ $nns -le 3 ]; then
             dns="${dns}${dns:+$nl}nameserver ${fopt#dhcp-option DNS }"
           else
             printf "%s\n" "Too many nameservers - ignoring after third" >&2
           fi
           ;;
        *)
           printf "%s\n" "Unknown option \"${fopt}\" - ignored" >&2
           ;;
	esac
  i=$((i + 1))
done

ds=""
if [ $ndoms -eq 1 ]; then
  ds="${nl}domain"
elif [ $ndoms -gt 1 ]; then
  ds="${nl}search"
fi

# This is the complete file - "$domains" has a leading space already
out="# resolv.conf autogenerated by ${0} (${dev})${nl}${dns}${ds}${domains}"

# use resolvconf if it's available
if type resolvconf >/dev/null 2>&1; then
  printf "%s\n" "${out}" | resolvconf -a "${dev}"
else
  # Preserve the existing resolv.conf
  if [ -e /etc/resolv.conf ] ; then
    cp /etc/resolv.conf /etc/resolv.conf.ovpnsave
  fi
  printf "%s\n" "${out}" > /etc/resolv.conf
  chmod 644 /etc/resolv.conf
fi

exit 0
client.down
#!/bin/sh

# Copyright (c) 2005-2018 OpenVPN Inc
# Licensed under the GPL version 2

# First version by Jesse Adelman
# someone at boldandbusted dink com
# http://www.boldandbusted.com/

# PURPOSE: This script automatically removes the /etc/resolv.conf entries previously
# set by the companion script "client.up".

# INSTALL NOTES:
# Place this in /etc/openvpn/client.down
# Then, add the following to your /etc/openvpn/<clientconfig>.conf:
#   client
#   up /etc/openvpn/client.up
#   down /etc/openvpn/client.down
# Next, "chmod a+x /etc/openvpn/client.down"

# USAGE NOTES:
# Note that this script is best served with the companion "client.up"
# script.

# Tested under Debian lenny with OpenVPN 2.1_rc11
# It should work with any UNIX with a POSIX sh, /etc/resolv.conf or resolvconf

# This runs with the context of the OpenVPN UID/GID
# at the time of execution. This generally means that
# the client "up" script will run fine, but the "down" script
# will require the use of the OpenVPN "down-root" plugin
# which is in the plugins/ directory of the OpenVPN source tree
# The config example above would have to be changed to:
#   client
#   up /etc/openvpn/client.up
#   plugin openvpn-plugin-down-root.so "/etc/openvpn/client.down"

# A horrid work around, from a security perspective,
# is to run OpenVPN as root. THIS IS NOT RECOMMENDED. You have
# been WARNED.
PATH=/bin:/usr/bin:/usr/local/bin:/sbin:/usr/sbin:/usr/local/sbin

if type resolvconf >/dev/null 2>&1; then
  resolvconf -d "${dev}" -f
elif [ -e /etc/resolv.conf.ovpnsave ] ; then
  # cp + rm rather than mv in case it's a symlink
  cp /etc/resolv.conf.ovpnsave /etc/resolv.conf
  rm -f /etc/resolv.conf.ovpnsave
fi

exit 0
WiFi
Set up a trunk device
Trunk interface automatically connects to one of multiple Ethernet or wifi devices.
Trunks are virtual interfaces consisting of one or more network interfaces. In this section, our example will be a laptop with a wired bge0 interface and a wireless iwn0 interface. We will build a trunk(4) interface using both of them. The wired and wireless interfaces must be connected to the same layer two network.
1. Devices
List devices
ifcongig
The listed devices are
-
Ethernet
hostname.em0 -
WiFi
hostname.iwm0 -
Trunk
hostname.trunk0

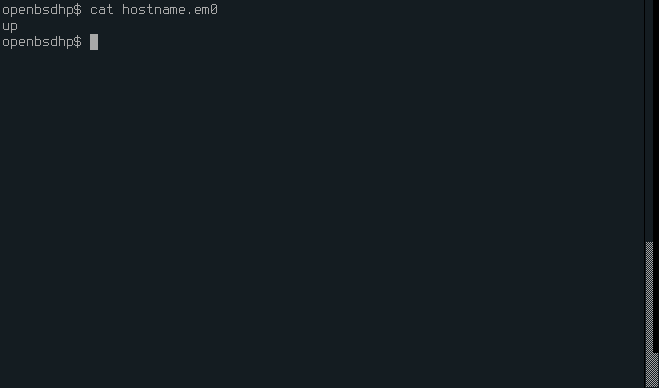
2. Ethernet device
Edit the /etc/hostname.em0 to contain only up
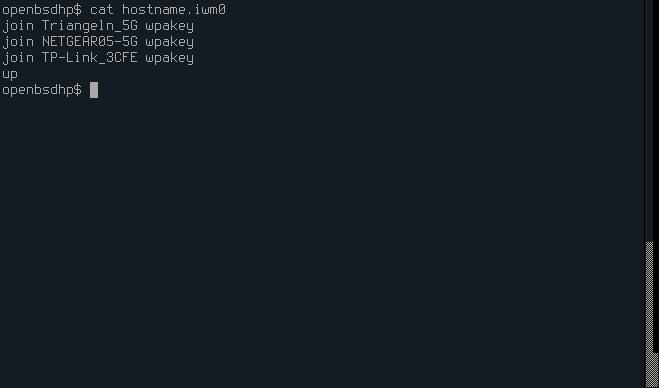
3. Wifi device
Edit the /etc/hostname.iwm0 add WiFi networks. One per each line separated by a space join $SSID wpakey $PASSWORD and add up on the last line. In the photo below passwords are deleted but they come after wpakey.
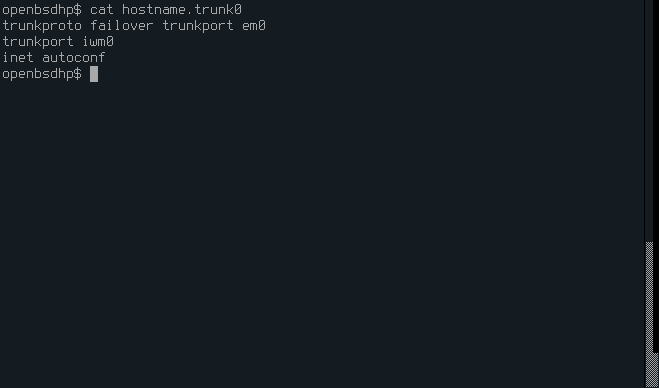
4. Trunk device
Create a new file for the trunk device.
nano /etc/hostname.trunk0
Add the following lines to it. Change the names of interfaces as needed to match your own.
trunkproto failover trunkport em0
trunkport iwm0
inet autoconf
5. Restart network
Run
/etc/netstart
Should connect to WiFi, if not reboot.
Commands Cheat Sheet
Key Sequence
| Key Sequence | Description |
|---|---|
ctrl+alt+F1 | Exit X and switch to tty0 |
ctrl+alt+F5 | Switch back to X |
Commands
| Command | Description |
|---|---|
rcctl ls on | List running services |
rcctl disable xenom | Disable xenom service |
rcctl enable xenom | Enable xenom service |
rcctl restart | Restarts a service |
rcctl reload | Reloads config file. Doesn't restart |
pkg_add -u | Update packages |
syspatch | Run security updates |
sysupgrade | Upgrade to new release |
shutdown -p now | Power off system |
Video Links
| Description | Link |
|---|---|
| Setup VirtualBox | https://youtu.be/4e7AF8HqZfo |
| Install OpenBSD | https://youtu.be/fGA2wGjOfTM |
| Run openvpn without daemon | https://youtu.be/VM-WL4wUqss |
| TOR Browser Demo | https://youtu.be/N4F8xtHmBac |

Installing Updates
sudo freebsd-update fetch install
sudo pkg upgrade
IBM
pkg install xf86-video-mga
Console Appearance
vidcontrol
vidfont
pkg install x11-fonts/spleen
To set a 1600x900 mode on all output connectors, put the following line in /boot/loader.conf
kern.vt.fb.default_mode="1600x900"
To set a 800x600 only on a laptop builtin screen, use the following line instead:
kern.vt.fb.modes.LVDS-1="800x600"
To set black and white colors of console palette
kern.vt.color.0.rgb="10,10,10"
kern.vt.color.15.rgb="#00ffff"
Show available colors
vidcontrol show
Set foreground and background colors
vidcontrol white black
set history = 1000
set savehist = 1000
visudo alice ALL=(ALL) NOPASSWD: ALL
Notes
https://lists.freebsd.org/pipermail/freebsd-questions/2014-August/260678.html
Both are correct. According to rc.conf(5):
kld_list (str) A list of kernel modules to load right after the local disks are mounted. Loading modules at this point in the boot process is much faster than doing it via /boot/loader.conf for those modules not necessary for mounting local disk.

Ubuntu

Debian
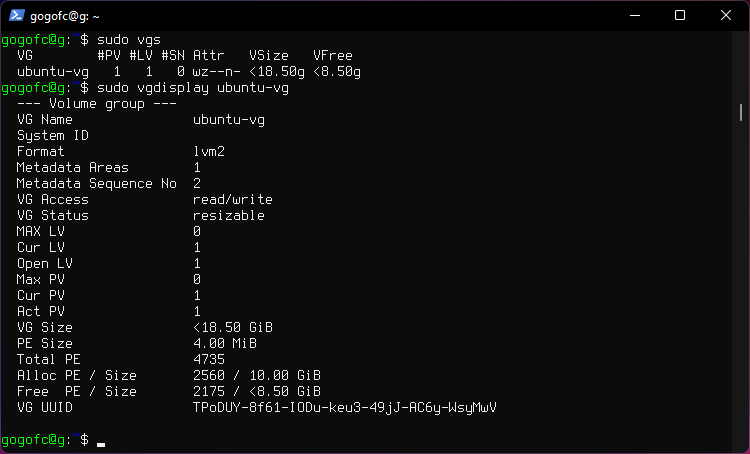
Logical Volume Manager
Extend the size of a partition.
Display information about volume groups
sudo vgs
Display volume group information
sudo vgdisplay ubuntu-vg

CentOS
Update CentOS 8
Downloads and caches metadata for enabled repositories.
sudo dnf makecache
Checks for updates.
sudo dnf check-update
Updates CentOS 8.
sudo dnf update

Windows
EFI bootloader repair
Toms Hardware Windows Boot Repair
BOOTREC /FIXMBR
BOOTREC /FIXBOOT
BOOTREC /SCANOS
BOOTREC /REBUILDBCD
To make it work I ran Automatic Repair again, which didn't work firts time around, FreeBSD dual boot broke my EFI boot m
msinfo32 System Information App
Scoop
Set-ExecutionPolicy RemoteSigned -scope CurrentUser
Invoke-Expression (New-Object System.Net.WebClient).DownloadString('https://get.scoop.sh')
scoop install youtube-dl

0. Install Open ZFS on Ubuntu.
sudo apt install zfsutils-linux
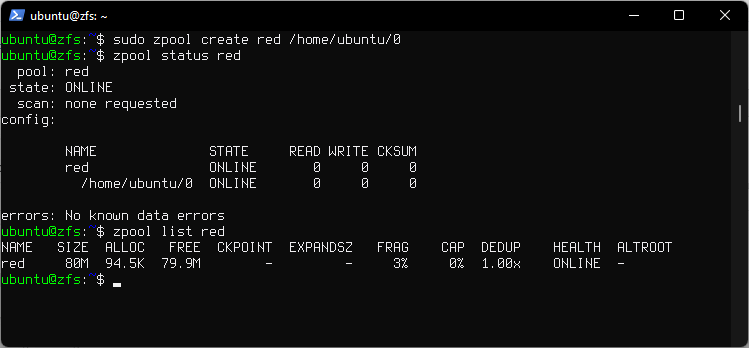
1. Create a pool
sudo zpool create red /home/ubuntu/0
- Creates a pool named
red, with single vdev and single disk. In this case disks is a regular file. Full path needs to be provided. Otherwise in Ubuntu/dev/sdcis used.
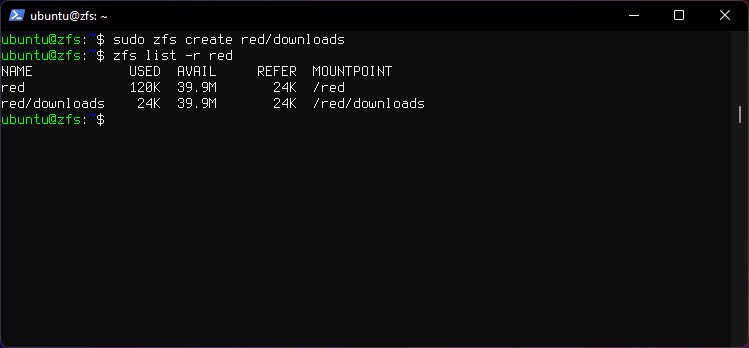
2. Create a dataset
sudo zfs create red/downloads
-
Creates a dataset named
downloads. -
sudois needed for mounting permissions because regular users can not mount to filesystem. -
Mount point defaults if not specified.
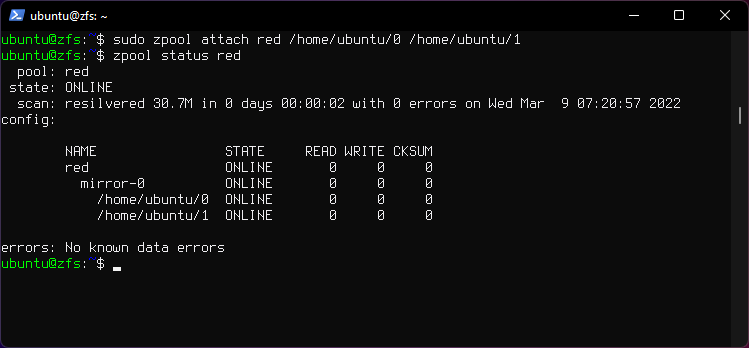
3. Attach a device to vdev
sudo zpool attach red /home/ubuntu/0 /home/ubuntu/1
- The pool will "resilver".
4. Detach a device from vdev
sudo zpool detach red /home/ubuntu/1
- The pool will "resilver".

5. Add a second "mirror" vdev to pool
sudo zpool add red mirror /home/ubuntu/2 /home/ubuntu/3
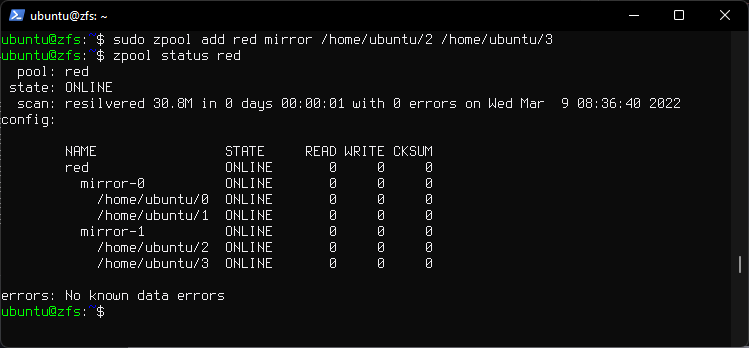
6. Remove top-level vdev from pool
sudo zpool remove red mirror-1
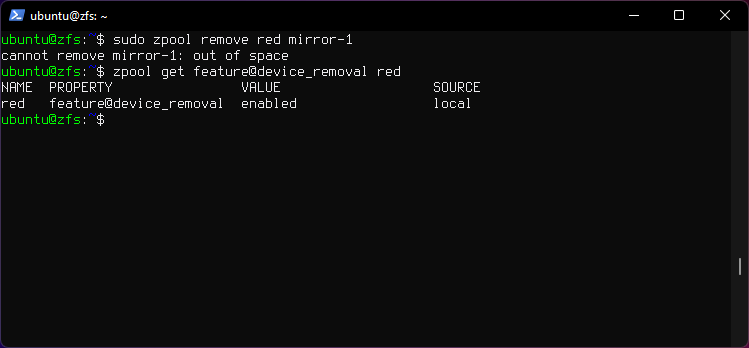
Gives an error.
- It should work with a physical disk, testing here is done with files.
device_removalfeature is enabled.- Use
zpool get all redto list all properties and features of poolred. - Use
zpool upgrade redto upgrade ZFS features for poolred. - zpool-remove man pages
To enable the feature run
sudo zpool set feature@device_removal=enabled red
7. Destroy dataset
sudo zfs destroy red/downloads
- Destroys dataset
downloadson the pool namedred.
8. Destroy pool
sudo zpool destroy red
- Destroys the pool named
red.
9. Import pool
sudo zpool import blue
- Imports pool
blueon same machine or a new machine.
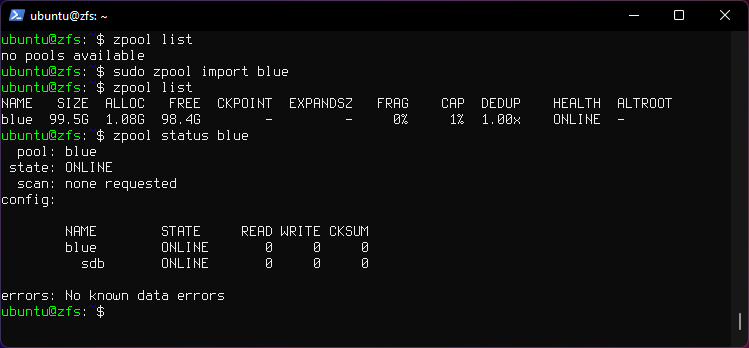
-
This is useful if moving disks to a new server machine, then all is needed is ZFS installed and run the command to import the pool.
-
Another case is if the OS is reinstalled, then the pool can be imported. Given that the OS isn't installed on the pool as zroot or "root on ZFS".
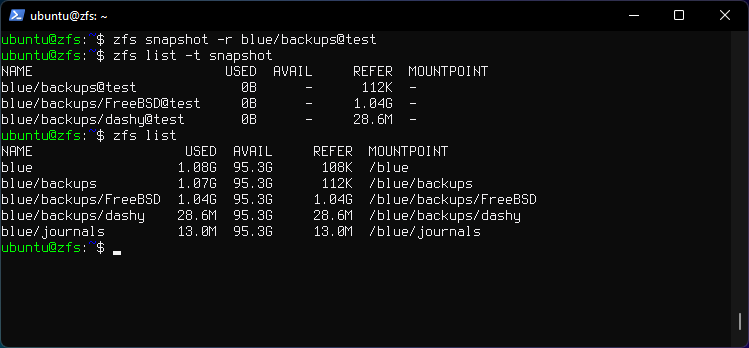
10. Snapshots
zfs snapshot -r blue/backups@test
- Creates snapshots for
blue/backupsand for all descendent file systems by using the -r option.
zfs list -t snapshot
- Lists snapshots
zfs send blue/backups@test | sudo zfs recv blue/backups/new
-
Send and receive snapshot and mount it as a new dataset at
blue/backups/new. -
A dataset is considered an independent file system, moving files across datasets is io intensive even when inside the same pool.
sudo zfs send -R zroot/usr/home@today | ssh user@irondesign.dev sudo zfs recv blue/backups/FreeBSD
-
Sends a snapshot over SSH, mounts it on backup server as a new dataset with all children datasets using option -R.
sudois needed at receiving ent to mount the dataset to fs. -
If using incremental snapshots use option -i, and include the original snapshot and all incremental subsequent snapshots. List snapshots
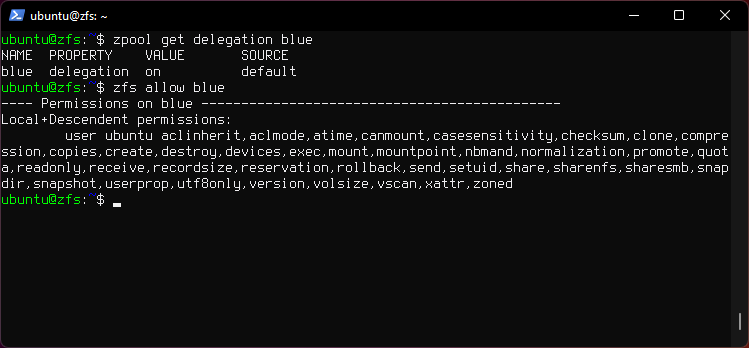
11. ZFS Delegated Permissions
zpool get delegation blue
- Checks if delegation property is on.
zfs allow blue
- Displays Permissions on pool
blue.
sudo zfs allow ubuntu create,destroy,mount,mountpoint,snapshot blue
- Sets Permissons for user ubuntu on pool
blue.
sudo zfs allow ubuntu create,destroy,mount,mountpoint,snapshot blue/ubuntu
- Sets Permissons for user ubuntu on dataset
blue/ubuntu.
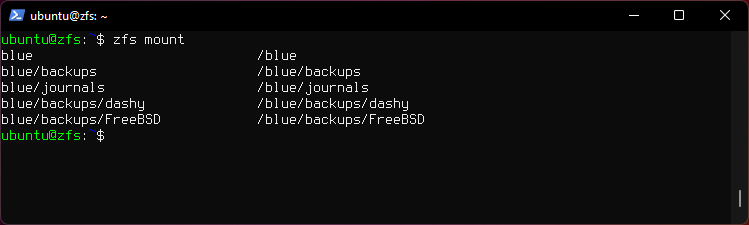
12. Other commands
zfs mount
- Shows mounted datasets with mount points.
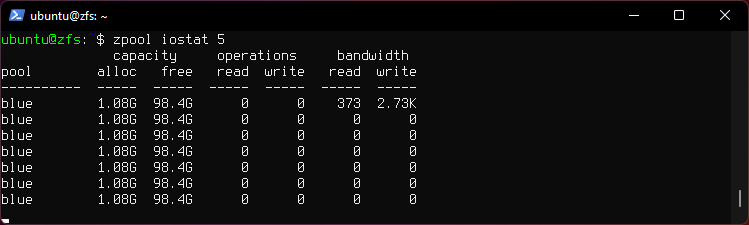
zpool iostat 5
- Displays io stats every 5 seconds. Add option
-vto include vdevs.
zfs get all
- Displays properties and features.
zfs allow blue/downloads
- Displays Permissions on dataset
blue/downloads.
Documentation
FreeBSD specific commands
geom disk list
- Lists disks.
smartctl -a /dev/da0
- Displays S.M.A.R.T. info for device
da0.
sudo diskinfo -v da0
- Displays info for disk
da0.
sudo smartctl --scan
- Scans for devices.
Testing ZFS using files
for ((i=0;i<=5;++i)); do dd if=/dev/zero of=disk_$i bs=1M count=100; done
for i in $(seq 6); do dd if=/dev/zero of=disk_$i bs=1M count=100; done
-
Creates 6 empty files for testing.
-
Files need to be larger than 64MB to be used in ZFS.
sudo zpool create purpleelephants mirror /home/ubuntu/disk_0 /home/ubuntu/disk_1 /home/ubuntu/disk_2 mirror /home/ubuntu/disk_3 /home/ubuntu/disk_4 /home/ubuntu/disk_5
- Creates a pool consisting of two mirrored vdevs with three disks each.
Root on ZFS (zroot) considerations
-
OS can be installed on a separate disk with either UFS EXT4 or ZFS (root on ZFS) fs, and have separate ZFS pools of disks for user data.
-
OS can live on a single ZFS pool along with user data on a single zroot pool consisting of however many disks plus have other ZFS pools of disks.
ZFS Snapshots
On Linux regular users have permissions to:
- Take Snapshots of their Home directory Dataset
- Destroy the Snapshots
- Rollback Snapshots
- Receive unmounted Snapshots for storing them as back up from elsewhere.
- Send Snapshots to remote locations.
Taking Snapshots
To take a snapshot of dataset rpool/USERDATA/user3853_2bv9ey enter a name after @.
zfs snapshot rpool/USERDATA/user3853_2bv9ey@SnapshotName
Destroying Snapshots
Destroy a snapshot.
zfs destroy rpool/USERDATA/user3853_2bv9ey@t353
Delete all snapshots on dataset user3853_2bv9ey, by adding % after @.
zfs destroy rpool/USERDATA/user3853_2bv9ey@%
Rolling back Snapshots
Rolling back to a Snapshot will revert the Dataset back to what it was at that time. Data currently on it will be replaced by data from the Snapshot, so if you need the current data move it elsewhere. All consequent Snapshots will be destroyed, ZFS will complain you have to use -r flag.
zfs rollback -r rpool/USERDATA/user3853_2bv9ey@t
Nomount flag
When sending and receiving Snapshot use -u flag to tell ZFS not to try to mount it. This also prevents the creation of empty directories where the dataset would have been mounted.
zfs send rpool/USERDATA/user3853_2bv9ey@today | zfs recv -u rpool/USERDATA/user3853_2bv9ey/newdataset
Send over SSH
zfs send rpool/USERDATA/user0_sosjq3@snap | ssh user3853@localhost zfs recv -u rpool/USERDATA/user3853_2bv9ey/snapnomount
Incremental Snapshot
When sending incremental Snapshots use the flag -i, and use the flag -F for receiving.
Flag -F forces rollback or Dataset, as the data has now changed.
zfs send -i rpool/USERDATA/user0_sx0jq9@inc rpool/USERDATA/user0_sx0jq9@inc4 | ssh user3853@localhost zfs recv -F rpool/USERDATA/user3853_2bv9ey/snapnomount
List Snapshots
List all Snapshots including received unmounted ones.
zfs list -t snapshot
List Datasets
Datasets will show mountpoints but will not be mounted.
zfs list
Show mounted
Shows actual mounted Datasets and mount points.
zfs mount
List a Dataset
Using the -r flag to recursively list all Datasets on user3853_2bv9ey.
zfs list -r rpool/USERDATA/user3853_2bv9ey
Send to remote
Using sudo zfs recv to mount the cloned Dataset with proper permissions.
zfs send rpool/USERDATA/user3853_2bv9ey/snapreceive@nomount | ssh user@irondesign.dev sudo zfs recv zroot/usr/home/extra/received
Send Snapshot, don't mount, and change the name of Snapshot at receiving Machine to @new.
zfs send rpool/USERDATA/user3853_2bv9ey/snapreceive@nomount | ssh user23@irondesign.dev sudo zfs recv -u zroot/usr/home/extra/unmouted@new
Documentation
illumos ZFS Administration Guide
Misc.
-
Users have permissions to receive Snapshots, but Snapshots will not be mounted.
-
Users don't have permission to mount.
-
Users do not have permission to promote Snapshots to Clones as that would require permissions to mount Datasets.
-
There is no limit to how many Snapshots you can take but they do take up space, so they are limited by Quota.
root on ZFS
Installing root on ZFS using Ubuntu 20.04 LTS.

These instructions follows the manual from openzfs-docs. Some steps are skipped. Do use and read the manual, it has detailed explanation, these notes are just supplementary notes to speed things up for this particular setup, although complete.
Adjusted for:
-
a two disk
mirrorsetup. -
no swap
-
no encryption
-
legacy (BIOS) boot
-
Assumes new unused clean disks, otherwise if reusing clean the disks. See manual.
-
See manual if setting up SWAP, Encryption or EFI boot.
Hyper-V setup
-
Create two disks and attach them.
-
2 CPU speeds up
initramfscompile/install time. -
2048 RAM for Desktop Environment.
Install
Boot to Ubuntu live CD and select try Ubuntu.
Step 1: Prepare The Install Environment
Update and install vim.
sudo apt update
sudo apt install --yes openssh-server vim
Set a password for user ubuntu.
passwd
Display IP address.
ip a
SSH into Ubuntu.
ssh ubuntu@172.30.95.151
Disable automounting.
gsettings set org.gnome.desktop.media-handling automount false
Become root.
sudo -i
Install ZFS in the Live CD environment.
apt install --yes debootstrap gdisk zfsutils-linux
systemctl stop zed
Step 2: Disk Formatting
list the aliases.
ls -la /dev/disk/by-id
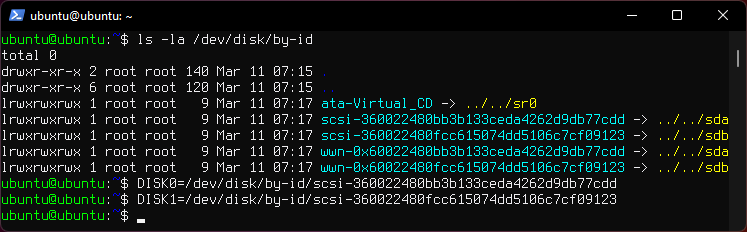
Manual says:
Always use the long
/dev/disk/by-id/*aliases with ZFS. Using the/dev/sd*device nodes directly can cause sporadic import failures, especially on systems that have more than one storage pool.
Set a variable with the disk name for each disk. You can use tab to autocomplete.
DISK0=/dev/disk/by-id/scsi-*
DISK1=/dev/disk/by-id/scsi-*
Ensure swap partitions are not in use.
swapoff --all
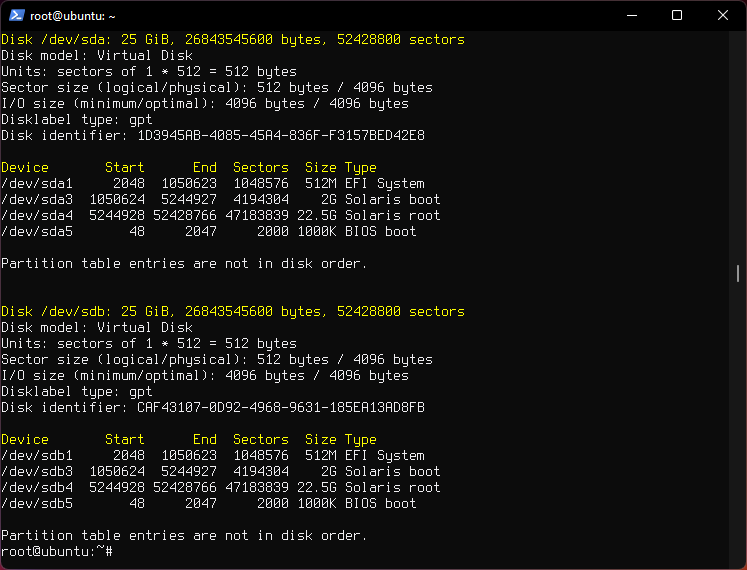
Clear the partition tables.
sgdisk --zap-all $DISK0
sgdisk --zap-all $DISK1
Create bootloader partitions.
sgdisk -n1:1M:+512M -t1:EF00 $DISK0
sgdisk -n1:1M:+512M -t1:EF00 $DISK1
Create bootloader partitions for legacy (BIOS) booting.
sgdisk -a1 -n5:24K:+1000K -t5:EF02 $DISK0
sgdisk -a1 -n5:24K:+1000K -t5:EF02 $DISK1
Create boot pool partitions.
sgdisk -n3:0:+2G -t3:BE00 $DISK0
sgdisk -n3:0:+2G -t3:BE00 $DISK1
Create root pool partitions.
sgdisk -n4:0:0 -t4:BF00 $DISK0
sgdisk -n4:0:0 -t4:BF00 $DISK1
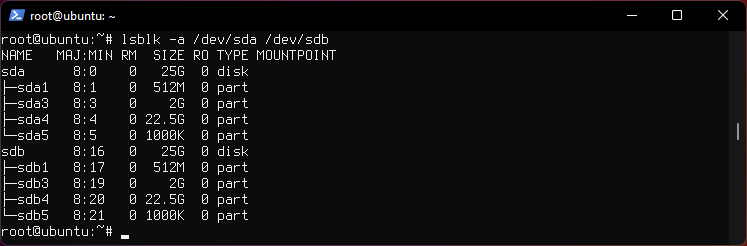
You will end up with 4 partitions on each disk.
Create the boot pool.
zpool create \
    -o cachefile=/etc/zfs/zpool.cache \
    -o ashift=12 -o autotrim=on -d \
    -o feature@async_destroy=enabled \
    -o feature@bookmarks=enabled \
    -o feature@embedded_data=enabled \
    -o feature@empty_bpobj=enabled \
    -o feature@enabled_txg=enabled \
    -o feature@extensible_dataset=enabled \
    -o feature@filesystem_limits=enabled \
    -o feature@hole_birth=enabled \
    -o feature@large_blocks=enabled \
    -o feature@lz4_compress=enabled \
    -o feature@spacemap_histogram=enabled \
    -O acltype=posixacl -O canmount=off -O compression=lz4 \
    -O devices=off -O normalization=formD -O relatime=on -O xattr=sa \
    -O mountpoint=/boot -R /mnt \
    bpool mirror \
    ${DISK0}-part3 \
    ${DISK1}-part3
Create the root pool.
zpool create \
    -o ashift=12 -o autotrim=on \
    -O acltype=posixacl -O canmount=off -O compression=lz4 \
    -O dnodesize=auto -O normalization=formD -O relatime=on \
    -O xattr=sa -O mountpoint=/ -R /mnt \
    rpool mirror \
    ${DISK0}-part4 \
    ${DISK1}-part4
Step 3: System Installation
Create filesystem datasets to act as containers.
zfs create -o canmount=off -o mountpoint=none rpool/ROOT
zfs create -o canmount=off -o mountpoint=none bpool/BOOT
Create filesystem datasets for the root and boot filesystems.
UUID=$(dd if=/dev/urandom bs=1 count=100 2>/dev/null |
    tr -dc 'a-z0-9' | cut -c-6)

zfs create -o mountpoint=/ \
    -o com.ubuntu.zsys:bootfs=yes \
    -o com.ubuntu.zsys:last-used=$(date +%s) rpool/ROOT/ubuntu_$UUID

zfs create -o mountpoint=/boot bpool/BOOT/ubuntu_$UUID
Create datasets.
zfs create -o com.ubuntu.zsys:bootfs=no \
    rpool/ROOT/ubuntu_$UUID/srv
zfs create -o com.ubuntu.zsys:bootfs=no -o canmount=off \
    rpool/ROOT/ubuntu_$UUID/usr
zfs create rpool/ROOT/ubuntu_$UUID/usr/local
zfs create -o com.ubuntu.zsys:bootfs=no -o canmount=off \
    rpool/ROOT/ubuntu_$UUID/var
zfs create rpool/ROOT/ubuntu_$UUID/var/games
zfs create rpool/ROOT/ubuntu_$UUID/var/lib
zfs create rpool/ROOT/ubuntu_$UUID/var/lib/AccountsService
zfs create rpool/ROOT/ubuntu_$UUID/var/lib/apt
zfs create rpool/ROOT/ubuntu_$UUID/var/lib/dpkg
zfs create rpool/ROOT/ubuntu_$UUID/var/lib/NetworkManager
zfs create rpool/ROOT/ubuntu_$UUID/var/log
zfs create rpool/ROOT/ubuntu_$UUID/var/mail
zfs create rpool/ROOT/ubuntu_$UUID/var/snap
zfs create rpool/ROOT/ubuntu_$UUID/var/spool
zfs create rpool/ROOT/ubuntu_$UUID/var/www

zfs create -o canmount=off -o mountpoint=/ \
    rpool/USERDATA
zfs create -o com.ubuntu.zsys:bootfs-datasets=rpool/ROOT/ubuntu_$UUID \
    -o canmount=on -o mountpoint=/root \
    rpool/USERDATA/root_$UUID
chmod 700 /mnt/root
For a mirror or raidz topology, create a dataset for /boot/grub.
zfs create -o com.ubuntu.zsys:bootfs=no bpool/grub
Mount a tmpfs at /run.
mkdir /mnt/run
mount -t tmpfs tmpfs /mnt/run
mkdir /mnt/run/lock
Create a separate dataset for /tmp.
zfs create -o com.ubuntu.zsys:bootfs=no \
    rpool/ROOT/ubuntu_$UUID/tmp
chmod 1777 /mnt/tmp
Install the minimal system.
debootstrap focal /mnt
Copy in zpool.cache.
mkdir /mnt/etc/zfs
cp /etc/zfs/zpool.cache /mnt/etc/zfs/
Step 4: System Configuration
Configure the hostname.
Replace HOSTNAME with the desired hostname.
hostname HOSTNAME
hostname > /mnt/etc/hostname
nano /mnt/etc/hosts
Add a line:
127.0.1.1       HOSTNAME
or if the system has a real name in DNS:
127.0.1.1       FQDN HOSTNAME
Configure the network interface.
Find the interface name.
ip a
Adjust NAME below to match your interface name
nano /mnt/etc/netplan/01-netcfg.yaml
network:
  version: 2
  ethernets:
    NAME:
      dhcp4: true
Configure the package sources.
nano /mnt/etc/apt/sources.list
deb http://archive.ubuntu.com/ubuntu focal main restricted universe multiverse
deb http://archive.ubuntu.com/ubuntu focal-updates main restricted universe multiverse
deb http://archive.ubuntu.com/ubuntu focal-backports main restricted universe multiverse
deb http://security.ubuntu.com/ubuntu focal-security main restricted universe multiverse
Bind the virtual filesystems from the LiveCD environment to the new system and chroot into it.
mount --make-private --rbind /dev  /mnt/dev
mount --make-private --rbind /proc /mnt/proc
mount --make-private --rbind /sys  /mnt/sys
chroot /mnt /usr/bin/env DISK0=$DISK0 DISK1=$DISK1 UUID=$UUID bash --login
Configure a basic system environment.
apt update
Always ensure that en_US.UTF-8 is available.
dpkg-reconfigure locales tzdata keyboard-configuration console-setup
Install your preferred text editor.
apt install --yes nano vim
Create the EFI filesystem.
apt install --yes dosfstools
mkdosfs -F 32 -s 1 -n EFI ${DISK0}-part1
mkdosfs -F 32 -s 1 -n EFI ${DISK1}-part1
mkdir /boot/efi
echo /dev/disk/by-uuid/$(blkid -s UUID -o value ${DISK0}-part1) \
    /boot/efi vfat defaults 0 0 >> /etc/fstab
mount /boot/efi
Only DISK0 for now.
Install GRUB/Linux/ZFS for legacy (BIOS) booting.
apt install --yes grub-pc linux-image-generic zfs-initramfs zsys
Set a root password.
passwd
Setup system groups.
addgroup --system lpadmin
addgroup --system lxd
addgroup --system sambashare
Patch a dependency loop.
apt install --yes curl patch
Ignore error:
ERROR couldn't connect to zsys daemon: connection error: desc = "transport: Error while dialing dial unix /run/zsysd.sock: connect: no such file or directory"
curl https://launchpadlibrarian.net/478315221/2150-fix-systemd-dependency-loops.patch | \
    sed "s|/etc|/lib|;s|\.in$||" | (cd / ; patch -p1)
Ignore the failure in Hunk #2 (say n twice).
Install SSH.
apt install --yes openssh-server
nano /etc/ssh/sshd_config
# Set: PermitRootLogin yes
Step 5: GRUB Installation
Verify that the ZFS boot filesystem is recognized.
grub-probe /boot
Refresh the initrd files
update-initramfs -c -k all
Disable memory zeroing.
nano /etc/default/grub
# Add init_on_alloc=0 to: GRUB_CMDLINE_LINUX_DEFAULT
# Save and quit (or see the next step).
Optional (but highly recommended): Make debugging GRUB easier.
nano /etc/default/grub
# Comment out: GRUB_TIMEOUT_STYLE=hidden
# Set: GRUB_TIMEOUT=5
# Below GRUB_TIMEOUT, add: GRUB_RECORDFAIL_TIMEOUT=5
# Remove quiet and splash from: GRUB_CMDLINE_LINUX_DEFAULT
# Uncomment: GRUB_TERMINAL=console
# Save and quit.
Later, once the system has rebooted twice and you are sure everything is working, you can undo these changes, if desired.
Update the boot configuration.
update-grub
Note: Ignore errors from osprober
Install GRUB to the MBR.
grub-install $DISK0
grub-install $DISK1
Disable grub-initrd-fallback.service.
systemctl mask grub-initrd-fallback.service
Fix filesystem mount ordering.
mkdir /etc/zfs/zfs-list.cache
touch /etc/zfs/zfs-list.cache/bpool
touch /etc/zfs/zfs-list.cache/rpool
ln -s /usr/lib/zfs-linux/zed.d/history_event-zfs-list-cacher.sh /etc/zfs/zed.d
zed -F &
Enter
Verify that zed updated the cache by making sure these are not empty.
cat /etc/zfs/zfs-list.cache/bpool
cat /etc/zfs/zfs-list.cache/rpool
If either is empty, force a cache update and check again.
zfs set canmount=on bpool/BOOT/ubuntu_$UUID
zfs set canmount=on rpool/ROOT/ubuntu_$UUID
If they are still empty, stop zed (as below), start zed (as above) and try again
Once the files have data, stop zed.
fg
Press Ctrl-C.
Fix the paths to eliminate /mnt.
sed -Ei "s|/mnt/?|/|" /etc/zfs/zfs-list.cache/*
Exit from the chroot environment back to the LiveCD environment.
exit
Run these commands in the LiveCD environment to unmount all filesystems.
mount | grep -v zfs | tac | awk '/\/mnt/ {print $3}' | \
    xargs -i{} umount -lf {}
zpool export -a
Reboot.
reboot
On the first reboot the root pool pool has to be imported manually during initramfs because it wasn't exported during install.
zpool import -f rpool Then exit initramfs by typing exit.
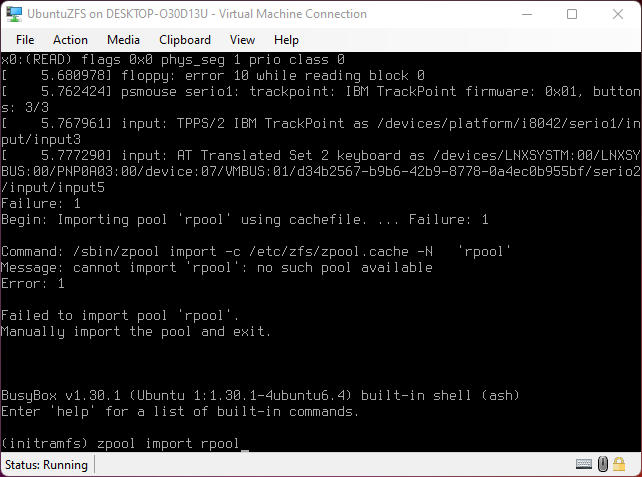
If the pool doesn't get imported properly either at first reboot, or at each reboot if the wrong password is entered to decrypt the pool the Kernel will panic, then shut off the VM or Machine and power back on and enter the correct password.

Step 6: First Boot.
Create a user account.
username=YOUR_USERNAME
UUID=$(dd if=/dev/urandom bs=1 count=100 2>/dev/null |
    tr -dc 'a-z0-9' | cut -c-6)
ROOT_DS=$(zfs list -o name | awk '/ROOT\/ubuntu_/{print $1;exit}')
zfs create -o com.ubuntu.zsys:bootfs-datasets=$ROOT_DS \
    -o canmount=on -o mountpoint=/home/$username \
    rpool/USERDATA/${username}_$UUID
adduser $username
cp -a /etc/skel/. /home/$username
chown -R $username:$username /home/$username
usermod -a -G adm,cdrom,dip,lpadmin,lxd,plugdev,sambashare,sudo $username
Step 7: Full Software Installation.
apt dist-upgrade --yes
Install a command-line environment only.
apt install --yes ubuntu-standard
Hyper-V
Create Virtual Switch and NAT in PowerShell
Create an internal virtual switch named "NAT_Switch" that can talk to external network, a private switch can not.
New-VMSwitch -SwitchName "NAT_Switch" -SwitchType Internal
Get switch ifIndex, in this case 29.
Get-NetAdapter
Add 10.0.0.1 as the gateway IP of the switch.
New-NetIPAddress -IPAddress 10.0.0.1 -PrefixLength 24 -InterfaceIndex 29
Enable NAT
New-NetNat -Name NAT_for_VMs -InternalIPInterfaceAddressPrefix 10.0.0.0/24
Removing NAT
Get-NetNat
Remove-NetNAT -Name NAT_Switch
Links:
https://rdr-it.com/en/hyper-v-create-a-nat-switch/
https://4sysops.com/archives/native-nat-in-windows-10-hyper-v-using-a-nat-virtual-switch/
XCP-ng
ZFS Storage on XCP-ng
Install ZFS
yum install zfs
Load Kernel Modules
depmod -a
modprobe zfs
Create zpool
zpool create -o ashift=12 blue mirror /dev/sda /dev/sdb
Create Dataset
zfs create blue/zlocal
List Host uuid
xe host-list
Or set the variable
HOST_UUID=$(xe host-list | grep uuid | awk '{print $5}')
Create SR
xe sr-create \
host-uuid=$HOST_UUID \
name-label="Local ZFS" \
type=zfs \
device-config:location=/blue/zlocal
Docs
pfSense

bhyve

Docker
Docs

Compile DWM on FreeBSD 13.0
Summary of instructions from this complete Guide
Change X11INC and X11LIB paths in each & every config.mk file to FreeBSD-adjusted form adding 'local':
X11INC=/usr/local/include
X11LIB=/usr/local/lib
Git clone software
$ mkdir ~/git
$ cd git
$ git clone git://git.suckless.org/dmenu
$ git clone git://git.suckless.org/slstatus
$ git clone git://git.suckless.org/st
$ git clone git://git.suckless.org/dwm
$ git clone git://git.suckless.org/sent
$ git clone git://git.suckless.org/surf
Supplementing notes:
Laptop: >HP EliteBook 840 G2 >Intel graphics
Add user "iron" to 'video' group
sudo pw group mod video -m iron
Enable Linux compatibility kernel modules at boot time,
add this line to /etc/rc.conf file.
linux_enable="YES"
Or to load modules right away run:
kldload linux64
kldload linux
Install packages
pkg install git xorg-server xorg-fonts-truetype gcr devel/glib20 xorg-fonts-type1 p5-X11-Xlib p5-PkgConfig xauth xrandr xinit libXft xrdb webkit2-gtk3 feh xf86-input-mouse xf86-input-keyboard linux-c7-libpng pkgconf ncurses xf86-input-libinput terminus-font drm-kmod xterm
Edit /etc/rc.conf file to contain:
kld_list=”i915kms”
Create .xinitrc and .Xresources files in $HOME dir
In home directory run:
ee .xinitrc
and paste the following:
xrdb -load $HOME/.Xresources
feh --bg-fill ~/.wallpaper&
slstatus&
exec dwm
Run:
ee .Xresources
! Use a nice truetype font and size by default...
xterm*faceName: xos4 Terminus
xterm*faceSize: 12

! Every shell is a login shell by default (for inclusion of all necessary environment v
xterm*loginshell: true

! I like a LOT of scrollback...
xterm*savelines: 16384

! double-click to select whole URLs 😀
xterm*charClass: 33:48,36-47:48,58-59:48,61:48,63-64:48,95:48,126:48

! DOS-box colours...
xterm*foreground: rgb:a8/a8/a8
xterm*background: rgb:00/00/00
xterm*color0: rgb:00/00/00
xterm*color1: rgb:a8/00/00
xterm*color2: rgb:00/a8/00
xterm*color3: rgb:a8/54/00
xterm*color4: rgb:00/00/a8
xterm*color5: rgb:a8/00/a8
xterm*color6: rgb:00/a8/a8
xterm*color7: rgb:a8/a8/a8
xterm*color8: rgb:54/54/54
xterm*color9: rgb:fc/54/54
xterm*color10: rgb:54/fc/54
xterm*color11: rgb:fc/fc/54
xterm*color12: rgb:54/54/fc
xterm*color13: rgb:fc/54/fc
xterm*color14: rgb:54/fc/fc
xterm*color15: rgb:fc/fc/fc

! right hand side scrollbar...
xterm*rightScrollBar: true
xterm*ScrollBar: true

! stop output to terminal from jumping down to bottom of scroll again
xterm*scrollTtyOutput: false

!To copy between xterm and other programs/documents/…
!SHIFT+INSERT = PASTE
!SHIFT+PRINTSCREEN = COPY
XTerm*selectToClipboard: true
Notes:
Ctrl-Alt-F2 to switch console to tty1
Alt-F9 go back to X
https://www.freshports.org/graphics/intel-backlight
misc
sudo pw group mod video -m user23
For Linux® compatibility to be enabled at boot time, add this line to /etc/rc.conf:
linux_enable="YES"
or at runtime
kldload linux64
kldload linux
pkg install git xorg-server xorg-fonts-truetype gcr devel/glib20 xorg-fonts-type1 p5-X11-Xlib p5-PkgConfig xauth xrandr xinit libXft xrdb webkit2-gtk3 feh xf86-input-mouse xf86-input-keyboard linux-c7-libpng pkgconf ncurses xf86-input-libinput terminus-font

Termux
Add to PATH
Edit .bash_profile file.
Append the PATH to PATH=$PATH:$HOME/.local/bin:$HOME/bin,.
End result will be PATH=$PATH:$HOME/.local/bin:$HOME/bin:/home/ec2-user/pear/bin
PATH="$PATH:/data/data/com.termux/files/home/.cargo/bin"
PATH=$PATH:~/opt/bin
or
PATH=~/opt/bin:$PATH
depending on whether you want to add ~/opt/bin at the end (to be searched after all other directories, in case there is a program by the same name in multiple directories) or at the beginning (to be searched before all other directories).
You can add multiple entries at the same time. PATH=$PATH:~/opt/bin:~/opt/node/bin or variations on the ordering work just fine. Don't put export at the beginning of the line as it has additional complications (see below under “Notes on shells other than bash”).
If your PATH gets built by many different components, you might end up with duplicate entries.

Using Duplicati to backup data
Duplicati has a GUI which makes setting up easy.
Install
Download Duplicati.
Configure a new backup
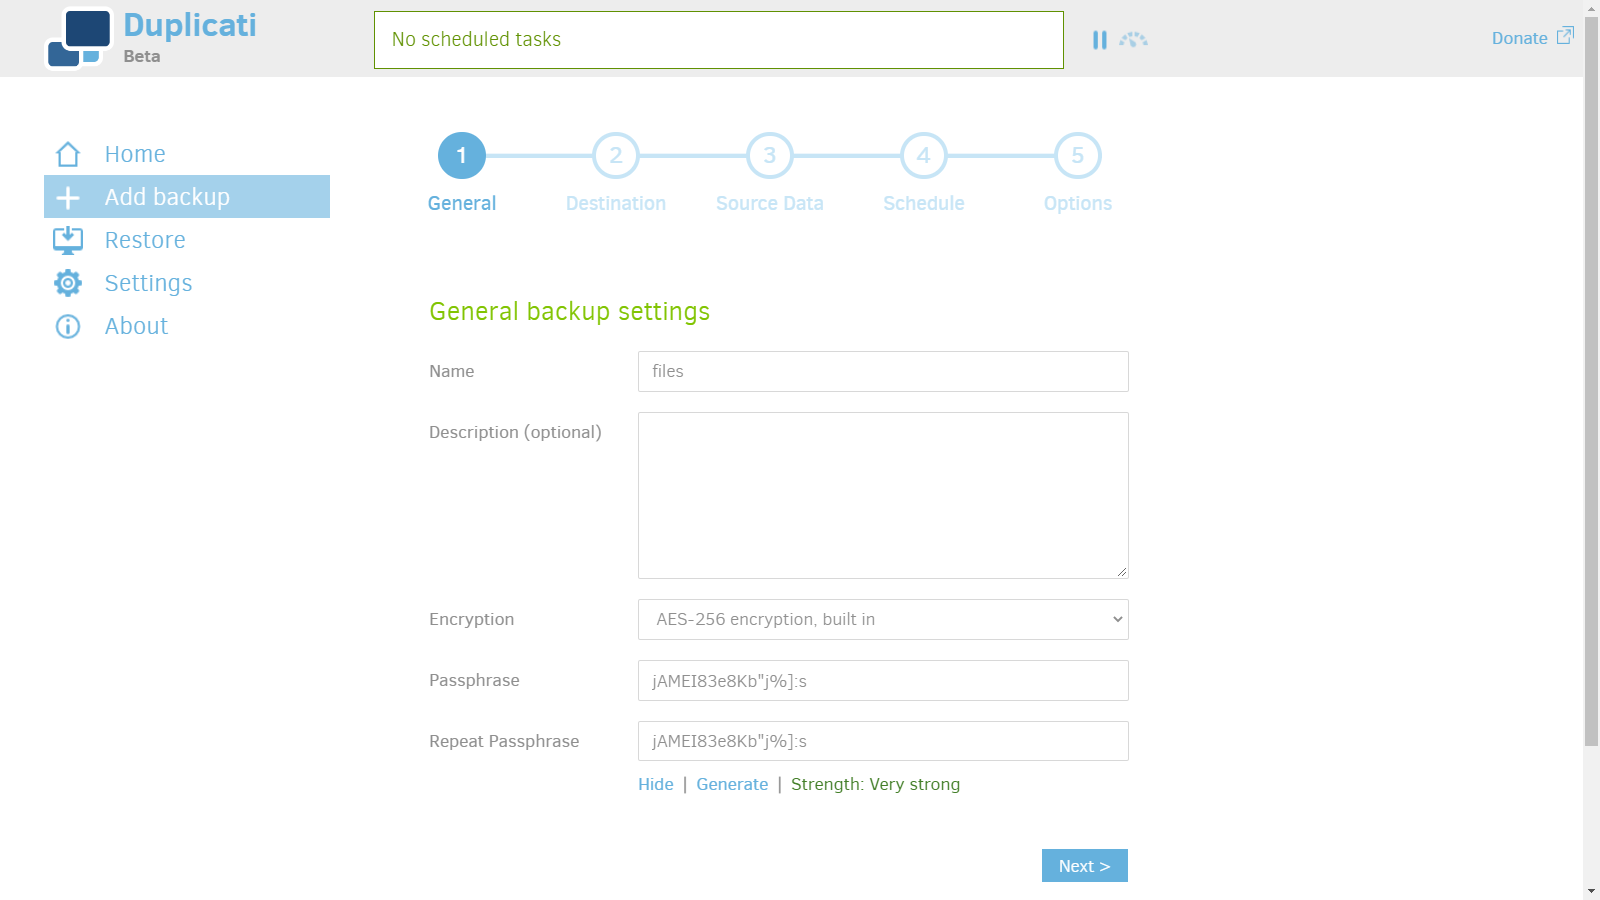
1. Add new backup.
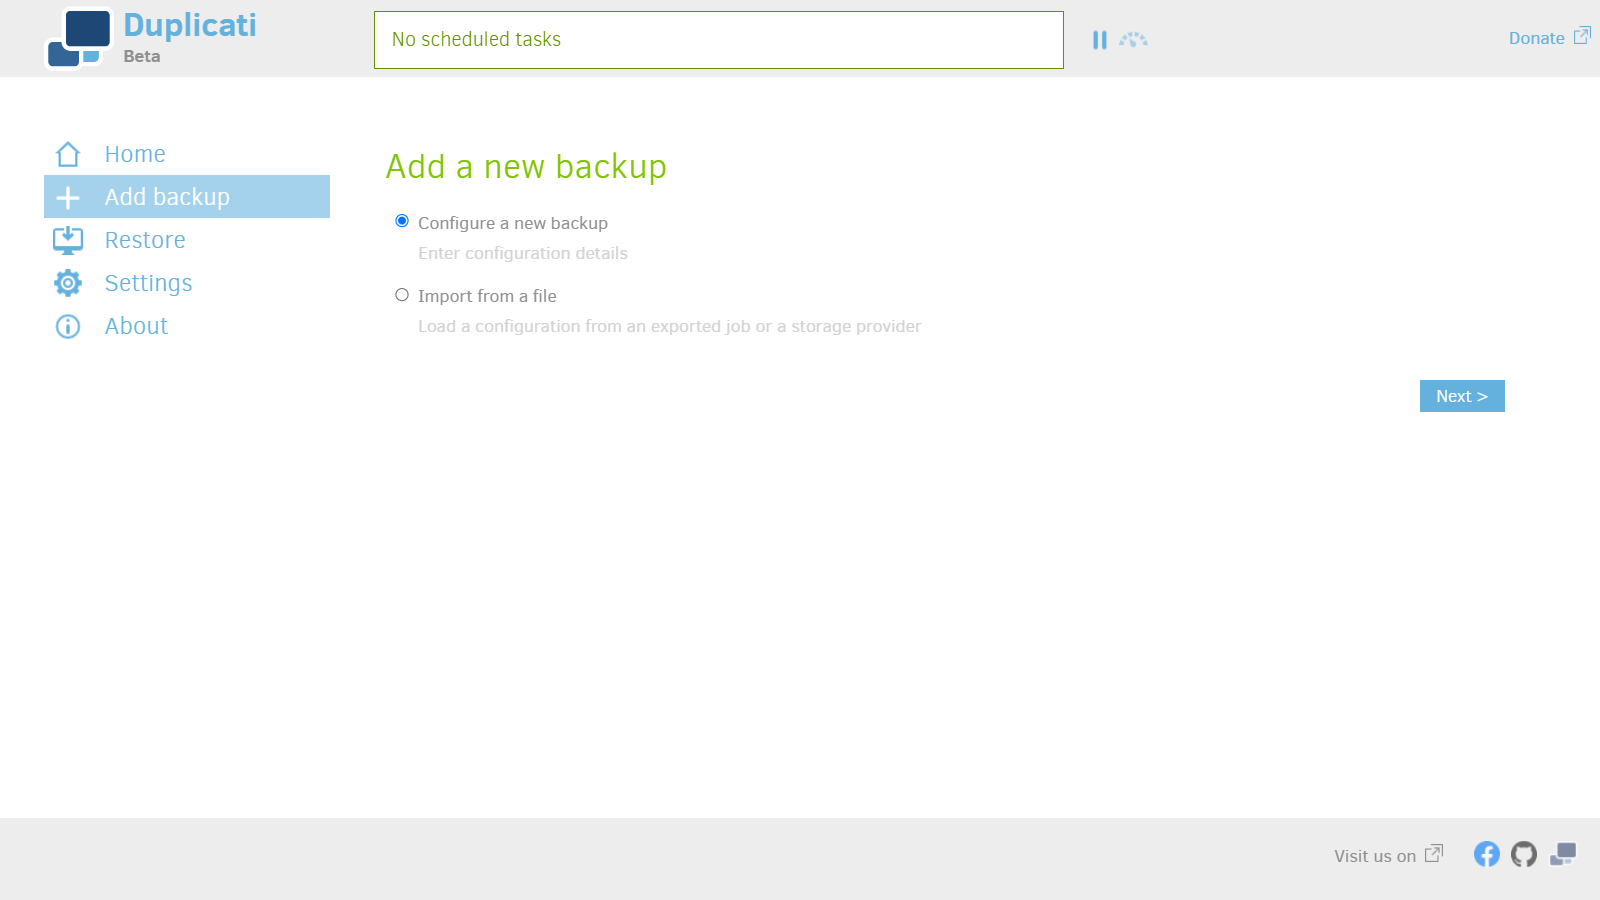
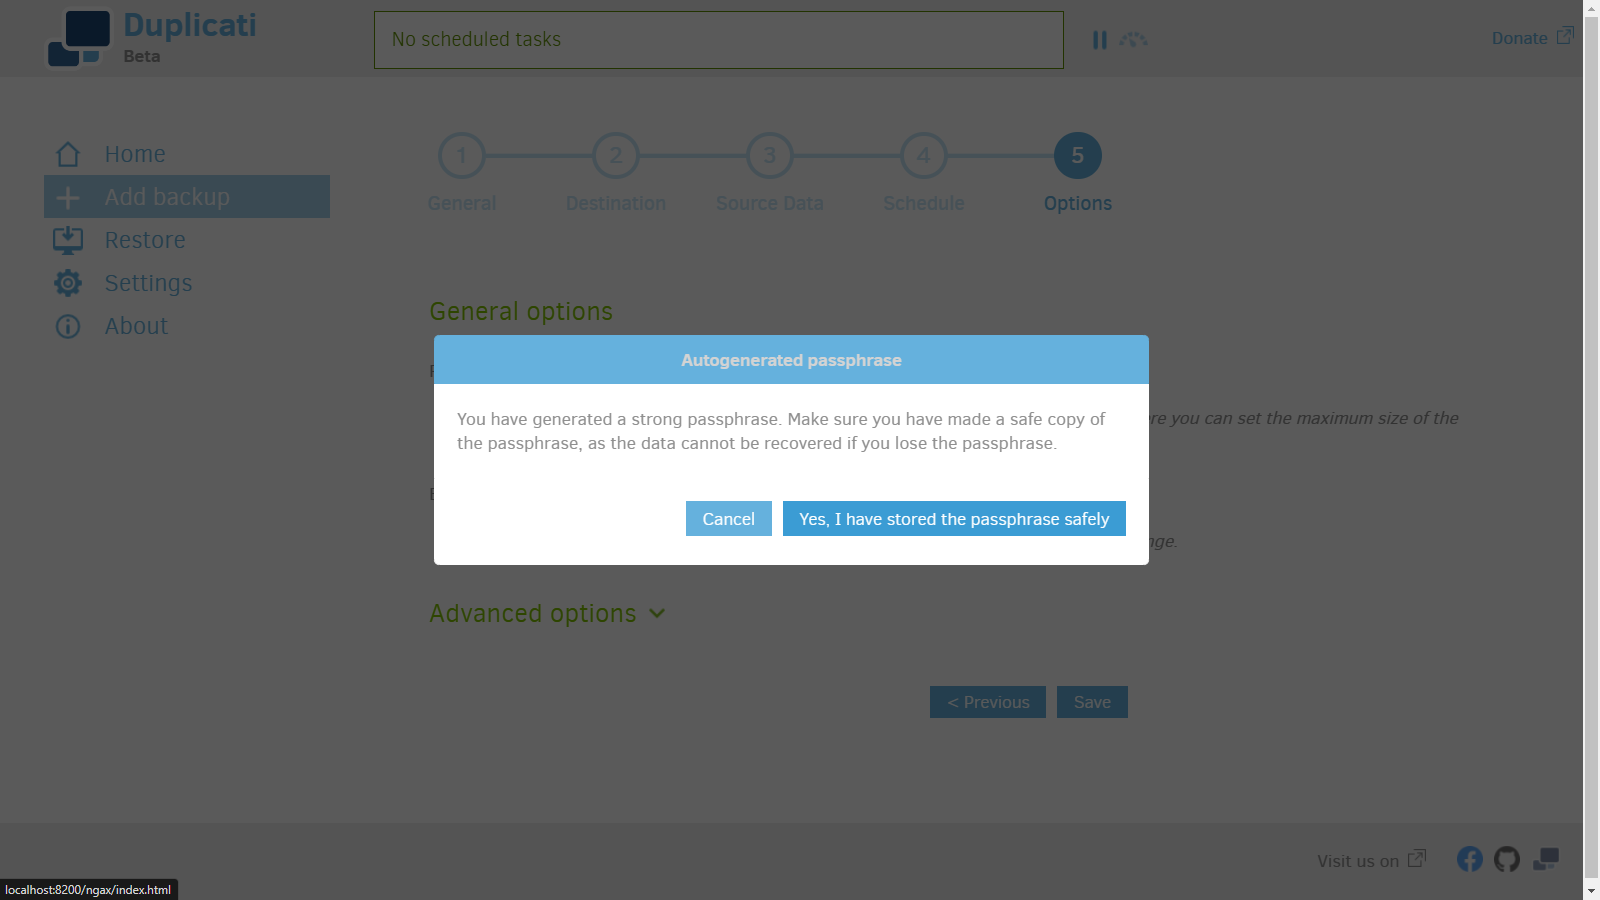
2. Choose password.
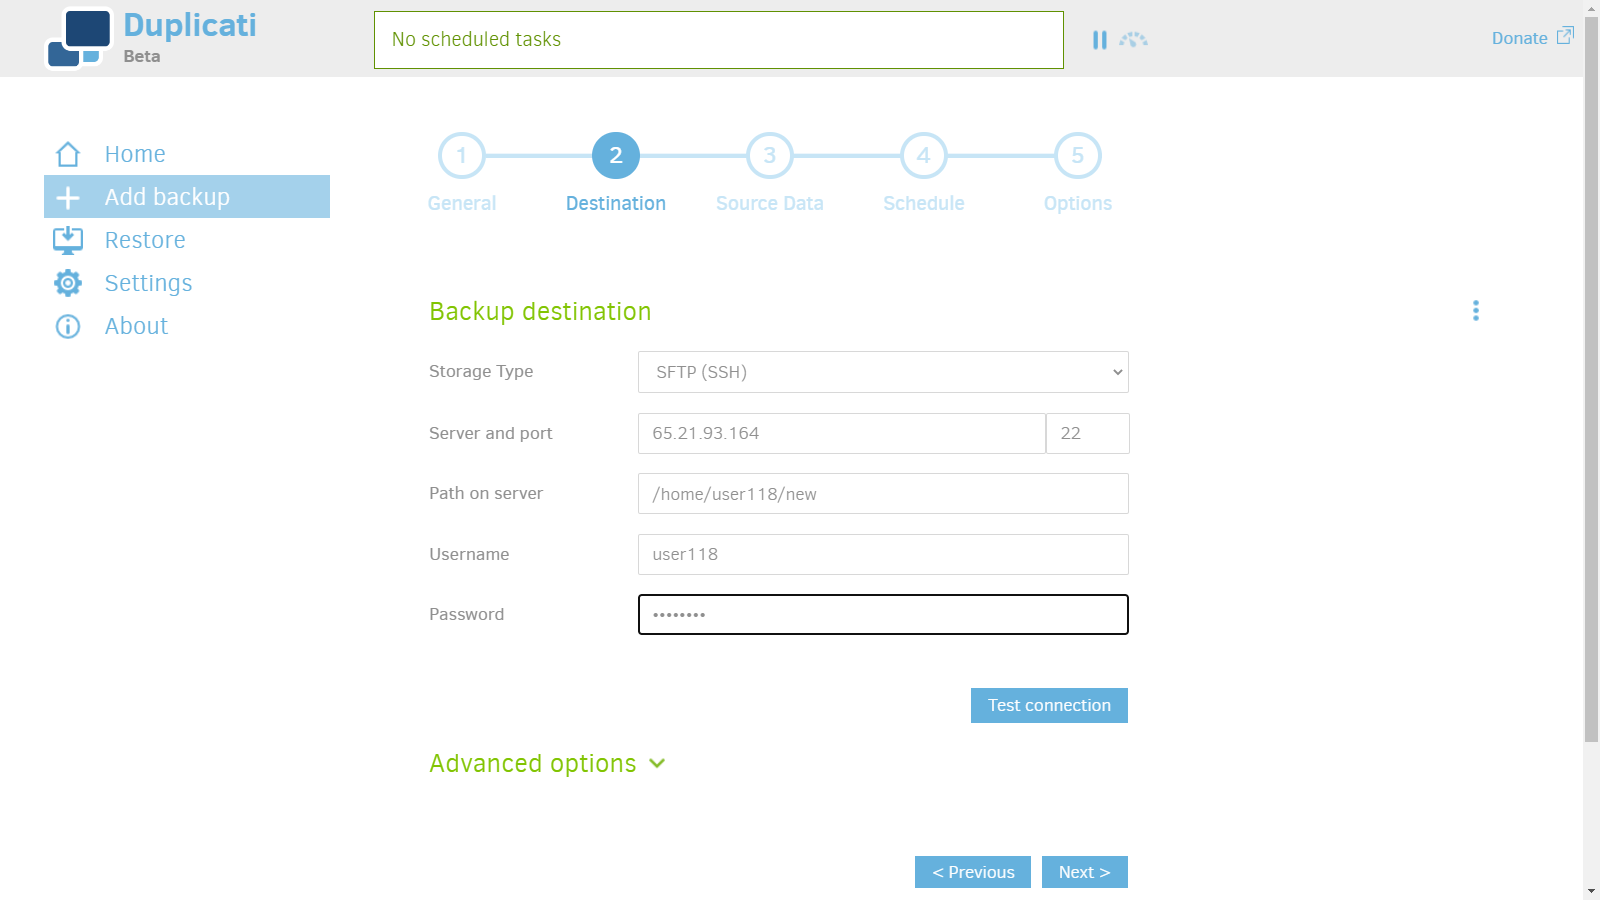
3. Enter server info.
- SFTP as storage type.
- Server FQDN or IP address and Port 22.
- Enter home directory as path on Server.
/home/{user}/ - User and password.
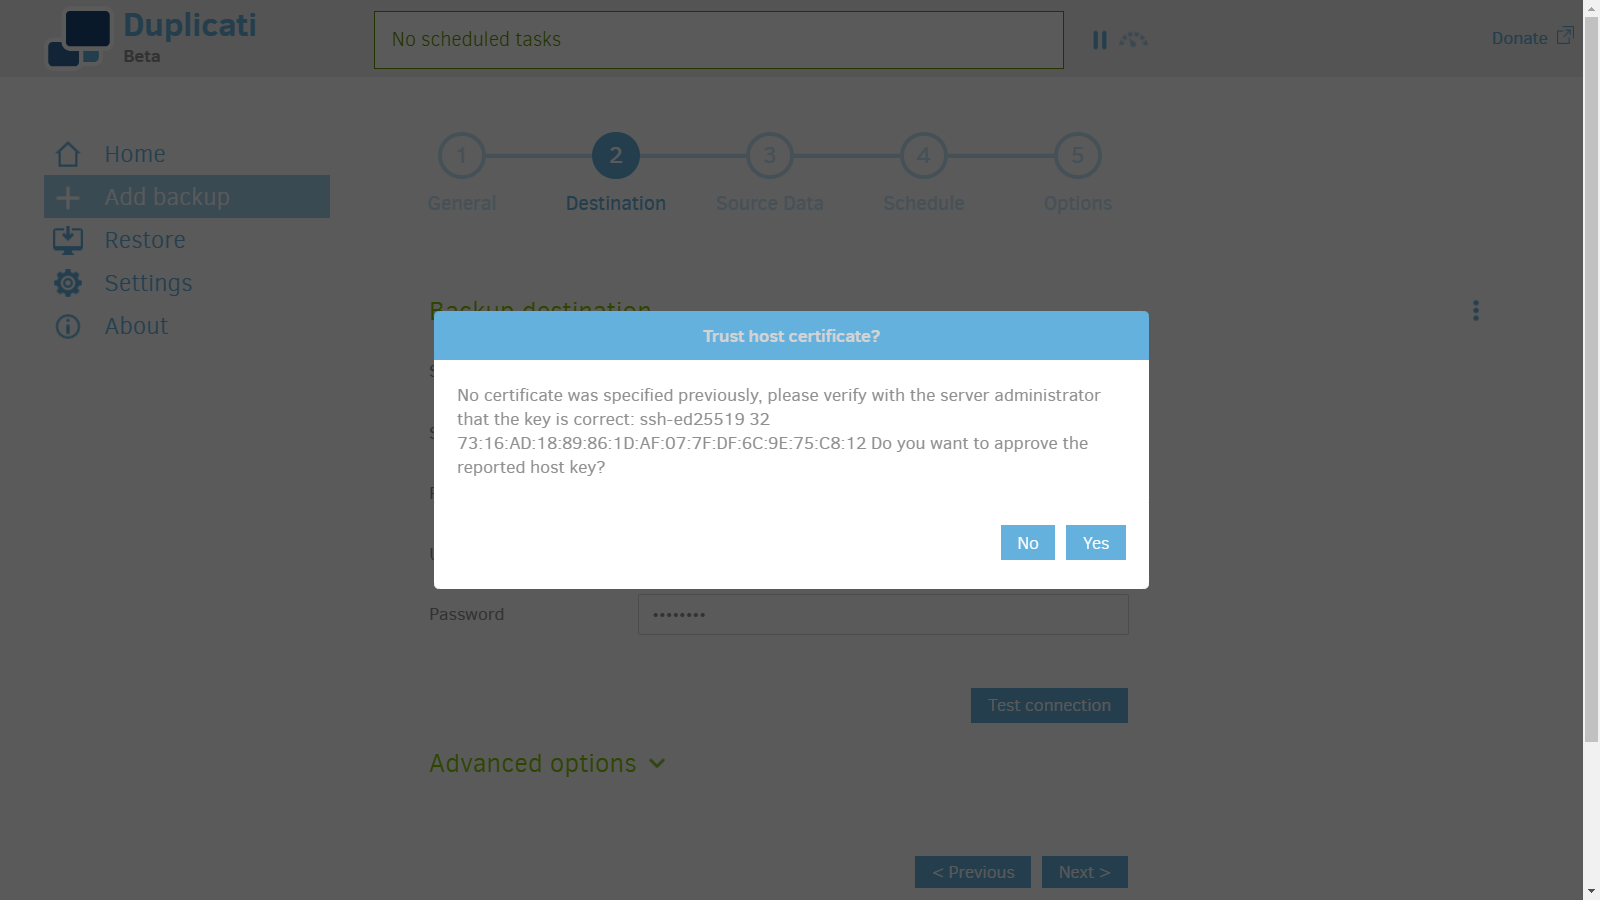
4. Hit yes to trust the host key.
5. Click Yes to create a new folder.
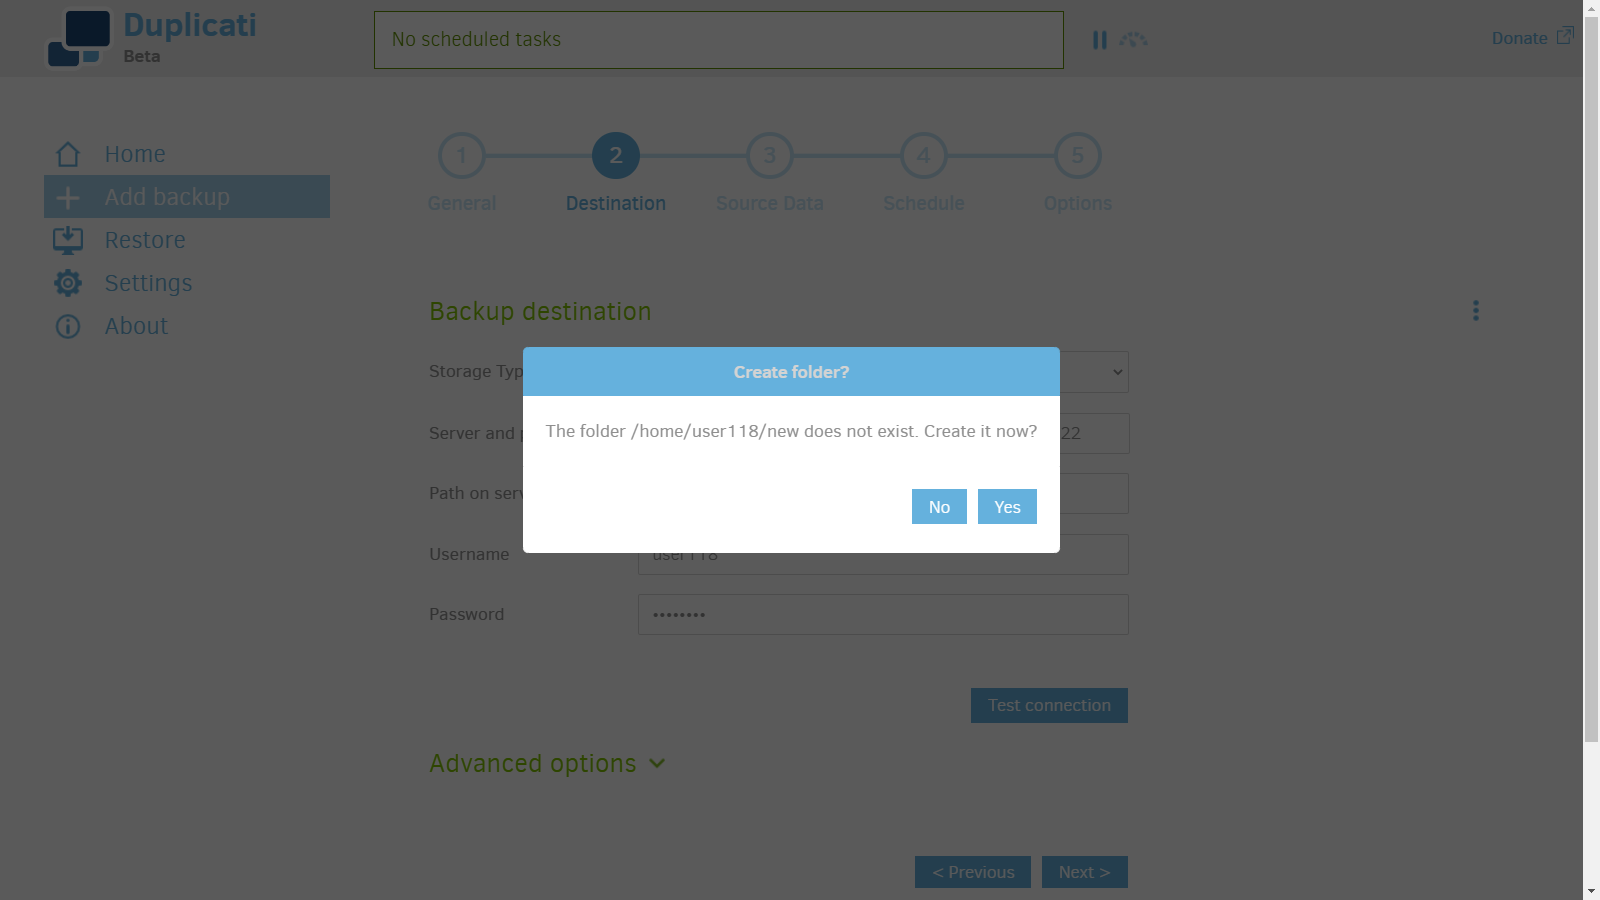
6. Add data source.
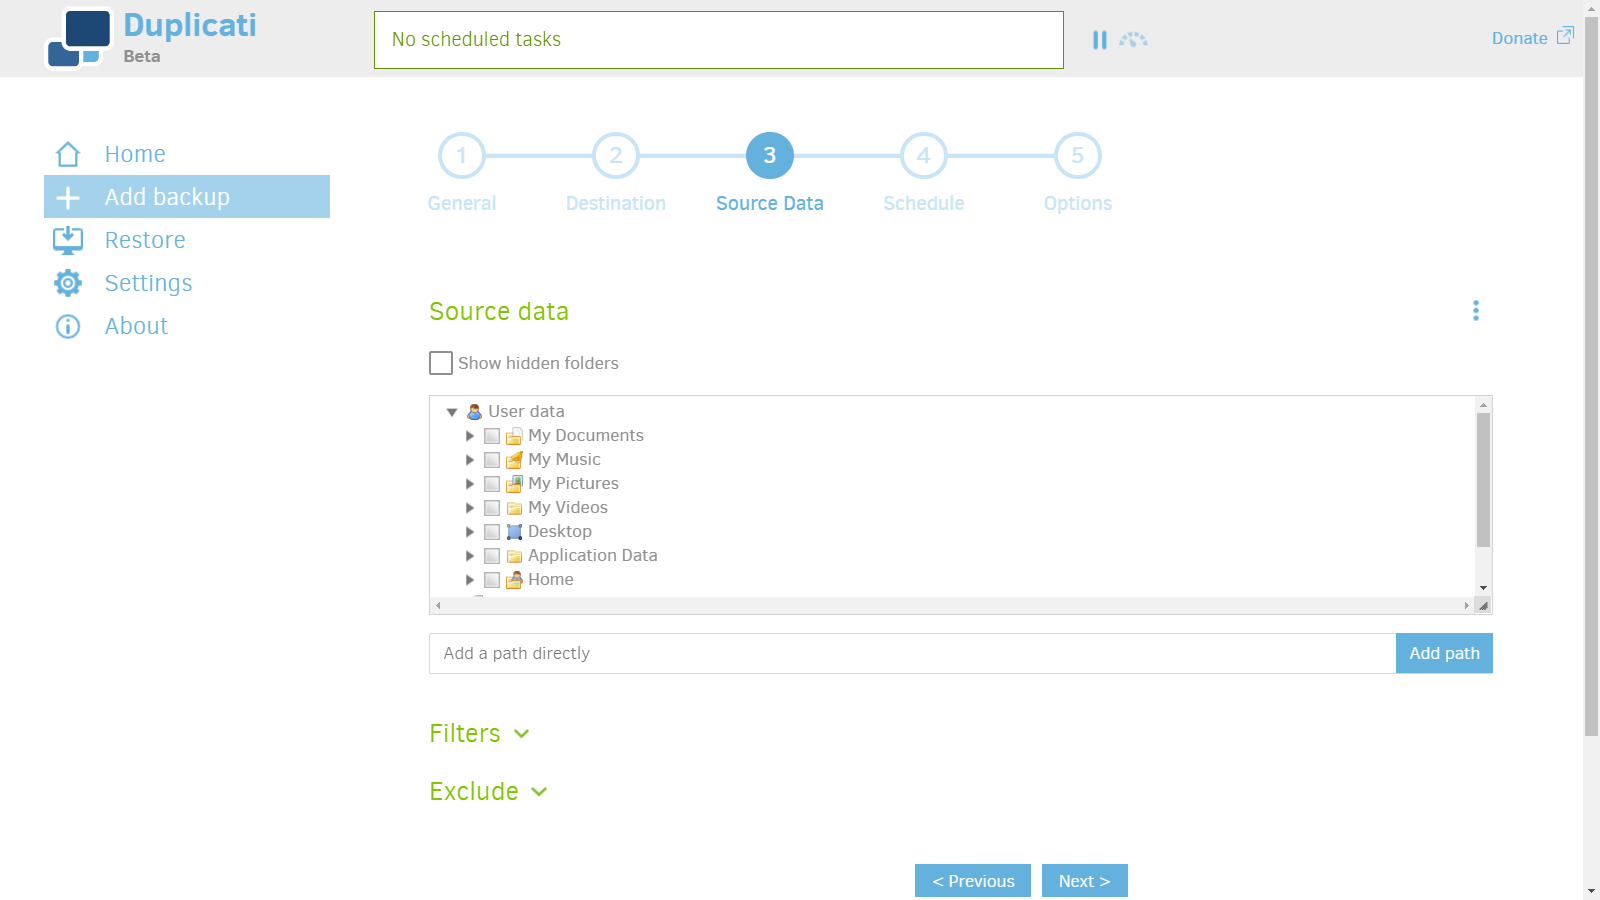
7. Schedule backups.
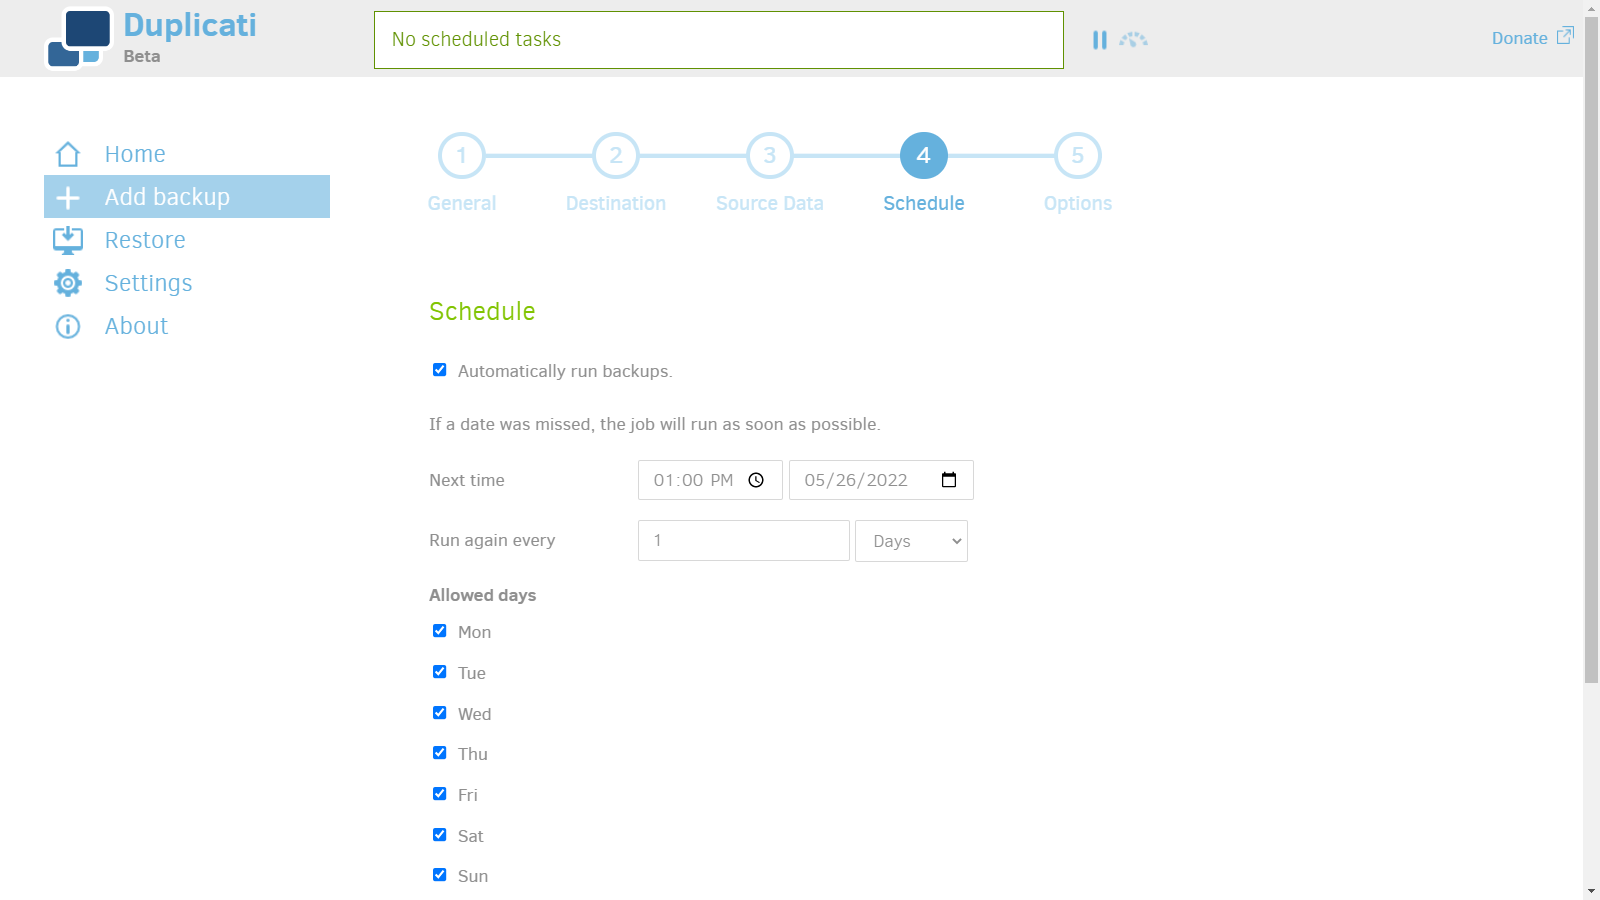
8. Save settings.
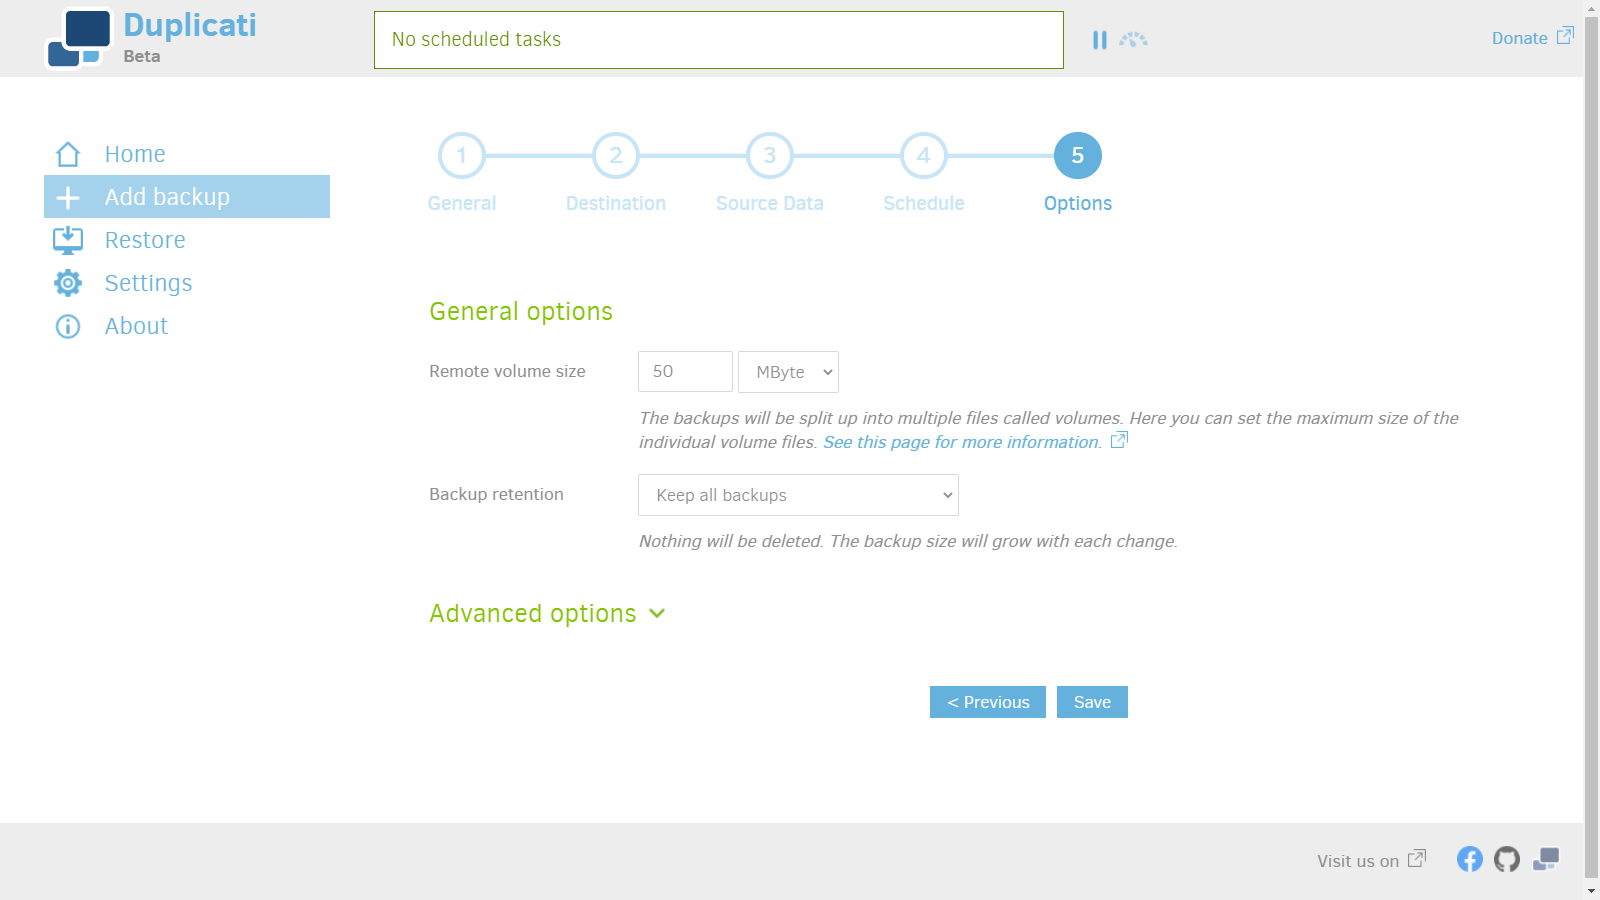
9. Save the Password.
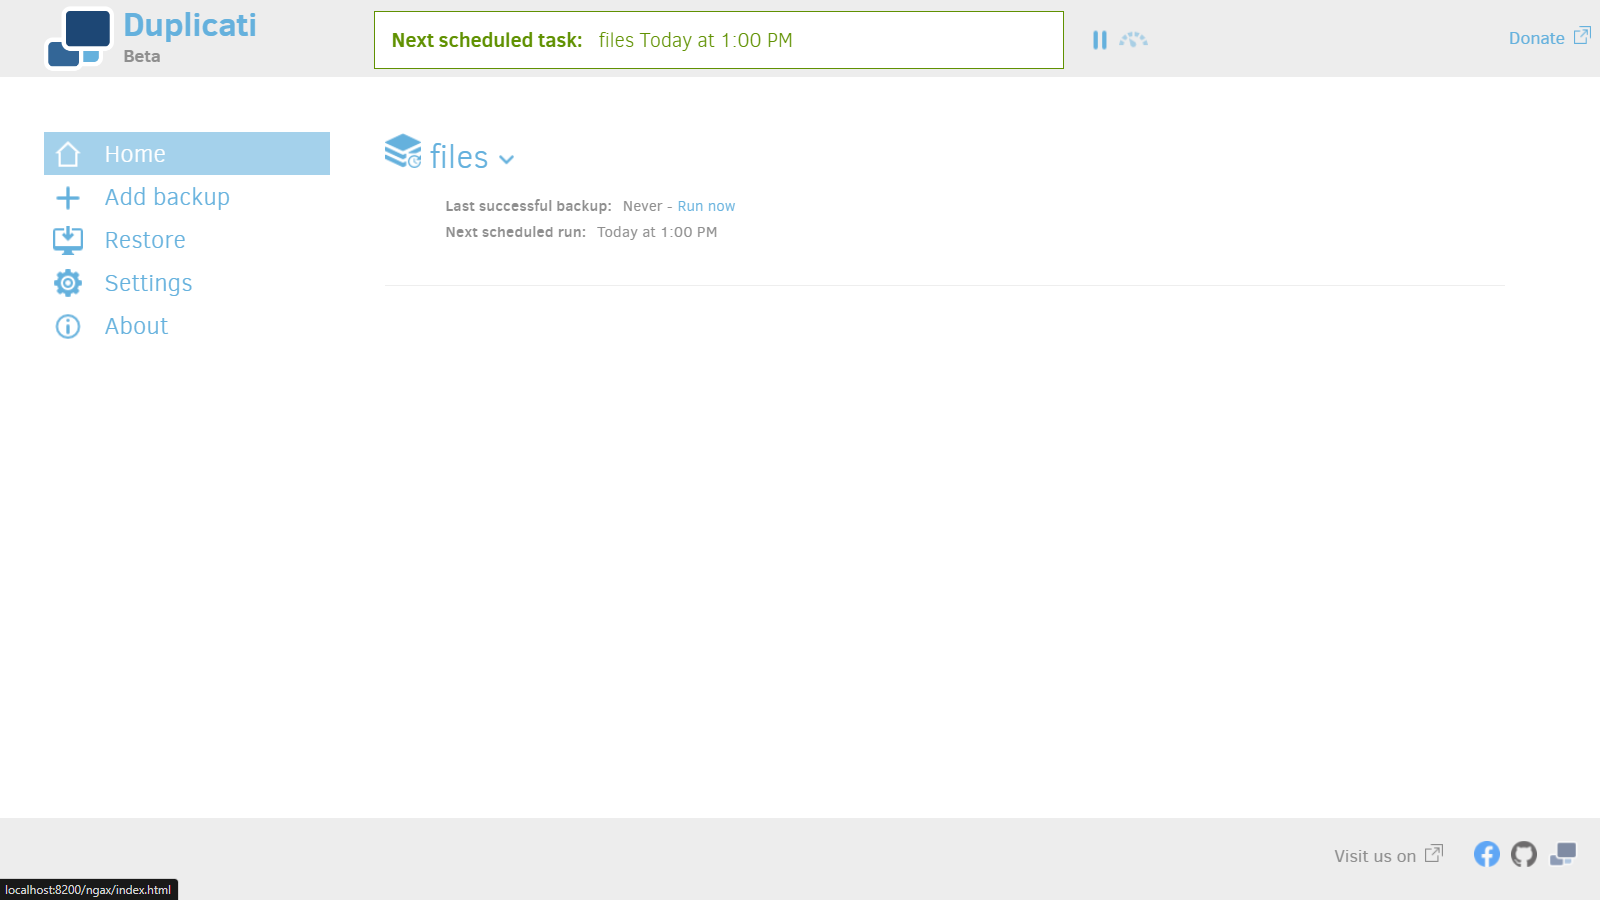
10. You can click run now to run the backup immediately ahead of schedule.
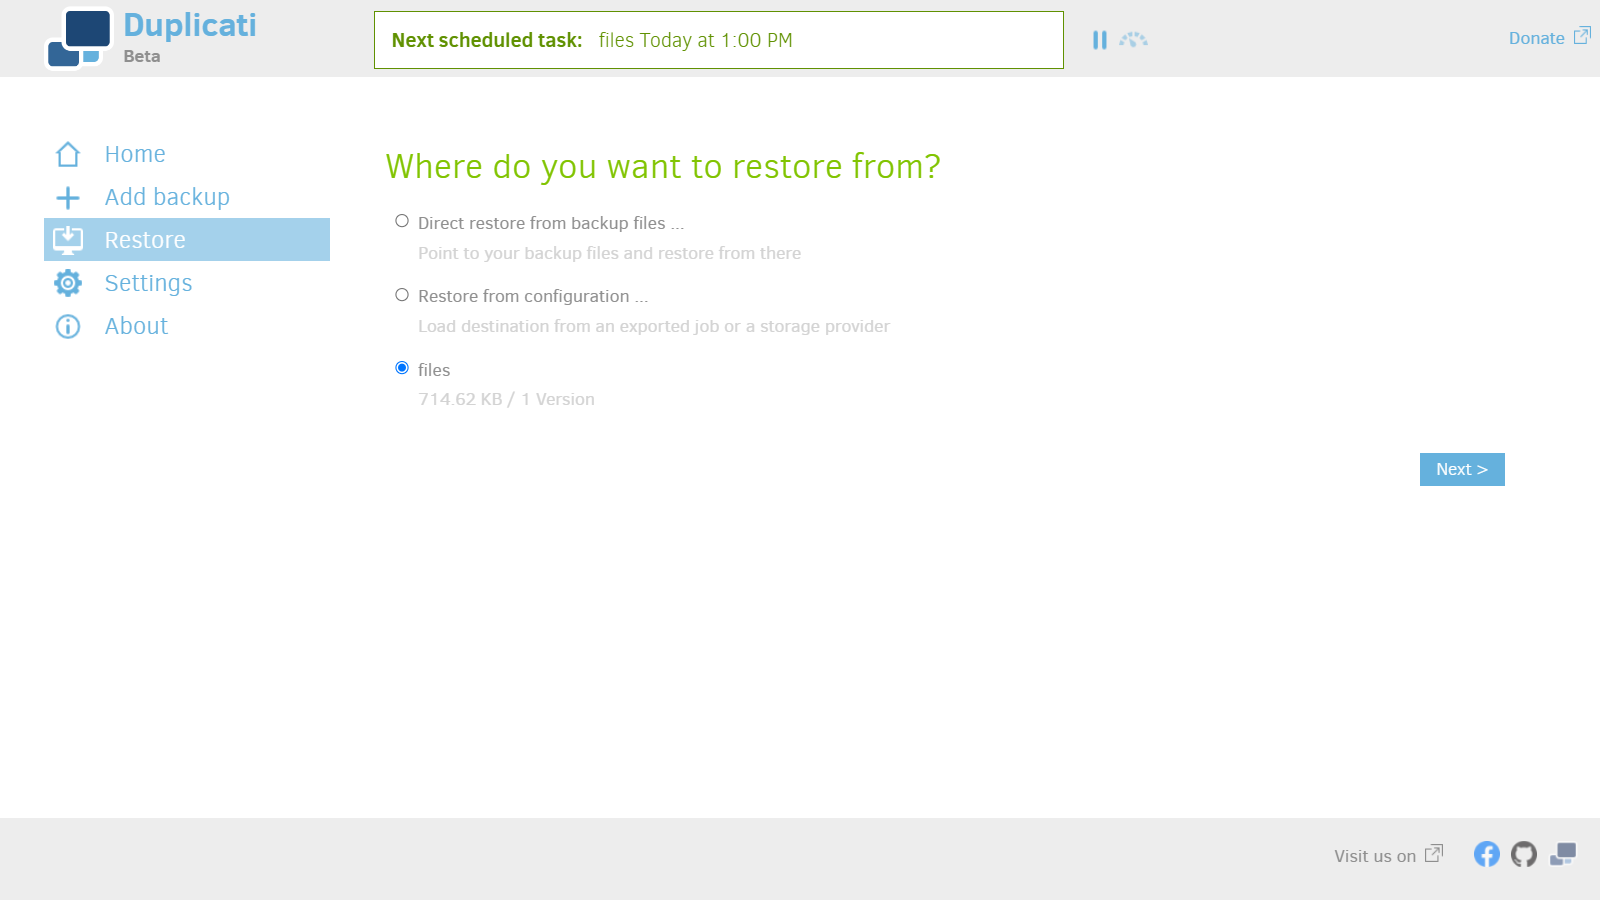
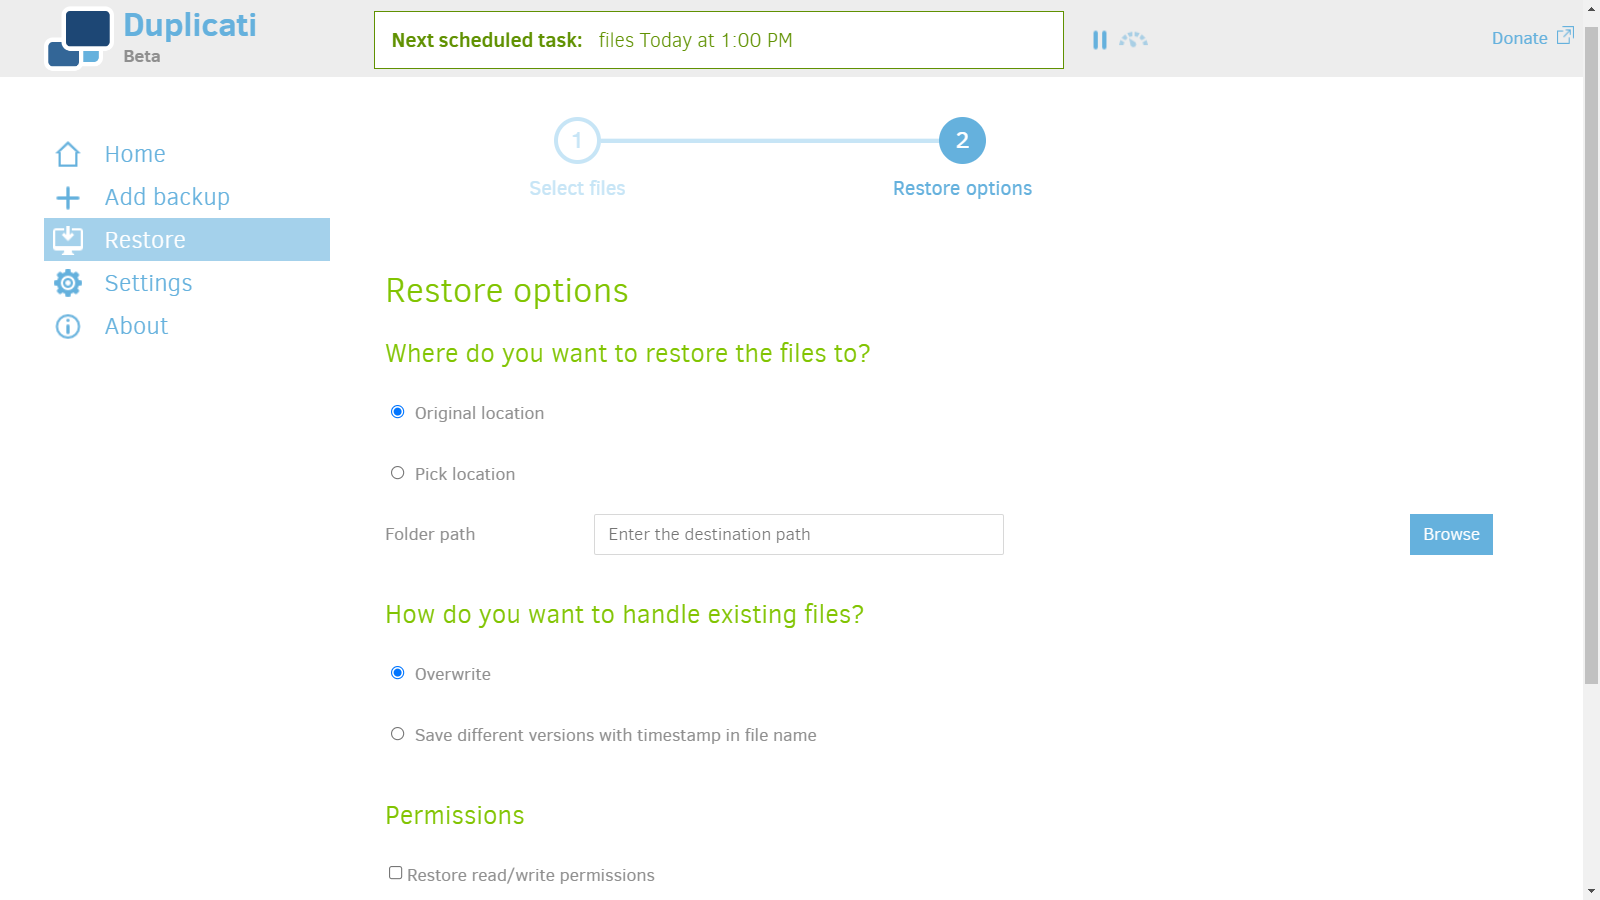
Restore files
1. Choose a backup to restore.
2. You can choose to restore different versions of backups.
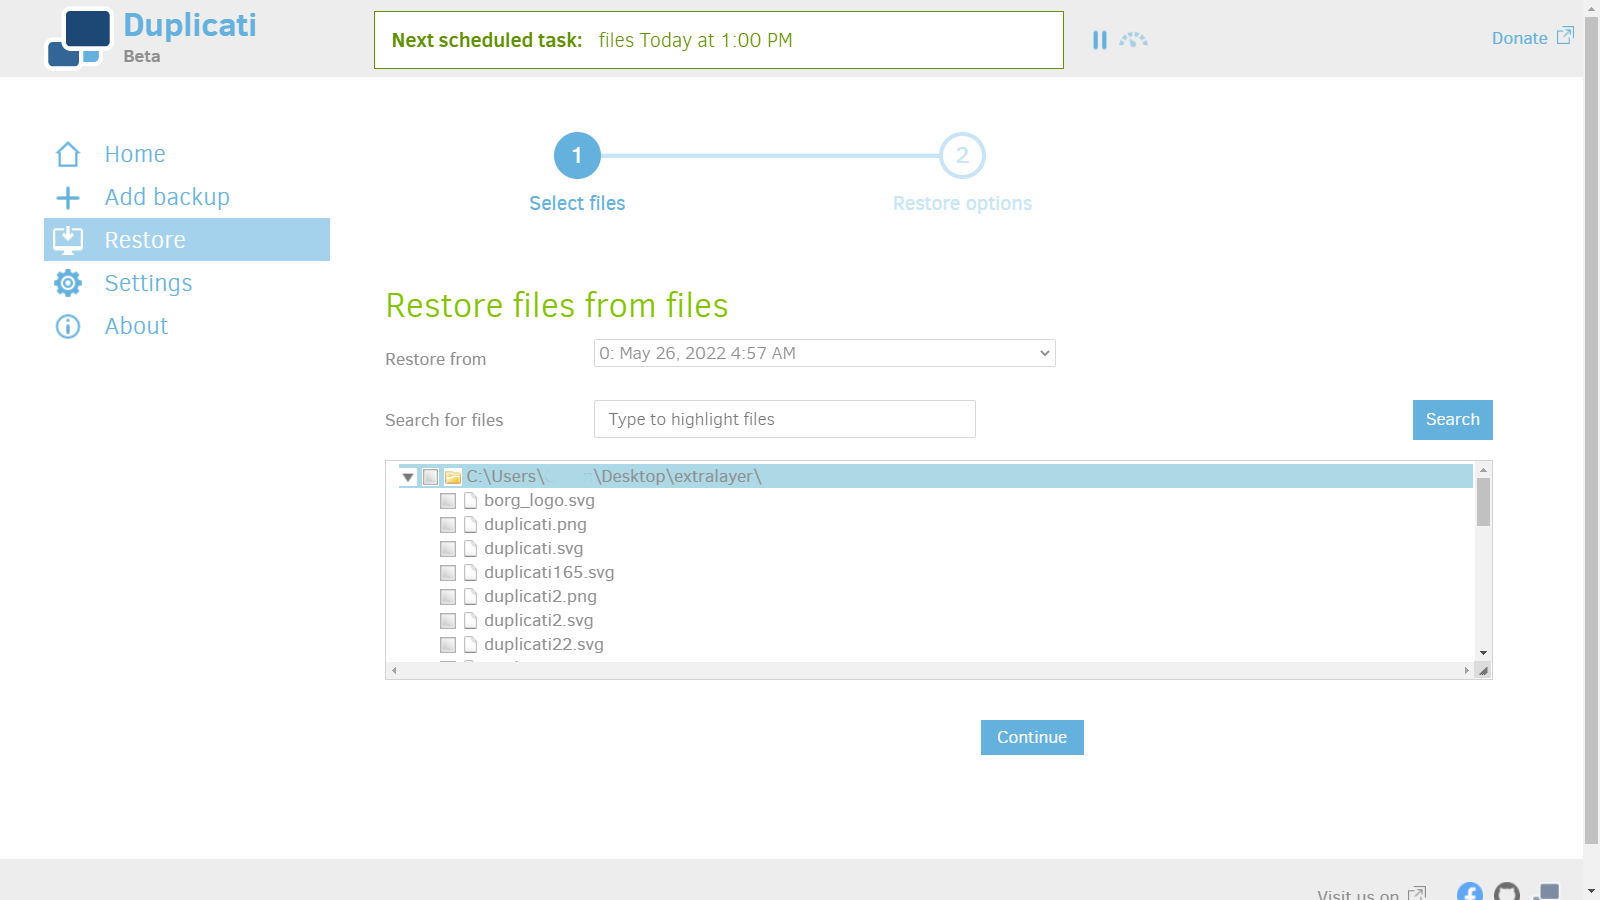
3. Choose restore destination.

Using Rclone to sync data.
In this example we use:
- Rclone over SFTP.
- User SSH password.
Install
Install Rclone on Debian and Ubuntu.
sudo apt install rclone
Install Rclone on Windows and other Systems.
Go to https://rclone.org/downloads/
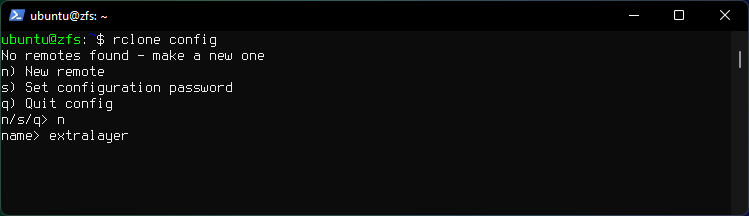
Configure Rclone
Create a New Remote, run rclone config.
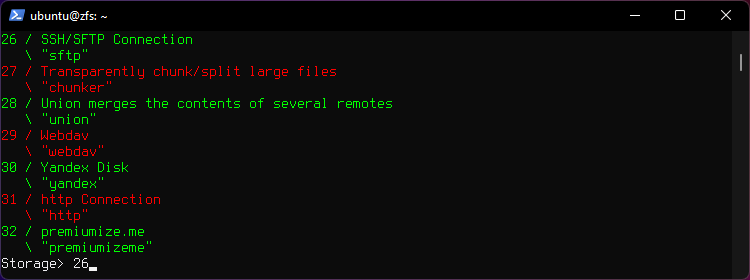
rclone config
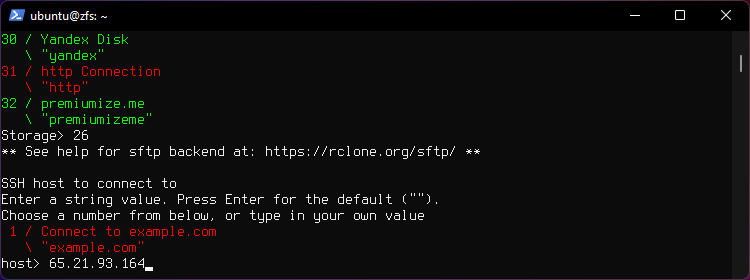
Choose option 26 for SSH.
Enter Hostname or IP.
Enter your username.
Hit Enter for default port 22.
Type y to enter your password.

Enter your password.
Press Enter for the default value.
Type n to leave optional password blank.
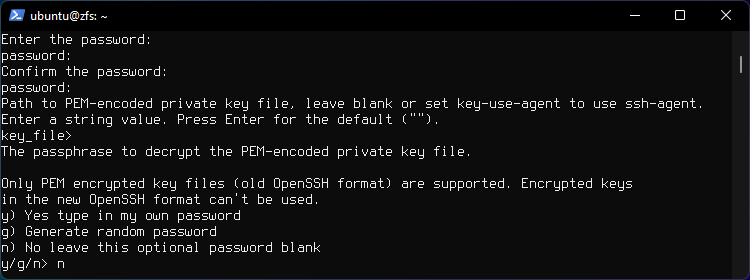
Press Enter for the default ("false").
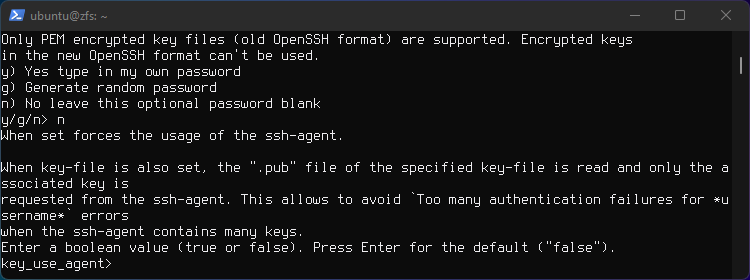
Press Enter for the default ("false") twice.
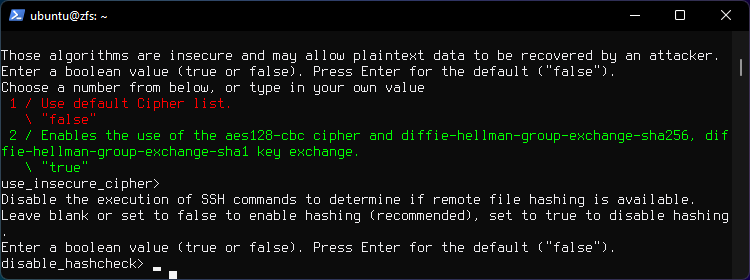
Press n for advanced config.
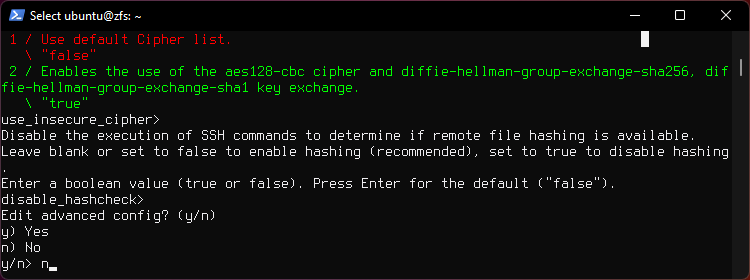
Press y to confirm settings.
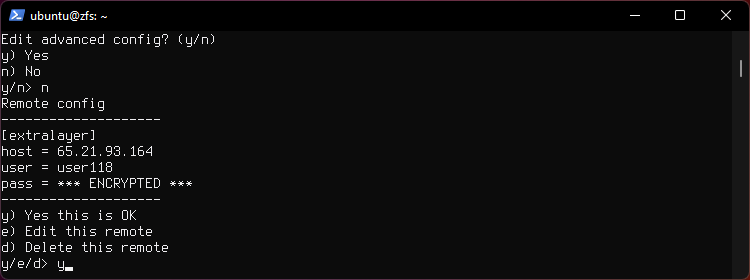
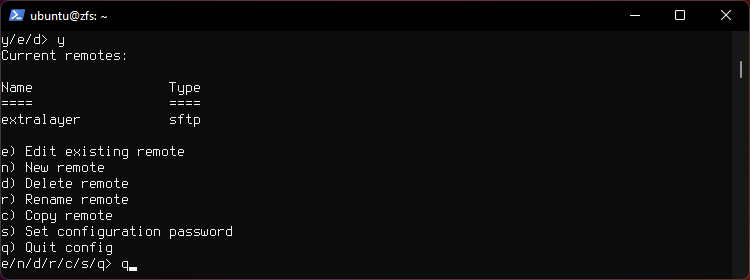
New "remote" is now created.
Type q to quit.
Listing files and directories on remote
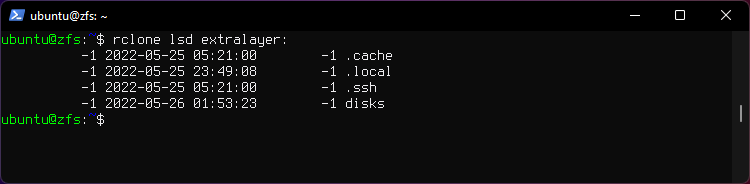
List directories in the home directory
rclone lsd extralayer:
Use -R flag to list directories and sub-directories recursively.
rclone lsd -R extralayer:
List files in the home directory
rclone ls extralayer:
List directories and files in the home directory
rclone lsf extralayer:
List directories and files recursively.
rclone lsf -R extralayer:disks
Use Rclone to sync data
Clone a local directory named disks to a remote directory named disks.
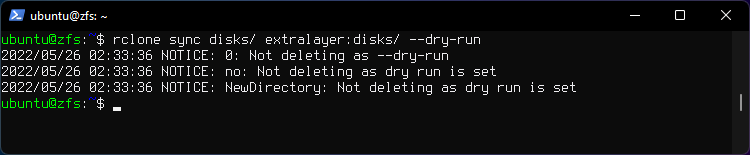
rclone sync disks/ extralayer:disks/ -P
Flag -P shows progress.
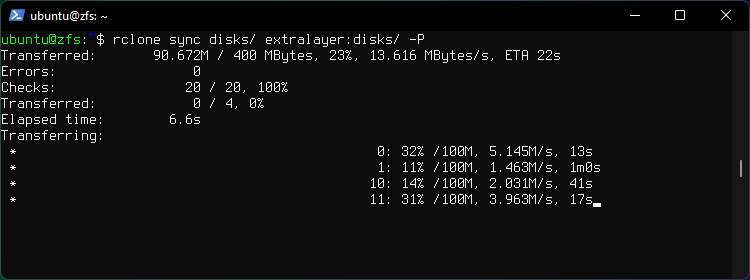
The command will sync everything from local to remote. If data is added or deleted locally Rclone will sync the changes to remote when you run rclone sync again.
If the directory of the same name already exists on remote then Rclone will remove the files from remote directory that do not exist on local and upload the existing local files to remote, so make sure you don't overwrite something you don't want to overwrite accidentally.
Important: Use --dry-run flag beforehand to prevet data loss.
Message "Not deleting as dry run is set" will display.
Rclone Browser
https://github.com/kapitainsky/RcloneBrowser
Rclone Documentation

Using Rsync to backup data
Sync
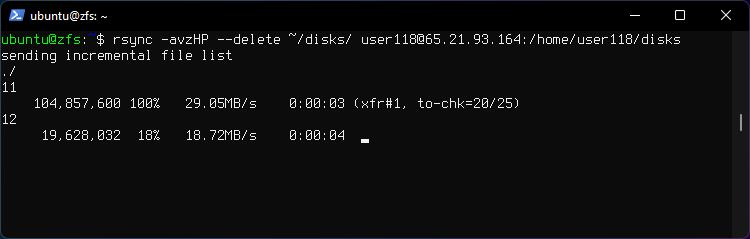
Send incremental file list, delete files at destination if files don't exist at origin, preserve hardlinks, progress, partial transfer in case of network interrupt, compress, verbose.
This command will essentially sync or mirror the local directory to the remote directory, when the command runs again newly added files will be uploaded and files that are deleted in local directory will be removed from remote directory also.
Transfer contents of directory disks.
rsync -avzHP --delete ~/disks/ iron@irondesign.dev:/home/iron/disks
If you omit the forward slash at the end of disks/ Rsync will transfer the directory disks and it's contents to a new directory on remote host named disk.
rsync -avzHP --delete ~/disks iron@irondesign.dev:/home/iron/disks
End result is /home/iron/disks/disks.
Relative path
Relative path flag -P will copy full path /etc/nginx/sites-enabled/default and create if it doesn't exist on remote dir /blue/backups/.
rsync -aP --relative /etc/nginx/sites-enabled/default me@irondesign.dev:/blue/backups/wg/
End result is /blue/backups/etc/nginx/sites-enabled/default.
Delete extraneous files
rsync -avzH --delete --existing --ignore-existing --ignore-errors data databases user23@10.0.0.23:/home/user23
  --existing, --ignore-non-existing
          This tells rsync to skip creating files (including  directories)
          that  do  not  exist  yet on the destination.  If this option is
          combined with the --ignore-existing option,  no  files  will  be
          updated  (which  can  be  useful if all you want to do is delete
          extraneous files).
Flags
-a --archiveThis is equivalent to -rlptgoD. It is a quick way of saying you want recursion and want to preserve almost everything. Note however that -a does not preserve hardlinks, because finding multiply-linked files is expensive. You must separately specify -H.
-z --compress
With this option, rsync compresses the file data as it is sent to the destination machine, which reduces the
amount of data being transmitted -- something that is useful over a slow connection.
-v --verbose
This option increases the amount of information you are given during the transfer.
By default, rsync works silently.
A single -v will give you information about what files are being transferred
and a brief summary at the end.
Two -v flags will give you information on what files are being skipped and
slightly more information at the end.
-P combines the flags --progress and --partial
--progress
This option tells rsync to print information showing the progress of the transfer.
This gives a bored user something to watch.
--partial
By default, rsync will delete any partially transferred file if the transfer is interrupted. In some circumstances
it is more desirable to keep partially transferred files. Using the --partial option tells rsync to keep the partial
file which should make a subsequent transfer of the rest of the file much faster.
-t, --times
preserve modification times
-H, --hard-links
This tells rsync to look for hard-linked files in the transfer and link together the corresponding files on the receiving side. Without this option, hard-linked files in the transfer are treated as though they were separate files.
When you are updating a non-empty destination, this option only ensures that files that are hard-linked together on the source are hard-linked together on the destination. It does NOT currently endeavor to break already existing hard links on the destination that do not exist between the source files. Note, however, that if one or more extra-linked files have content changes, they will become unlinked when updated (assuming you are not using the --inplace option).
Note that rsync can only detect hard links between files that are inside the transfer set. If rsync updates a file that has extra hard-link connections to files outside the transfer, that linkage will be broken. If you are tempted to use the --inplace option to avoid this breakage, be very careful that you know how your files are being updated so that you are certain that no unintended changes happen due to lingering hard links (and see the --inplace option for more caveats).
If incremental recursion is active (see --recursive), rsync may transfer a missing hard-linked file before it finds that another link for that contents exists elsewhere in the hierarchy. This does not affect the accuracy of the transfer, just its efficiency. One way to avoid this is to disable incremental recursion using the --no-inc-recursive option.
--delete
Delete files in remote directory that don't exist in local directories.
![]()
Using Borg to backup data
In this example we use:
- Borg over SSH to set up remote repo.
- SSH keys to login.
Install
Install Borg on Debian and Ubuntu based Linux.
sudo apt install borgbackup
Install Borg on other Systems.
Go to https://www.borgbackup.org/releases/
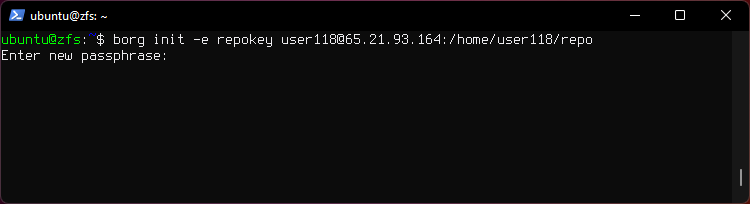
Set up remote repo.
1. Initialize a repository on remote host.
borg init -e repokey user118@65.21.93.164:/home/user118/repo
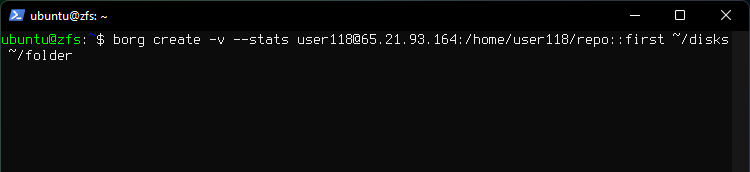
2. Backup the ~/disks and ~/folder directories into an archive called first.
borg create -v --stats user118@65.21.93.164:/home/user118/repo::first ~/disks ~/folder

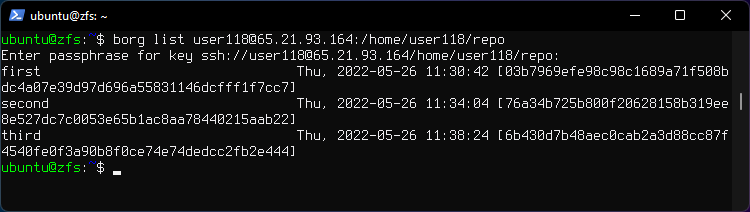
3. List all archives in the repository.
borg list user118@65.21.93.164:/home/user118/repo
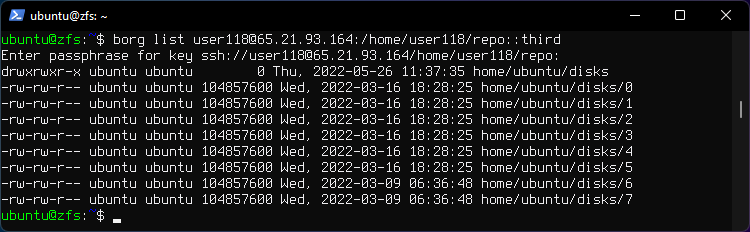
4. List contents of archive named third.
borg list user118@65.21.93.164:/home/user118/repo::third
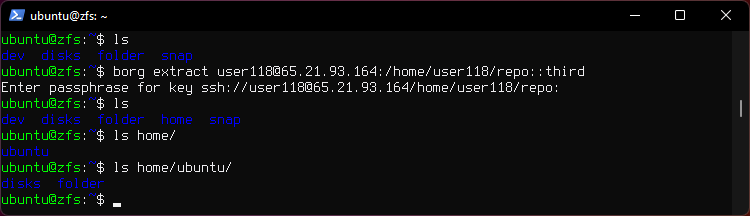
5. Restore the third archive to current directory.
borg extract user118@65.21.93.164:/home/user118/repo::third
6. Delete the third archive.
borg delete user118@65.21.93.164:/home/user118/repo::third
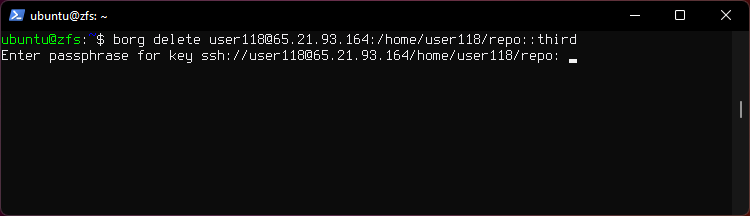
Note that this does not free repo disk space.
7. Recover disk space by compacting the segment files in the repo.
ssh user118@65.21.93.164 borg compact /home/user118/repo
8. Delete the whole repository and the related local cache:
borg delete user118@65.21.93.164:/home/user118/repo
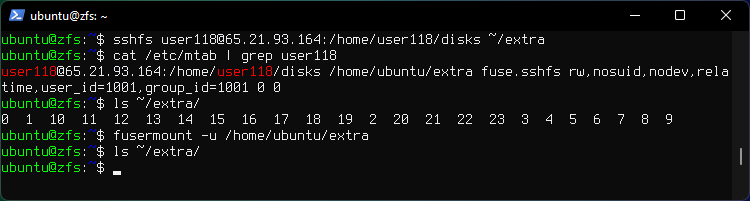
9. SSHFS
If it is not possible to install Borg on the remote host, it is still possible to use the remote host to store a repository by mounting the remote filesystem, for example, using sshfs:
This will mount remote directory disks to local directory extra.
sshfs user118@65.21.93.164:/home/user118/disks ~/extra
borg init -e repokey ~/extra/repo
fusermount -u /home/{user}/extra
Documentation

General commands for using OpenSSH
Generating a SSH key allows paswordless login.
After a Key is generated it needs to be transferred to the remote host's authorized_keys file, that can be done with ssh-copy-id command.
Generate a key.
ssh-keygen -t rsa -b 4096
Remove a host from known hosts.
ssh-keygen -R 10.0.0.1
Copy public key
ssh-copy-id user@10.0.0.23
On windows you can install Git SCM for Windows, it provides a BASH emulation which you can use to run ssh-copy-id command. It uses the SSH Key from User's directory generated by SSH on Windows.
Documentation
SCP - Secure Copy Protocol
Using SCP to copy data.
Copy a directory and it's contents recursively.
sudo scp -r /home/user/data user@10.0.0.1:/home/user
Copy a file from remote directory to current directory.
scp user@10.0.0.1:/home/user/file.md .
-
SCP does not support resuming if the transfer is interrupted.
-
If a file only got transferred partially it can be resumed with Rsync using the
-Pflag or SFTP using the-aflag.
Flags
-p Preserve modification time timestamps.
Docs
SFTP - Secure File Transfer Protocol
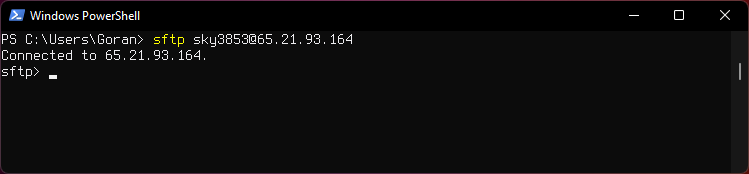
Using SFTP to transfer data.
Connect to Server via SFTP
sftp user@extralayer.eu
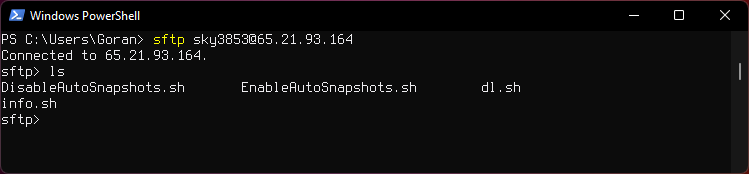
List files on remote server
ls
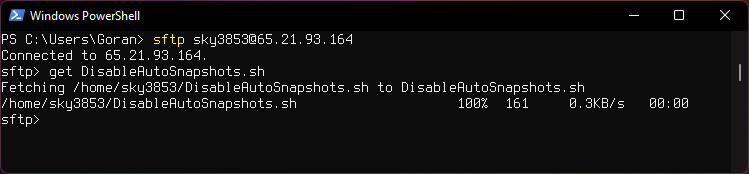
Dowloading a file
get filename.txt
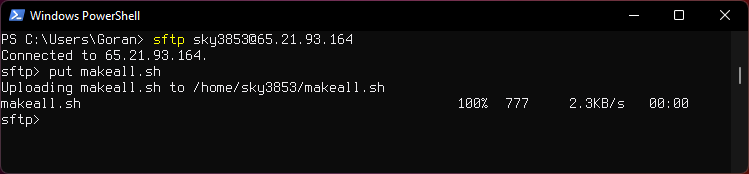
Uploading a flie
put filename.md
Other commands
Preserve time-stamps, important for Photo Albums.
put -p directory
Download a directory and the contents.
get -r directory
Upload a directory and the contents.
put -r directory
Display remote working directory.
pwd
Print local working directory.
lpwd
Display a remote directory listing
ls
Display local directory listing
lls
Quit sftp
bye

Resuming transfer
Copy remote directory contents to local dir media with resume and recursive flags.
sftp -ar iron@irondesign.dev:/home/iron/video C:\Users\Iron\Media
Options:
-rRecursively copy entire directories when uploading and downloading. Note that sftp does not follow symbolic links encountered in the tree traversal.
-aAttempt to continue interrupted transfers rather than overwriting existing partial or complete copies of files. If the partial contents differ from those being transferred, then the resultant file is likely to be corrupt.
Docs
SSHFS
Mount a remote file system using SSHFS.
Linux
Install
sudo apt install sshfs
Mount
Mount a remote directory disks to ~/extra.
sshfs user118@65.21.93.164:/home/user118/disks ~/extra
Unmount.
fusermount -u /home/ubuntu/extra
Check for mounted directories.
cat /etc/mtab | grep user118
Windows
Install
These are needed to run SSHFS on Windows.
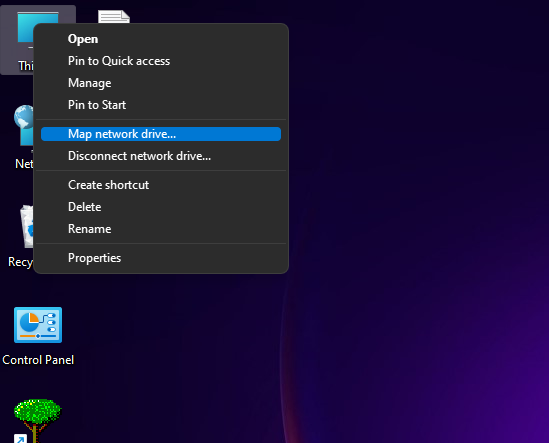
1. Map a Network Drive.
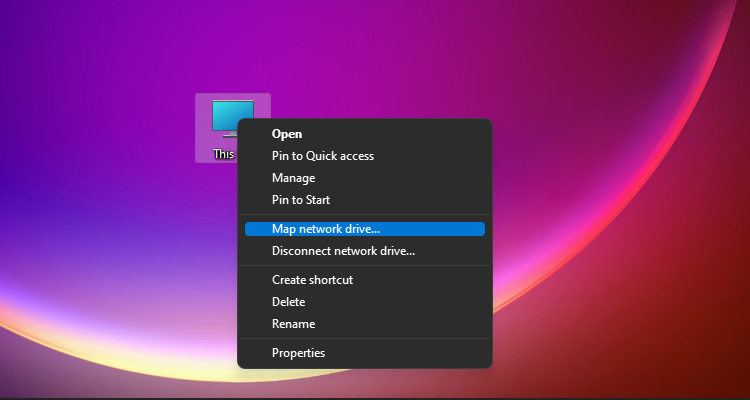
2. Choose Drive Letter, Enter login info.
\\sshfs.k\sky3853@65.21.93.164
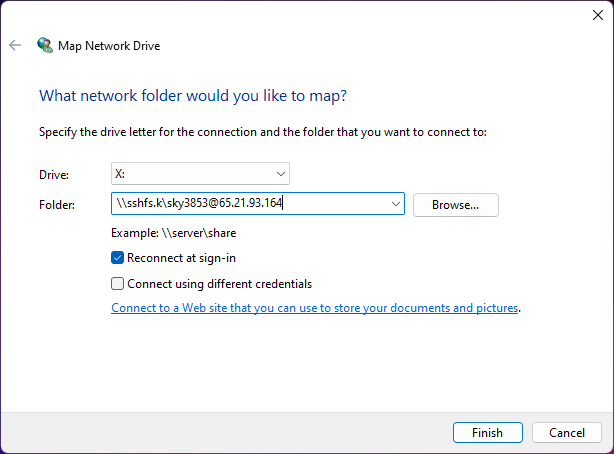
3. Connected.
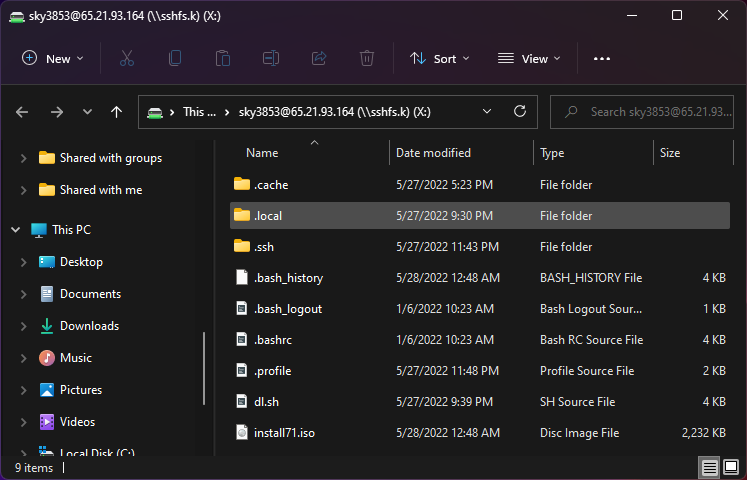
4. Right click Show more options.
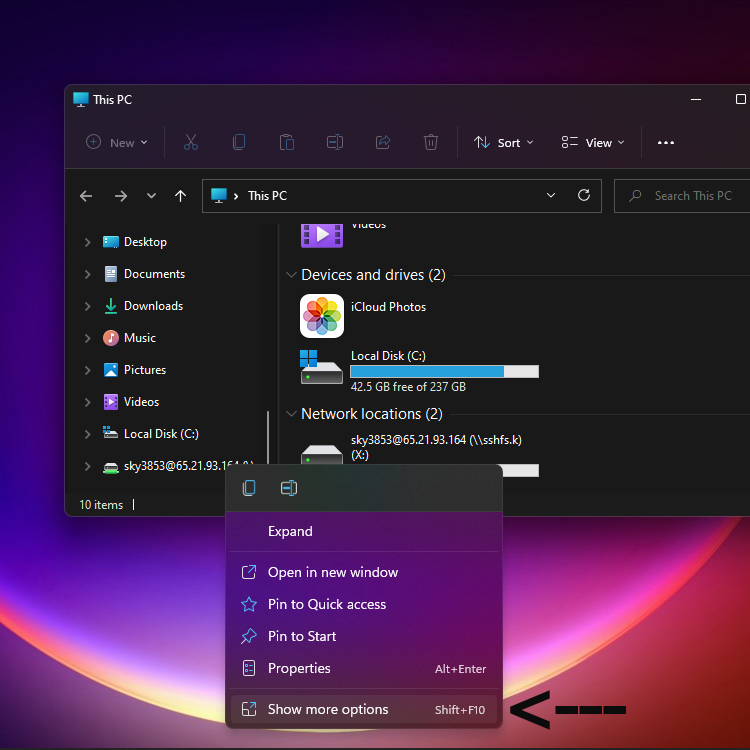
5. Disconnect.

Syncthing
HOW DO I ACCESS THE WEB GUI FROM ANOTHER COMPUTER?
The default listening address is 127.0.0.1:8384, so you can only access the GUI from the same machine. This is for security reasons. Change the GUI listen address through the web UI from 127.0.0.1:8384 to 0.0.0.0:8384 or change the config.xml:
<gui enabled="true" tls="false">


  <address>127.0.0.1:8384</address>
to
<gui enabled="true" tls="false">


  <address>0.0.0.0:8384</address>
Then the GUI is accessible from everywhere. You should set a password and enable HTTPS with this configuration. You can do this from inside the GUI.
If both your computers are Unix-like (Linux, Mac, etc.) you can also leave the GUI settings at default and use an ssh port forward to access it. For example,
$ ssh -L 9090:127.0.0.1:8384 user@othercomputer.example.com
will log you into othercomputer.example.com, and present the remote Syncthing GUI on http://localhost:9090 on your local computer.
If you only want to access the remote gui and don’t want the terminal session, use this example,
$ ssh -N -L 9090:127.0.0.1:8384 user@othercomputer.example.com
If only your remote computer is Unix-like, you can still access it with ssh from Windows.
Under Windows 10 (64 bit) you can use the same ssh command if you install the Windows Subsystem for Linux https://docs.microsoft.com/windows/wsl/install-win10.
Another Windows way to run ssh is to install gow (Gnu On Windows) https://github.com/bmatzelle/gow.
The easiest way to install gow is with the chocolatey https://chocolatey.org/ package manager.
Seafile
Admin password reset script
Enter a new valid email or existing.
/opt/seafile/seafile-server-8.0.0/reset-admin.sh
Log files locations
Database info:
/opt/seafile/conf/seafile.conf
Logs:
/opt/seaflie/logs
Docs
Crontab
Run on the 1st of every Month at 2:15 AM
crontab -e
15 2 1 * * certbot renew --post-hook 'systemctl restart nginx'
UI upload error
Set URL to:
SERVICE_URL 		http://irondesign.dev/
FILE_SERVER_ROOT	https://irondesign.dev/seafhttp
https://irondesign.dev/sys/web-settings/
Nginx seafile.conf
log_format seafileformat '$http_x_forwarded_for $remote_addr [$time_local] "$request" $status $body_bytes_sent "$http_referer" "$http_user_agent" $upstream_response_time';

server {
    listen       80;
    server_name  irondesign.dev www.irondesign.dev;
    rewrite ^ https://$http_host$request_uri? permanent;    # Forced redirect from HTTP to HTTPS

    server_tokens off;      # Prevents the Nginx version from being displayed in the HTTP response header


	proxy_set_header X-Forwarded-For $remote_addr; #Commented out. After uncommenting icons showed up.
}

server {
    listen 443 ssl http2;
    ssl_certificate /etc/letsencrypt/live/irondesign.dev/fullchain.pem;    # Path to your fullchain.pem
    ssl_certificate_key /etc/letsencrypt/live/irondesign.dev/privkey.pem;  # Path to your privkey.pem
    server_name irondesign.dev www.irondesign.dev;
    server_tokens off;

    # HSTS for protection against man-in-the-middle-attacks
    # https://manual.seafile.com/deploy/https_with_nginx/#advanced-tls-configuration-for-nginx-optional
    #
    add_header Strict-Transport-Security "max-age=31536000; includeSubDomains";


    location / {
         proxy_pass         http://127.0.0.1:8000;
         proxy_set_header   Host $host;
         proxy_set_header   X-Real-IP $remote_addr;
         proxy_set_header   X-Forwarded-For $proxy_add_x_forwarded_for;
         proxy_set_header   X-Forwarded-Host $server_name;
         proxy_set_header   X-Forwarded-Proto $scheme;
         proxy_read_timeout  1200s;

         proxy_set_header   X-Forwarded-Proto https;

	 #added for optimization nginx -t complained
	 proxy_headers_hash_max_size 512;
	 proxy_headers_hash_bucket_size 128;

         # used for view/edit office file via Office Online Server
         client_max_body_size 0;

         access_log      /var/log/nginx/seahub.access.log seafileformat;
         error_log       /var/log/nginx/seahub.error.log;
    }

    location /seafhttp {
         rewrite ^/seafhttp(.*)$ $1 break;
         proxy_pass http://127.0.0.1:8082;
         client_max_body_size 0;
         proxy_set_header   X-Forwarded-For $proxy_add_x_forwarded_for;
         proxy_connect_timeout  36000s;
         proxy_read_timeout  36000s;

        access_log      /var/log/nginx/seafhttp.access.log seafileformat;
        error_log       /var/log/nginx/seafhttp.error.log;
    }
    location /media {
        root /opt/seafile/seafile-server-latest/seahub;
    }
    location /seafdav {
        proxy_pass         http://127.0.0.1:8080/seafdav;
        proxy_set_header   Host $host;
        proxy_set_header   X-Real-IP $remote_addr;
        proxy_set_header   X-Forwarded-For $proxy_add_x_forwarded_for;
        proxy_set_header   X-Forwarded-Host $server_name;
        proxy_set_header   X-Forwarded-Proto $scheme;
        proxy_read_timeout  1200s;

        client_max_body_size 0;

        access_log      /var/log/nginx/seafdav.access.log seafileformat;
        error_log       /var/log/nginx/seafdav.error.log;
    }
}
Seafile 8.0
For Seafile 8.0.x or newer versions on Ubuntu 18.04/20.04 (64bit) server
Install
Script auto install
cd /root
wget --no-check-certificate https://raw.githubusercontent.com/haiwen/seafile-server-installer/master/seafile-8.0_ubuntu
bash seafile-8.0_ubuntu 8.0.0
Github haiwen seafile-server-installer
Backup
Main Server
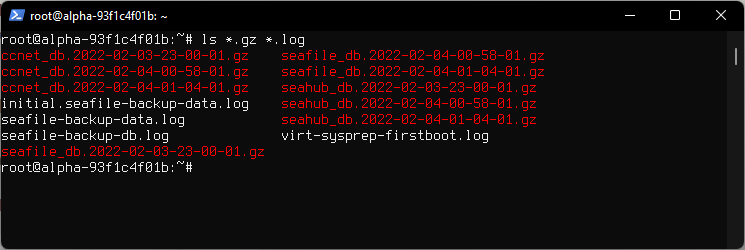
Mysqldump databases are kept for 12 days, those older than 12 days are deleted. They are very small in size.
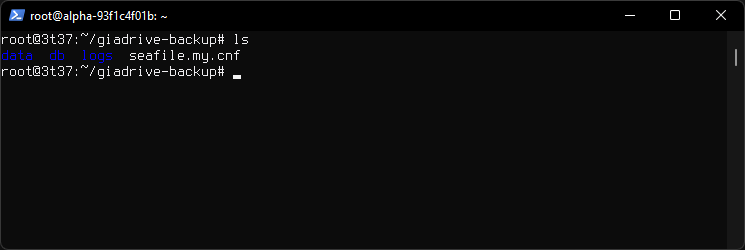
Contents of /root directory.
seafile_db seahub_db ccnet_db
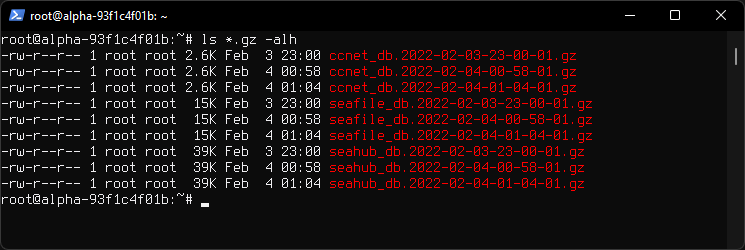
Space used by databases in Kilobytes.
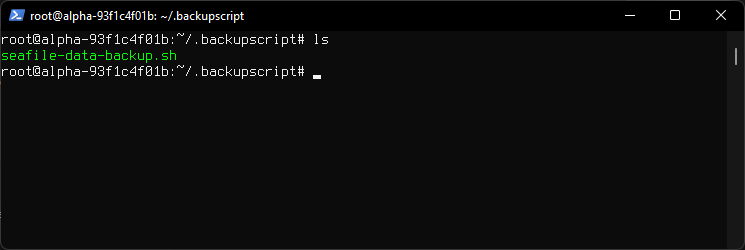
Backup Script is located at /root/.backupscript/seafile-data-backup.sh
Backup Server
Backup directory /root/giadrive-backup
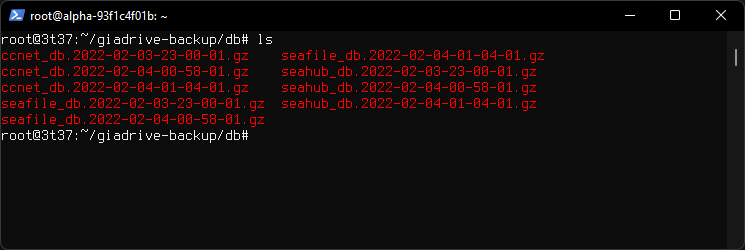
Databases directory /root/giadrive-backup/db
Logs directory /root/giadrive-backup/logs
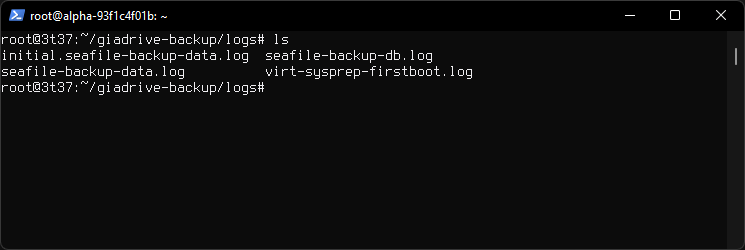
Log Contents
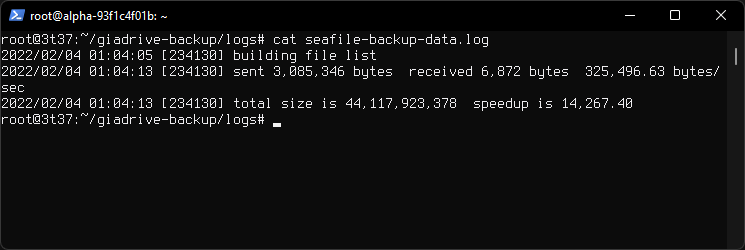
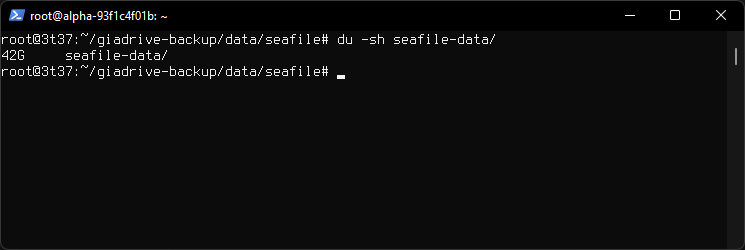
Seafile directory /root/giadrive-backup/data/seafile
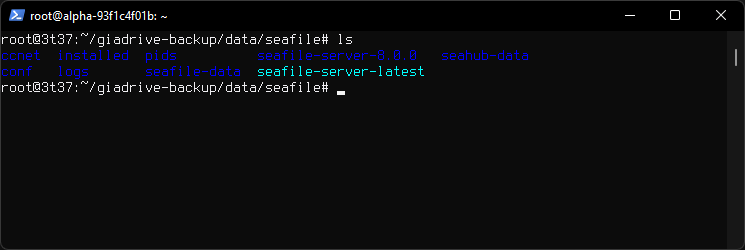
Space used
Cron
# Renew SSL automatically
15 2 1 * * certbot renew --post-hook 'systemctl restart nginx'

# Backup script daily at midnight

0 23 * * * /root/.backupscript/seafile-data-backup.sh
Backup Directories
Cron runs scripts in user's home directory.
Logs and database backup files are saved to /root directory of main server and backed up in /root/giadrive-backup directory of the backup server.
Copy of data is backed up only on backup server.
Restore
0. Install Seafile
On the new Server install a fresh Seafile.
1. Copy data from backup server.
Copy entire giadrive-backup folder from backup server to new server.
rsync -avHP --delete giadrive-backup root@new.server.dev:/root
Login to new server and replace seaflie-data and seahub-data folders with the ones we backed up. Do not replace anything else in the /opt/seafile/ directory besides those two directories.
mv -rf /root/giadrive-backup/data/seafile/seafile-data /opt/seafile/seafile-data
mv -rf /root/giadrive-backup/data/seafile/seahub-data /opt/seafile/seahub-data
Restore proper permissions
chown seafile:seafile /opt/seafile/seafile-data/ /opt/seafile/seahub-data/
2. Restore the database.
Extract the .gzarchive fr each database.
gzip -d ccnet-db.sql.2013-10-19-16-00-05.gz
Import the databases.
mysql -u root ccnet_db < ccnet-db.sql.2013-10-19-16-00-05
mysql -u root seafile_db < seafile-db.sql.2013-10-19-16-00-20
mysql -u root seahub_db < seahub-db.sql.2013-10-19-16-01-05
3. Run Seafile Filesystem Check
Run file system check as seafile user.
Scripts are located in cd /opt/seafile/seafile-server-latest directory.
sudo -u seafile /opt/seafile/seafile-server-latest/seaf-fsck.sh
Since database and data are backed up separately, they may become a little inconsistent with each other. To correct the potential inconsistency, run seaf-fsck tool to check data integrity on the new machine. See seaf-fsck documentation.
4. Restart Seafile
Restart Seafile and Seahub as seafile user.
sudo -u seafile /opt/seafile/seafile-server-latest/seafile.sh restart
sudo -u seafile /opt/seafile/seafile-server-latest/seahub.sh restart
Seafile docs
Seafile FSCK
The seaf-fsck tool accepts the following arguments:
- cd seafile-server-latest
- ./seaf-fsck.sh [--repair|-r] [--export|-E export_path] [repo_id_1 [repo_id_2 ...]]
Repairing Corruption
- cd seafile-server-latest
- ./seaf-fsck.sh
- cd seafile-server-latest
- ./seaf-fsck.sh --repair
Most of time you run the read-only integrity check first, to find out which libraries are corrupted. And then you repair specific libraries with the following command:
- cd seafile-server-latest
- ./seaf-fsck.sh --repair [library-id1] [library-id2] ...
Data Transfer Speed
Recovery data transfer speed considerations.
In the event where a data recovery is needed, it would take 4 hours 25 minutes to complete a transfer of 200 GB of data on a VPS at limited IO at about 80 Mbps.
Next scheduled backups
Time to complete the next scheduled backup will depend on daily data added. Predicting about 5 minutes each day .
| Additional Data | Time to complete |
|---|---|
| 2 GB | 3 Minutes |
| 5 GB | 7 Minutes |
| 10 GB | 14 Minutes |
| 100 GB | 2 Hours |
| 200 GB | 5 Hours |
| 500 GB | 11 Hours |
Backup script
/root/.backupscript/seafile-data-backup.sh
#!/bin/sh

# (1) set up all the mysqldump variables
FILE0=seafile_db.`date +"%Y-%m-%d-%H-%M-%S"`
FILE1=seahub_db.`date +"%Y-%m-%d-%H-%M-%S"`
FILE2=ccnet_db.`date +"%Y-%m-%d-%H-%M-%S"`
DBSERVER=localhost
DATABASE0=seafile_db
DATABASE1=seahub_db
DATABASE2=ccnet_db
USER=root

unalias rm     2> /dev/null


# use this command for a database server on a separate host:
#mysqldump --opt --protocol=TCP --user=${USER} --host=${DBSERVER} ${DATABASE} > ${FILE}


mysqldump --opt --user=${USER} ${DATABASE0} > ${FILE0}
mysqldump --opt --user=${USER} ${DATABASE1} > ${FILE1}
mysqldump --opt --user=${USER} ${DATABASE2} > ${FILE2}

# (4) gzip the mysql database dump file
gzip $FILE0
gzip $FILE1
gzip $FILE2

# rsync mysqldump
rsync -avHP --delete $FILE0.gz $FILE1.gz $FILE2.gz root@10.10.10.10:/root/giadrive-backup/db/ --log-file=seafile-backup-db.log

# Finds files ending in .gz older than 12 days and deletes them
find /root -mtime +12 -type f -name '*.gz' -delete

sleep 1

# rsync seafile data folder
rsync -avHP --delete /opt/seafile root@10.10.10.10:/root/giadrive-backup/data/ --log-file=seafile-backup-data.log

# rsync logs
rsync -avHP --delete *.log root@10.10.10.10:/root/giadrive-backup/logs/
NextCloud
Accessing NextCloud files using WebDAV
NextCloud snap data location
/var/snap/nextcloud/common/nextcloud/data/cats
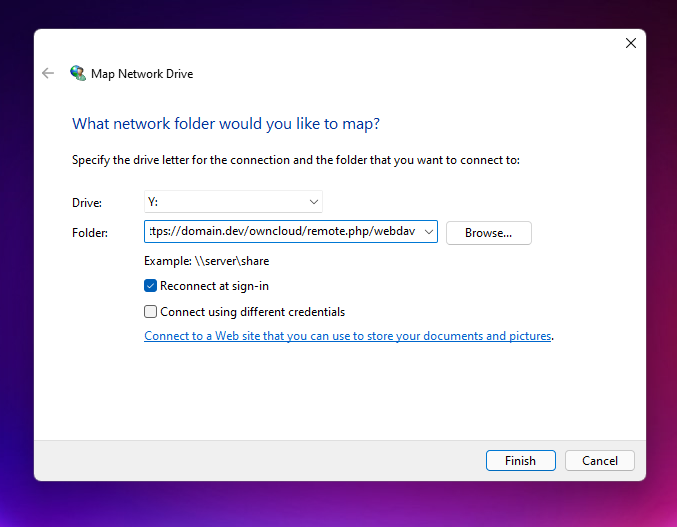
Mapping a Windows network drive
Using Windows Explorer
https://domain.dev/owncloud/remote.php/webdav
https://domain.dev/owncloud/remote.php/dav/files/username/
Using Command Prompt
net use G: https://domain.dev/owncloud/remote.php/webdav /user:username password
net use Z: https://domain.dev/owncloud/remote.php/dav/files/username/ /user:username password
net use S: \\domain.dev@ssl\owncloud\remote.php\webdav /user:username password
net use S: \\domain.dev@ssl\owncloud\remote.php\dav\files\username /user:username password
Packet Filter
Uncomplicated Firewall
sudo ufw app list
sudo ufw allow OpenSSH
sudo ufw enable
sudo ufw status
sudo ufw allow "Nginx HTTPS"
Let's Encrypt
Snap
sudo apt install snapd
sudo snap install core; sudo snap refresh core
sudo snap install --classic certbot
sudo ln -s /snap/bin/certbot /usr/bin/certbot
sudo certbot --nginx
sudo certbot renew --dry-run
python3-certbot-nginx
sudo apt install python3-acme python3-certbot python3-mock python3-openssl python3-pkg-resources python3-pyparsing python3-zope.interface
sudo apt install python3-certbot-nginx
sudo certbot --nginx
sudo certbot --nginx -d your_domain -d www.your_domain
sudo certbot renew --dry-run
Delete SSL
sudo certbot delete

Apache
Modules
List available modules (Debian/Ubuntu)
ls /etc/apache2/mods-enabled/
Enable mod by sym link
ln -s /etc/apache2/mods-available/headers.load /etc/apache2/mods-enabled/
HTTP 2
Enable HTTP/2 (Ubuntu 20)
sudo apt-get install php7.4-fpm && a2dismod php7.4 && a2enconf php7.4-fpm && a2enmod proxy_fcgi && a2dismod mpm_prefork && a2enmod mpm_event && a2enmod ssl && a2enmod http2 && systemctl restart apache2
Add Protocols h2 http/1.1 line inside virtual host tags.
<VirtualHost *:443>
  ServerName irondesign.dev
  DocumentRoot /var/www/public_html/iron
  SSLEngine on
  SSLCertificateKeyFile /path/to/private.pem
  SSLCertificateFile /path/to/cert.pem
  SSLProtocol all -SSLv3 -TLSv1 -TLSv1.1
  Protocols h2 http/1.1
</VirtualHost
Check
curl -I -L --http2 https://irondesign.dev
Dashy
Set up Dashy using Docker Compose
docker-compose.yml
---
version: "3.8"
services:
  dashy:
    # To build from source, replace 'image: lissy93/dashy' with 'build: .'
    # build: .
    image: lissy93/dashy
    container_name: Dashy
    # Pass in your config file below, by specifying the path on your host machine
    # volumes:
      # - /root/my-config.yml:/app/public/conf.yml
    ports:
      - 4000:80
    # Set any environmental variables
    environment:
      - NODE_ENV=production
    # Specify your user ID and group ID. You can find this by running `id -u` and `id -g`
    #  - UID=1000
    #  - GID=1000
    # Specify restart policy
    restart: unless-stopped
    # Configure healthchecks
    healthcheck:
      test: ['CMD', 'node', '/app/services/healthcheck']
      interval: 1m30s
      timeout: 10s
      retries: 3
      start_period: 40s

Server Blocks
Nginx on Debian - Digital Ocean
sudo nano /etc/nginx/sites-available/your_domain
sudo ln -s /etc/nginx/sites-available/your_domain /etc/nginx/sites-enabled/
sudo nano /etc/nginx/nginx.conf
...
http {
    ...
    server_names_hash_bucket_size 64;
    ...
}
...
Apache Benchmark
sudo apt install apache2-utils
Start Benchmark
ab -n 1000 -c 100 https://irondesign.dev/
-c count 100 requests per second
-n number 1000 requests total
See open file limits
ulimit -n
ulimit -a
Edit
events {
worker_connections 1024;
}
Restarting nginx
Gracefully reload nginx web server:
sudo systemctl reload nginx
service nginx reload
/etc/init.d/nginx reload
nginx -s reload
Fully restart nginx web server:
sudo systemctl restart nginx
service nginx restart
/etc/init.d/nginx restart
Status
sudo systemctl status nginx
service nginx status
![]()
Install dependencies
sudo apt install php-ctype php-dom php-gd php-json php-mbstring php-xml php-zip php-curl
php --ini
Create a new user
sudo -u www-data bin/plugin login new-user
Install via Composer
sudo apt install composer
which composer
php -r "copy('https://getcomposer.org/installer', 'composer-setup.php');"
sudo php composer-setup.php --install-dir=/usr/bin --filename=composer
Cache was annoying, after editng a website cache would persist until Ctrl+F5
sudo apt remove php-opcache
sudo apt remove php-apcu
SSL
PHP
Checking for installed php modules and packages
php -m
Checking for installed php modules and packages In addition to running
php -m to get the list of installed php modules, you will probably find it helpful to get the list of the currently installed php packages in Ubuntu:
sudo dpkg --get-selections | grep -v deinstall | grep php This is helpful since Ubuntu makes php modules available via packages.
You can then install the needed modules by selecting from the available Ubuntu php packages, which you can view by running:
sudo apt-cache search php | grep "^php5-" Or, for Ubuntu 16.04 and higher:
sudo apt-cache search php | grep "^php7" As you have mentioned, there is plenty of information available on the actual installation of the packages that you might require, so I won't go into detail about that here.
Related: Enabling / disabling installed php modules It is possible that an installed module has been disabled. In that case, it won't show up when running php -m, but it will show up in the list of installed Ubuntu packages.
Modules can be enabled/disabled via the php5enmod tool (phpenmod on later distros) which is part of the php-common package.
Ubuntu 12.04:
Enabled modules are symlinked in /etc/php5/conf.d
Ubuntu 12.04: (with PHP 5.4+)
To enable an installed module:
php5enmod
php5dismod
To enable an installed module:
phpenmod
phpdismod
Remember to reload Apache2 after enabling/disabling:
service apache2 reload

Rust
mdbook install error
warning: spurious network error (1 tries remaining):
Adding
[http]
multiplexing = false
to ~/.cargo/config fixed it.
reddit rust comments cratesio timing out
cargo-update
Install
cargo install cargo-update
Update all
cargo install-update -a
Specific packages
cargo install-update crate1 crate2
Java
Install Oracle Java 1.8 on CentOS 7
Remove everything Java if needed.
sudoo yum -y remove java*
Download Oracle Java .rpm
https://www.oracle.com/java/technologies/javase/javase8-archive-downloads.html
Install:
sudo rpm -ivh jdk-8u202-linux-x64.rpm
Check:
rpm -q --whatprovides java
java -version
If installing more versions of Java, choose default.
sudo update-alternatives --config java
Add enviromentals
Edit file:
nano /home/user/.bash_profile
Add following at the end:
export JAVA_HOME=/usr/java/jdk1.8.0_202-amd64
export PATH=$JAVA_HOME/bin:$PATH
Edit:
nano /etc/environment
Add:
JAVA_HOME="/usr/java/jdk1.8.0_202-amd64"
Check:
echo $JAVA_HOME
HP EliteBook 840
I used this guide.
https://horodistea.wordpress.com/2020/02/06/compiling-suckless-tools-on-freebsd/
HP Elitebook G3 laptop Intel graphics
Add your user to 'video' group
sudo pw group mod video -m youruser
Enable Linux compatibility kernel modules at boot time, add this line to /etc/rc.conf file.
linux_enable="YES"
Or to load modules right away run
kldload linux64
kldload linux
Install packages
pkg install git xorg-server xorg-fonts-truetype gcr devel/glib20 xorg-fonts-type1 p5-X11-Xlib p5-PkgConfig xauth xrandr xinit libXft xrdb webkit2-gtk3 feh xf86-input-mouse xf86-input-keyboard linux-c7-libpng pkgconf ncurses xf86-input-libinput terminus-font drm-kmod xterm
Edit /etc/rc.conf file to contain kld_list=”i915kms”
Create .xinitrc and .Xresources files in $HOME dir
Run ee .xinitrc file in /home/userdir and paste following
xrdb -load $HOME/.Xresources
feh --bg-fill ~/.wallpaper&
slstatus&
exec dwm
Run ee .Xresources
! Use a nice truetype font and size by default...
xterm*faceName: xos4 Terminus
xterm*faceSize: 12

! Every shell is a login shell by default (for inclusion of all necessary environment v
xterm*loginshell: true

! I like a LOT of scrollback...
xterm*savelines: 16384

! double-click to select whole URLs 😀
xterm*charClass: 33:48,36-47:48,58-59:48,61:48,63-64:48,95:48,126:48

! DOS-box colours...
xterm*foreground: rgb:a8/a8/a8
xterm*background: rgb:00/00/00
xterm*color0: rgb:00/00/00
xterm*color1: rgb:a8/00/00
xterm*color2: rgb:00/a8/00
xterm*color3: rgb:a8/54/00
xterm*color4: rgb:00/00/a8
xterm*color5: rgb:a8/00/a8
xterm*color6: rgb:00/a8/a8
xterm*color7: rgb:a8/a8/a8
xterm*color8: rgb:54/54/54
xterm*color9: rgb:fc/54/54
xterm*color10: rgb:54/fc/54
xterm*color11: rgb:fc/fc/54
xterm*color12: rgb:54/54/fc
xterm*color13: rgb:fc/54/fc
xterm*color14: rgb:54/fc/fc
xterm*color15: rgb:fc/fc/fc

! right hand side scrollbar...
xterm*rightScrollBar: true
xterm*ScrollBar: true

! stop output to terminal from jumping down to bottom of scroll again
xterm*scrollTtyOutput: false

!To copy between xterm and other programs/documents/…
!SHIFT+INSERT = PASTE
!SHIFT+PRINTSCREEN = COPY
XTerm*selectToClipboard: true
Notes:
Ctrl-Alt-F2 switch console to tty1 Alt-F9 go back to X
https://www.freshports.org/graphics/intel-backlight
HP Specificd
/boot/loader.conf dev.rtsx.0.inversion=1
https://bugs.freebsd.org/bugzilla/show_bug.cgi?id=255130#c16
module_register: cannot register pci/rtsx from rtsx.ko; already loaded from kernel Module pci/rtsx failed to register: 17
Tomcat
Install Tomcat 8.5 on CentOS 7
Change directory.
cd /opt
Install wget.
sudo yum install wget
Get Tomcat.
sudo wget https://dlcdn.apache.org/tomcat/tomcat-8/v8.5.76/bin/apache-tomcat-8.5.76.tar.gz
Untar.
sudo tar -xzvf apache-tomcat-8.5.76.tar.gz
Rename.
sudo mv apache-tomcat-8.5.76/ tomcat/
Create user and group.
Add tomcat group and tomcat user.
groupadd tomcat
useradd -s /bin/false -g tomcat -d /opt/tomcat tomcat
Change mod.
chmod 775 -R tomcat/
Change ownership.
sudo chown -hR tomcat:tomcat /opt/tomcat
Firewall.
Add rule.
sudo firewall-cmd --zone=public --permanent --add-port=8080/tcp
Reload.
sudo firewall-cmd --reload
Check port.
sudo firewall-cmd --list-ports
At this point you can test Tomcat.
Start.
sudo bash /opt/tomcat/bin/startup.sh
Check if it's running.
netstat -plntu
URL:
Stop.
sudo bash /opt/tomcat/bin/shutdown.sh
Run as service
Create a new file 'tomcat.service'
sudo nano /etc/systemd/system/tomcat.service
Paste the configuration.
[Unit]
Description=Apache Tomcat 8 Servlet Container
After=syslog.target network.target

[Service]
User=tomcat
Group=tomcat
Type=forking
Environment=CATALINA_PID=/opt/tomcat/tomcat.pid
Environment=CATALINA_HOME=/opt/tomcat
Environment=CATALINA_BASE=/opt/tomcat
ExecStart=/opt/tomcat/bin/startup.sh
ExecStop=/opt/tomcat/bin/shutdown.sh
Restart=on-failure

[Install]
WantedBy=multi-user.target
Start and enable at boot.
sudo systemctl daemon-reload
sudo systemctl start tomcat
sudo systemctl enable tomcat
Check.
sudo systemctl status tomcat
Misc Commands
# /etc/rc.d/netif restart
/etc/group
Add users to a group syntax
pw group mod {groupNameHere} -m {userNameHere1,userNameHere2,...}
Shows which groups user belongs to
groups user23
Add a group
pw groupadd datoteka
Show users who belong to group datoteka
pw groupshow datoteka
Add user user23 to group datoteka
pw groupmod datoteka -M user23
Using id(1) to Determine Group Membership
id user23
returns:
uid=1001(user23) gid=1001(user23) groups=1001(user23),0(wheel),1002(datoteka)
Delete a group
pw groupdel datoteka
# portsnap fetch
# portsnap extract
# portsnap fetch update
Linux
User Account Info and Login Details
$ id root

uid=0(root) gid=0(root) groups=0(root)
$ groups root
root : root
$ getent passwd root
root:x:0:0:root:/root:/bin/bash
lslogins -u
 UID USER   PROC PWD-LOCK PWD-DENY LAST-LOGIN GECOS
   0 root     74                              root
$ who -u
root   pts/0        2021-12-24 17:43   .          1560 (8.8.8.8)
w
 18:00:19 up 23 min,  1 user,  load average: 0.00, 0.02, 0.08
USER     TTY      FROM             LOGIN@   IDLE   JCPU   PCPU WHAT
user   pts/0    88.808.808.888     17:43    1.00s  0.09s  0.01s w
$ last
du -sh