
root on ZFS
Installing root on ZFS using Ubuntu 20.04 LTS.

These instructions follows the manual from openzfs-docs. Some steps are skipped. Do use and read the manual, it has detailed explanation, these notes are just supplementary notes to speed things up for this particular setup, although complete.
Adjusted for:
-
a two disk
mirrorsetup. -
no swap
-
no encryption
-
legacy (BIOS) boot
-
Assumes new unused clean disks, otherwise if reusing clean the disks. See manual.
-
See manual if setting up SWAP, Encryption or EFI boot.
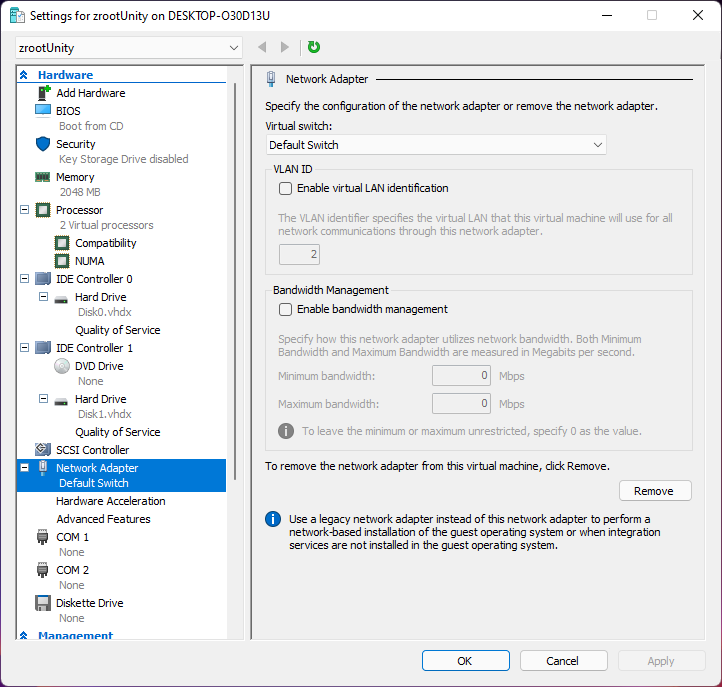
Hyper-V setup
-
Create two disks and attach them.
-
2 CPU speeds up
initramfscompile/install time. -
2048 RAM for Desktop Environment.
Install
Boot to Ubuntu live CD and select try Ubuntu.
Step 1: Prepare The Install Environment
Update and install vim.
sudo apt update
sudo apt install --yes openssh-server vim
Set a password for user ubuntu.
passwd
Display IP address.
ip a
SSH into Ubuntu.
ssh ubuntu@172.30.95.151
Disable automounting.
gsettings set org.gnome.desktop.media-handling automount false
Become root.
sudo -i
Install ZFS in the Live CD environment.
apt install --yes debootstrap gdisk zfsutils-linux
systemctl stop zed
Step 2: Disk Formatting
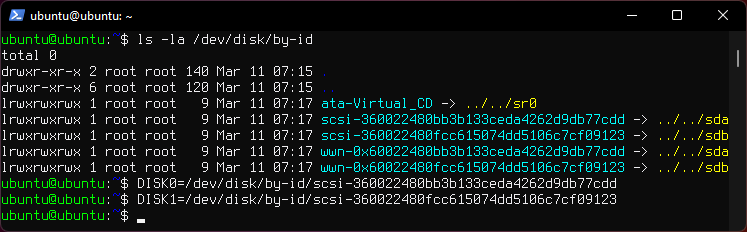
list the aliases.
ls -la /dev/disk/by-id
Manual says:
Always use the long
/dev/disk/by-id/*aliases with ZFS. Using the/dev/sd*device nodes directly can cause sporadic import failures, especially on systems that have more than one storage pool.
Set a variable with the disk name for each disk. You can use tab to autocomplete.
DISK0=/dev/disk/by-id/scsi-*
DISK1=/dev/disk/by-id/scsi-*
Ensure swap partitions are not in use.
swapoff --all
Clear the partition tables.
sgdisk --zap-all $DISK0
sgdisk --zap-all $DISK1
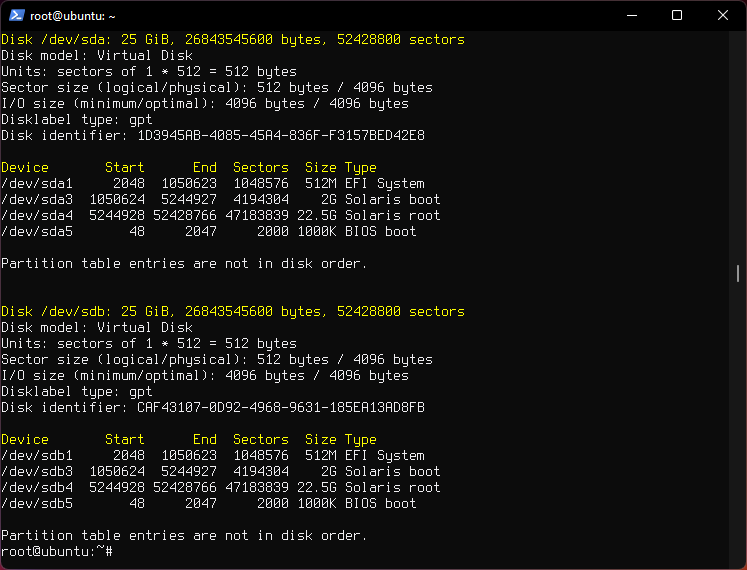
Create bootloader partitions.
sgdisk -n1:1M:+512M -t1:EF00 $DISK0
sgdisk -n1:1M:+512M -t1:EF00 $DISK1
Create bootloader partitions for legacy (BIOS) booting.
sgdisk -a1 -n5:24K:+1000K -t5:EF02 $DISK0
sgdisk -a1 -n5:24K:+1000K -t5:EF02 $DISK1
Create boot pool partitions.
sgdisk -n3:0:+2G -t3:BE00 $DISK0
sgdisk -n3:0:+2G -t3:BE00 $DISK1
Create root pool partitions.
sgdisk -n4:0:0 -t4:BF00 $DISK0
sgdisk -n4:0:0 -t4:BF00 $DISK1
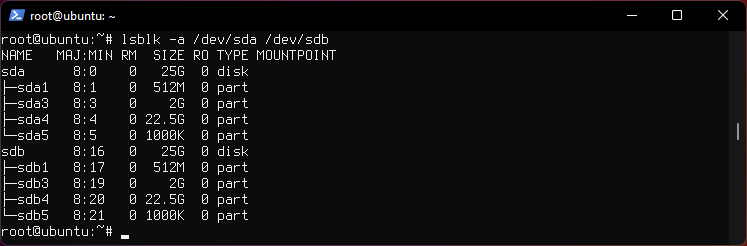
You will end up with 4 partitions on each disk.
Create the boot pool.
zpool create \
    -o cachefile=/etc/zfs/zpool.cache \
    -o ashift=12 -o autotrim=on -d \
    -o feature@async_destroy=enabled \
    -o feature@bookmarks=enabled \
    -o feature@embedded_data=enabled \
    -o feature@empty_bpobj=enabled \
    -o feature@enabled_txg=enabled \
    -o feature@extensible_dataset=enabled \
    -o feature@filesystem_limits=enabled \
    -o feature@hole_birth=enabled \
    -o feature@large_blocks=enabled \
    -o feature@lz4_compress=enabled \
    -o feature@spacemap_histogram=enabled \
    -O acltype=posixacl -O canmount=off -O compression=lz4 \
    -O devices=off -O normalization=formD -O relatime=on -O xattr=sa \
    -O mountpoint=/boot -R /mnt \
    bpool mirror \
    ${DISK0}-part3 \
    ${DISK1}-part3
Create the root pool.
zpool create \
    -o ashift=12 -o autotrim=on \
    -O acltype=posixacl -O canmount=off -O compression=lz4 \
    -O dnodesize=auto -O normalization=formD -O relatime=on \
    -O xattr=sa -O mountpoint=/ -R /mnt \
    rpool mirror \
    ${DISK0}-part4 \
    ${DISK1}-part4
Step 3: System Installation
Create filesystem datasets to act as containers.
zfs create -o canmount=off -o mountpoint=none rpool/ROOT
zfs create -o canmount=off -o mountpoint=none bpool/BOOT
Create filesystem datasets for the root and boot filesystems.
UUID=$(dd if=/dev/urandom bs=1 count=100 2>/dev/null |
    tr -dc 'a-z0-9' | cut -c-6)

zfs create -o mountpoint=/ \
    -o com.ubuntu.zsys:bootfs=yes \
    -o com.ubuntu.zsys:last-used=$(date +%s) rpool/ROOT/ubuntu_$UUID

zfs create -o mountpoint=/boot bpool/BOOT/ubuntu_$UUID
Create datasets.
zfs create -o com.ubuntu.zsys:bootfs=no \
    rpool/ROOT/ubuntu_$UUID/srv
zfs create -o com.ubuntu.zsys:bootfs=no -o canmount=off \
    rpool/ROOT/ubuntu_$UUID/usr
zfs create rpool/ROOT/ubuntu_$UUID/usr/local
zfs create -o com.ubuntu.zsys:bootfs=no -o canmount=off \
    rpool/ROOT/ubuntu_$UUID/var
zfs create rpool/ROOT/ubuntu_$UUID/var/games
zfs create rpool/ROOT/ubuntu_$UUID/var/lib
zfs create rpool/ROOT/ubuntu_$UUID/var/lib/AccountsService
zfs create rpool/ROOT/ubuntu_$UUID/var/lib/apt
zfs create rpool/ROOT/ubuntu_$UUID/var/lib/dpkg
zfs create rpool/ROOT/ubuntu_$UUID/var/lib/NetworkManager
zfs create rpool/ROOT/ubuntu_$UUID/var/log
zfs create rpool/ROOT/ubuntu_$UUID/var/mail
zfs create rpool/ROOT/ubuntu_$UUID/var/snap
zfs create rpool/ROOT/ubuntu_$UUID/var/spool
zfs create rpool/ROOT/ubuntu_$UUID/var/www

zfs create -o canmount=off -o mountpoint=/ \
    rpool/USERDATA
zfs create -o com.ubuntu.zsys:bootfs-datasets=rpool/ROOT/ubuntu_$UUID \
    -o canmount=on -o mountpoint=/root \
    rpool/USERDATA/root_$UUID
chmod 700 /mnt/root
For a mirror or raidz topology, create a dataset for /boot/grub.
zfs create -o com.ubuntu.zsys:bootfs=no bpool/grub
Mount a tmpfs at /run.
mkdir /mnt/run
mount -t tmpfs tmpfs /mnt/run
mkdir /mnt/run/lock
Create a separate dataset for /tmp.
zfs create -o com.ubuntu.zsys:bootfs=no \
    rpool/ROOT/ubuntu_$UUID/tmp
chmod 1777 /mnt/tmp
Install the minimal system.
debootstrap focal /mnt
Copy in zpool.cache.
mkdir /mnt/etc/zfs
cp /etc/zfs/zpool.cache /mnt/etc/zfs/
Step 4: System Configuration
Configure the hostname.
Replace HOSTNAME with the desired hostname.
hostname HOSTNAME
hostname > /mnt/etc/hostname
nano /mnt/etc/hosts
Add a line:
127.0.1.1       HOSTNAME
or if the system has a real name in DNS:
127.0.1.1       FQDN HOSTNAME
Configure the network interface.
Find the interface name.
ip a
Adjust NAME below to match your interface name
nano /mnt/etc/netplan/01-netcfg.yaml
network:
  version: 2
  ethernets:
    NAME:
      dhcp4: true
Configure the package sources.
nano /mnt/etc/apt/sources.list
deb http://archive.ubuntu.com/ubuntu focal main restricted universe multiverse
deb http://archive.ubuntu.com/ubuntu focal-updates main restricted universe multiverse
deb http://archive.ubuntu.com/ubuntu focal-backports main restricted universe multiverse
deb http://security.ubuntu.com/ubuntu focal-security main restricted universe multiverse
Bind the virtual filesystems from the LiveCD environment to the new system and chroot into it.
mount --make-private --rbind /dev  /mnt/dev
mount --make-private --rbind /proc /mnt/proc
mount --make-private --rbind /sys  /mnt/sys
chroot /mnt /usr/bin/env DISK0=$DISK0 DISK1=$DISK1 UUID=$UUID bash --login
Configure a basic system environment.
apt update
Always ensure that en_US.UTF-8 is available.
dpkg-reconfigure locales tzdata keyboard-configuration console-setup
Install your preferred text editor.
apt install --yes nano vim
Create the EFI filesystem.
apt install --yes dosfstools
mkdosfs -F 32 -s 1 -n EFI ${DISK0}-part1
mkdosfs -F 32 -s 1 -n EFI ${DISK1}-part1
mkdir /boot/efi
echo /dev/disk/by-uuid/$(blkid -s UUID -o value ${DISK0}-part1) \
    /boot/efi vfat defaults 0 0 >> /etc/fstab
mount /boot/efi
Only DISK0 for now.
Install GRUB/Linux/ZFS for legacy (BIOS) booting.
apt install --yes grub-pc linux-image-generic zfs-initramfs zsys
Set a root password.
passwd
Setup system groups.
addgroup --system lpadmin
addgroup --system lxd
addgroup --system sambashare
Patch a dependency loop.
apt install --yes curl patch
Ignore error:
ERROR couldn't connect to zsys daemon: connection error: desc = "transport: Error while dialing dial unix /run/zsysd.sock: connect: no such file or directory"
curl https://launchpadlibrarian.net/478315221/2150-fix-systemd-dependency-loops.patch | \
    sed "s|/etc|/lib|;s|\.in$||" | (cd / ; patch -p1)
Ignore the failure in Hunk #2 (say n twice).
Install SSH.
apt install --yes openssh-server
nano /etc/ssh/sshd_config
# Set: PermitRootLogin yes
Step 5: GRUB Installation
Verify that the ZFS boot filesystem is recognized.
grub-probe /boot
Refresh the initrd files
update-initramfs -c -k all
Disable memory zeroing.
nano /etc/default/grub
# Add init_on_alloc=0 to: GRUB_CMDLINE_LINUX_DEFAULT
# Save and quit (or see the next step).
Optional (but highly recommended): Make debugging GRUB easier.
nano /etc/default/grub
# Comment out: GRUB_TIMEOUT_STYLE=hidden
# Set: GRUB_TIMEOUT=5
# Below GRUB_TIMEOUT, add: GRUB_RECORDFAIL_TIMEOUT=5
# Remove quiet and splash from: GRUB_CMDLINE_LINUX_DEFAULT
# Uncomment: GRUB_TERMINAL=console
# Save and quit.
Later, once the system has rebooted twice and you are sure everything is working, you can undo these changes, if desired.
Update the boot configuration.
update-grub
Note: Ignore errors from osprober
Install GRUB to the MBR.
grub-install $DISK0
grub-install $DISK1
Disable grub-initrd-fallback.service.
systemctl mask grub-initrd-fallback.service
Fix filesystem mount ordering.
mkdir /etc/zfs/zfs-list.cache
touch /etc/zfs/zfs-list.cache/bpool
touch /etc/zfs/zfs-list.cache/rpool
ln -s /usr/lib/zfs-linux/zed.d/history_event-zfs-list-cacher.sh /etc/zfs/zed.d
zed -F &
Enter
Verify that zed updated the cache by making sure these are not empty.
cat /etc/zfs/zfs-list.cache/bpool
cat /etc/zfs/zfs-list.cache/rpool
If either is empty, force a cache update and check again.
zfs set canmount=on bpool/BOOT/ubuntu_$UUID
zfs set canmount=on rpool/ROOT/ubuntu_$UUID
If they are still empty, stop zed (as below), start zed (as above) and try again
Once the files have data, stop zed.
fg
Press Ctrl-C.
Fix the paths to eliminate /mnt.
sed -Ei "s|/mnt/?|/|" /etc/zfs/zfs-list.cache/*
Exit from the chroot environment back to the LiveCD environment.
exit
Run these commands in the LiveCD environment to unmount all filesystems.
mount | grep -v zfs | tac | awk '/\/mnt/ {print $3}' | \
    xargs -i{} umount -lf {}
zpool export -a
Reboot.
reboot
On the first reboot the root pool pool has to be imported manually during initramfs because it wasn't exported during install.
zpool import -f rpool Then exit initramfs by typing exit.
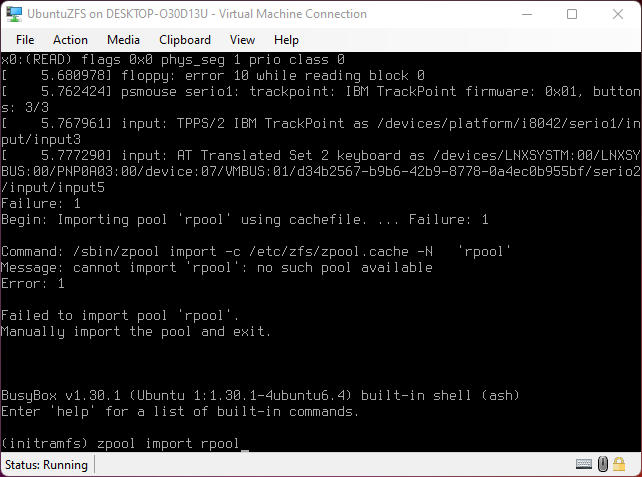
If the pool doesn't get imported properly either at first reboot, or at each reboot if the wrong password is entered to decrypt the pool the Kernel will panic, then shut off the VM or Machine and power back on and enter the correct password.

Step 6: First Boot.
Create a user account.
username=YOUR_USERNAME
UUID=$(dd if=/dev/urandom bs=1 count=100 2>/dev/null |
    tr -dc 'a-z0-9' | cut -c-6)
ROOT_DS=$(zfs list -o name | awk '/ROOT\/ubuntu_/{print $1;exit}')
zfs create -o com.ubuntu.zsys:bootfs-datasets=$ROOT_DS \
    -o canmount=on -o mountpoint=/home/$username \
    rpool/USERDATA/${username}_$UUID
adduser $username
cp -a /etc/skel/. /home/$username
chown -R $username:$username /home/$username
usermod -a -G adm,cdrom,dip,lpadmin,lxd,plugdev,sambashare,sudo $username
Step 7: Full Software Installation.
apt dist-upgrade --yes
Install a command-line environment only.
apt install --yes ubuntu-standard