ProtonVPN on OpenBSD
1. Install
Install OpenVPN client
pkg_add openvpn
Choose option 1.
2. Make a directory
Create a new directory to place config files and scripts.
mkdir /etc/openvpn/
3. Download scripts
Download client.up and client.down scripts from GitHub and place them in /etc/openvpn directory.
Make scrits executable
chmod +x client.up client.down
You can also copy scripts at the end of the page.
4. Download .ovpn file
Download a Linux configuration file from ProtonVPN Downloads page.
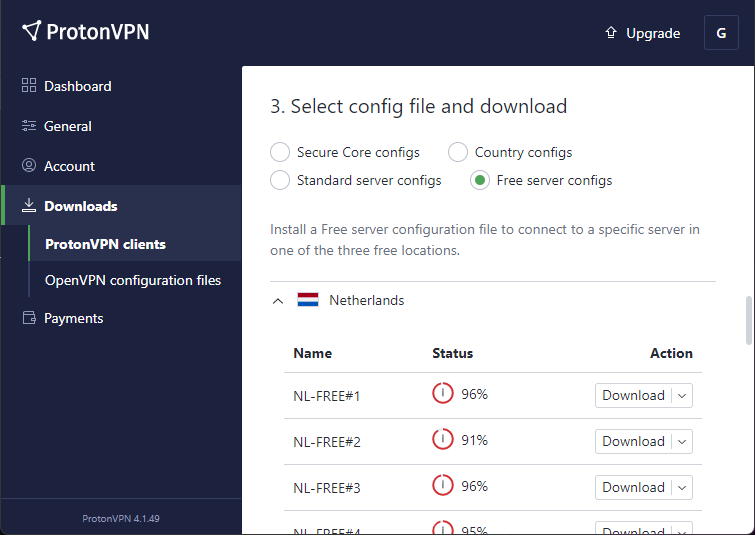
Rename the downloaded config file nl-free-01.protonvpn.com.udp.ovpn to proton.ovpn for simplicity.
Move the config file to /etc/openvpn/ folder.
5. Edit config
Edit the the two lines below in the proton.ovpn file.
up /etc/openvpn/update-resolv-conf
down /etc/openvpn/update-resolv-conf
So they look like this.
up /etc/openvpn/client.up
down /etc/openvpn/client.down
In order to link the scripts we downloaded.
6. Create Network Interface
Create a file named /etc/hostname.tun0.
nano /etc/hostname.tun0
And add the following to the /etc/hostname.tun0 file.
up
!/usr/local/sbin/openvpn --daemon --config /etc/openvpn/proton.ovpn
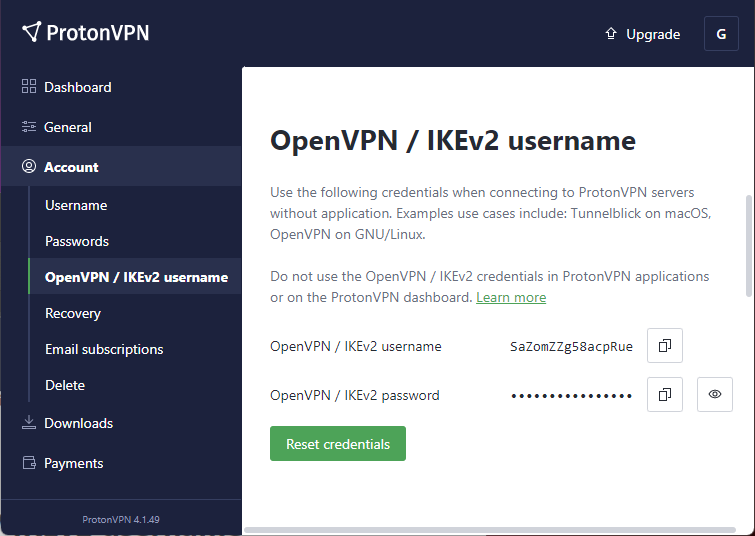
7. Save credentials
Auto connect to VPN and avoid having to entering username and password at the prompt by saving the credentials to a file.
Copy your IKEv2 ProtonVPN username and password.
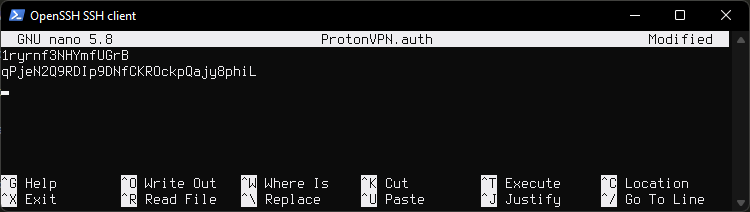
Create a new file and paste your username and password on two lines.
nano /etc/openvpn/ProtonVPN.auth
Edit the .ovpn file.
nano /etc/openvpn/proton.ovpn
Find the line auth-user-pass.
Add /etc/openvpn/ProtonVPN.auth at the end of auth-user-pass.
It will look like this:
auth-user-pass /etc/openvpn/ProtonVPN.auth
Edit file permissions for security
chown root:wheel /etc/openvpn/ProtonVPN.auth
chmod 0400 /etc/openvpn/ProtonVPN.auth
7. Disable resolvd
Disable resolvd and dhcpleased by running:
rcctl disable resolvd dhcpleased
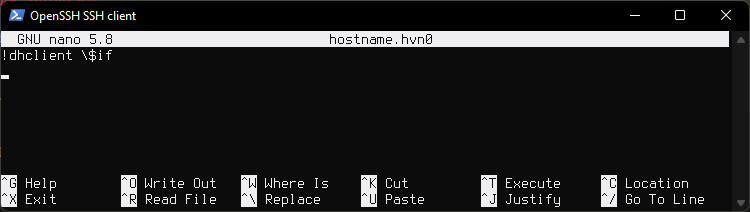
Enable dhclient(8) by adding "!dhclient \$if" to hostname.if(5). This would be the main interface that was created during install. In my case it is named hostname.hvn0
nano /etc/hostname.hvn0
Remove or comment out autoconf line and paste !dhclient \$if instead.
It will look like this.
Disabling
resolvdis needed because it rewrites theresolv.conffile if it detects the file has been changed, or rewrites the file if it has been deleted. This interferes withclient.upscript which has to modifyresolv.confin order to prevent DNS leaks by adding ProtonVPN DNS servers toresolv.conf, so that way our queries do not go through our local DNS.
8. Reboot
reboot and your VPN tunnel should be up and running.
9. Done
You are done. Nothing further is needed. Below are some micelaneous commnads to test the tunnel.
Testing
Check routes
To show routing table run:
route show
netstat -nr -f inet | more
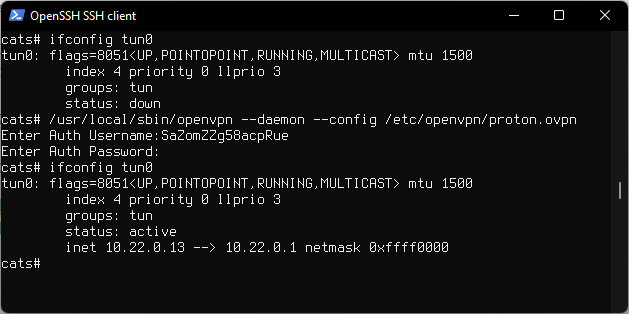
To show interface run:
ifconfig tun0
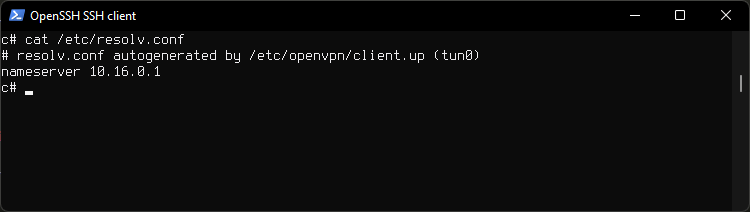
Check resolv.conf
Look at resolv.conf for ProtonVPN DNS our queries will go through.
cat /etc/resolv.conf
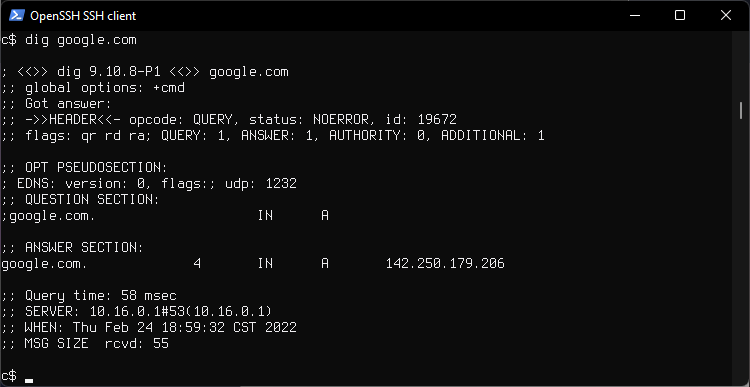
Check DNS
See which DNS server responds to our queries, at the bottom.
dig google.com
10.16.0.1 is a ProtonVPN assigned DNS.
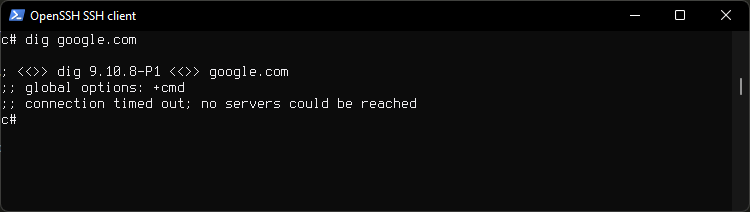
Check KillSwitch
Bring the tunnel downe
ifconfig tun0 down
You can also reset ProtonVPN credentials while tunnel is on
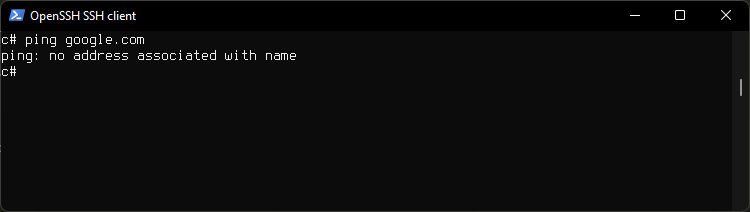
Then chech the network is down by running
dig google.com
ping 8.8.8.8
ping google.com
Reboot the system to reset the tunnel to connect to VPN.
Manual connect to VPN
For testing you can start the VPN as root.
Daemon mode
/usr/local/sbin/openvpn --daemon --config /etc/openvpn/proton.ovpn
In foreground, non daemon mode. Log messages will be displayed. You can hit CTRL+C to exit.
/usr/local/sbin/openvpn --config /etc/openvpn/proton.ovpn --verb 9
With --verb 9 flag for more verbose output
/usr/local/sbin/openvpn --config /etc/openvpn/proton.ovpn --verb 9
If credentials are not saved, openvpn will ask you to enter your username and password.
Auto start with rcctl
Starting the openvpn automatically when system boots using the client .ovpn config file. Tunnel in our config already starts on boot, this is just another option, if running a VPN server this is how it would be done.
Enable openvpn
rcctl enable openvpn
Set openvpn flags
rcctl set openvpn flags "--daemon --config /etc/openvpn/proton.ovpn"
Start openvpn client
rcctl start openvpn
Check if running
rcctl check openvpn
On reboot openvpn client will start automatically.
Scripts
client.up
#!/bin/sh

# Copyright (c) 2005-2018 OpenVPN Inc
# Licensed under the GPL version 2

# First version by Jesse Adelman
# someone at boldandbusted dink com
# http://www.boldandbusted.com/

# PURPOSE: This script automatically sets the proper /etc/resolv.conf entries
# as pulled down from an OpenVPN server.

# INSTALL NOTES:
# Place this in /etc/openvpn/client.up
# Then, add the following to your /etc/openvpn/<clientconfig>.conf:
#   client
#   up /etc/openvpn/client.up
# Next, "chmod a+x /etc/openvpn/client.up"

# USAGE NOTES:
# Note that this script is best served with the companion "client.down"
# script.

# Tested under Debian lenny with OpenVPN 2.1_rc11
# It should work with any UNIX with a POSIX sh, /etc/resolv.conf or resolvconf

# This runs with the context of the OpenVPN UID/GID
# at the time of execution. This generally means that
# the client "up" script will run fine, but the "down" script
# will require the use of the OpenVPN "down-root" plugin
# which is in the plugins/ directory of the OpenVPN source tree

# A horrid work around, from a security perspective,
# is to run OpenVPN as root. THIS IS NOT RECOMMENDED. You have
# been WARNED.
PATH=/bin:/usr/bin:/usr/local/bin:/sbin:/usr/sbin:/usr/local/sbin

# init variables

i=1
domains=
fopt=
ndoms=0
nns=0
nl='
'

# $foreign_option_<n> is something like
# "dhcp-option DOMAIN example.com" (multiple allowed)
# or
# "dhcp-option DNS 10.10.10.10" (multiple allowed)

# each DNS option becomes a "nameserver" option in resolv.conf
# if we get one DOMAIN, that becomes "domain" in resolv.conf
# if we get multiple DOMAINS, those become "search" lines in resolv.conf
# if we get no DOMAINS, then don't use either domain or search.

while true; do
  eval fopt=\$foreign_option_${i}
  [ -z "${fopt}" ] && break

  case ${fopt} in
		dhcp-option\ DOMAIN\ *)
           ndoms=$((ndoms + 1))
           domains="${domains} ${fopt#dhcp-option DOMAIN }"
           ;;
		dhcp-option\ DNS\ *)
           nns=$((nns + 1))
           if [ $nns -le 3 ]; then
             dns="${dns}${dns:+$nl}nameserver ${fopt#dhcp-option DNS }"
           else
             printf "%s\n" "Too many nameservers - ignoring after third" >&2
           fi
           ;;
        *)
           printf "%s\n" "Unknown option \"${fopt}\" - ignored" >&2
           ;;
	esac
  i=$((i + 1))
done

ds=""
if [ $ndoms -eq 1 ]; then
  ds="${nl}domain"
elif [ $ndoms -gt 1 ]; then
  ds="${nl}search"
fi

# This is the complete file - "$domains" has a leading space already
out="# resolv.conf autogenerated by ${0} (${dev})${nl}${dns}${ds}${domains}"

# use resolvconf if it's available
if type resolvconf >/dev/null 2>&1; then
  printf "%s\n" "${out}" | resolvconf -a "${dev}"
else
  # Preserve the existing resolv.conf
  if [ -e /etc/resolv.conf ] ; then
    cp /etc/resolv.conf /etc/resolv.conf.ovpnsave
  fi
  printf "%s\n" "${out}" > /etc/resolv.conf
  chmod 644 /etc/resolv.conf
fi

exit 0
client.down
#!/bin/sh

# Copyright (c) 2005-2018 OpenVPN Inc
# Licensed under the GPL version 2

# First version by Jesse Adelman
# someone at boldandbusted dink com
# http://www.boldandbusted.com/

# PURPOSE: This script automatically removes the /etc/resolv.conf entries previously
# set by the companion script "client.up".

# INSTALL NOTES:
# Place this in /etc/openvpn/client.down
# Then, add the following to your /etc/openvpn/<clientconfig>.conf:
#   client
#   up /etc/openvpn/client.up
#   down /etc/openvpn/client.down
# Next, "chmod a+x /etc/openvpn/client.down"

# USAGE NOTES:
# Note that this script is best served with the companion "client.up"
# script.

# Tested under Debian lenny with OpenVPN 2.1_rc11
# It should work with any UNIX with a POSIX sh, /etc/resolv.conf or resolvconf

# This runs with the context of the OpenVPN UID/GID
# at the time of execution. This generally means that
# the client "up" script will run fine, but the "down" script
# will require the use of the OpenVPN "down-root" plugin
# which is in the plugins/ directory of the OpenVPN source tree
# The config example above would have to be changed to:
#   client
#   up /etc/openvpn/client.up
#   plugin openvpn-plugin-down-root.so "/etc/openvpn/client.down"

# A horrid work around, from a security perspective,
# is to run OpenVPN as root. THIS IS NOT RECOMMENDED. You have
# been WARNED.
PATH=/bin:/usr/bin:/usr/local/bin:/sbin:/usr/sbin:/usr/local/sbin

if type resolvconf >/dev/null 2>&1; then
  resolvconf -d "${dev}" -f
elif [ -e /etc/resolv.conf.ovpnsave ] ; then
  # cp + rm rather than mv in case it's a symlink
  cp /etc/resolv.conf.ovpnsave /etc/resolv.conf
  rm -f /etc/resolv.conf.ovpnsave
fi

exit 0